


Introduction#
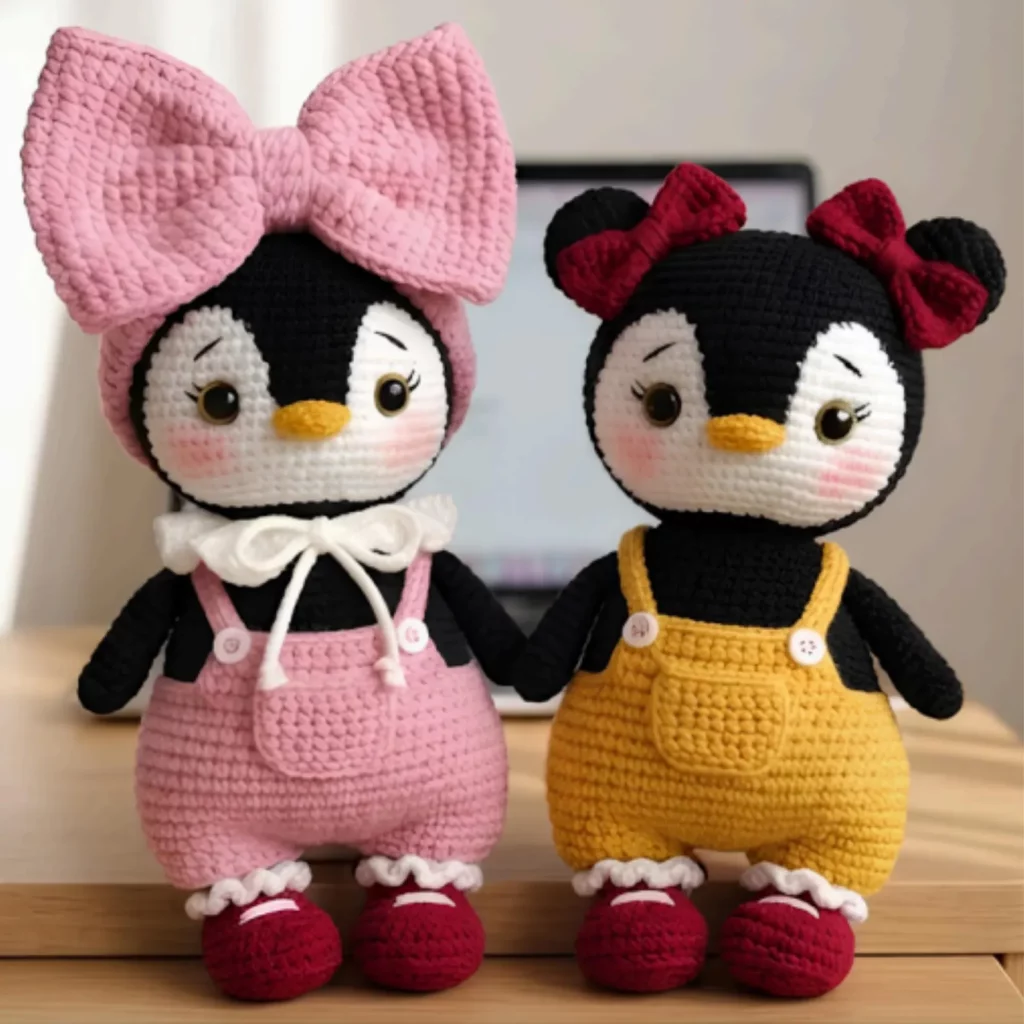
If you love amigurumi that looks finished-finished—the kind of plush that could sit on a nursery shelf, a craft market table, or a gift bag and instantly get a squeal—these dressed-up penguin dolls are that project. The sweet round face, tiny beak, rosy cheeks, and the best part: custom outfits with buttons, ruffles, and statement bows.
Explore more beginner amigurumi crochet patterns in our pattern library.
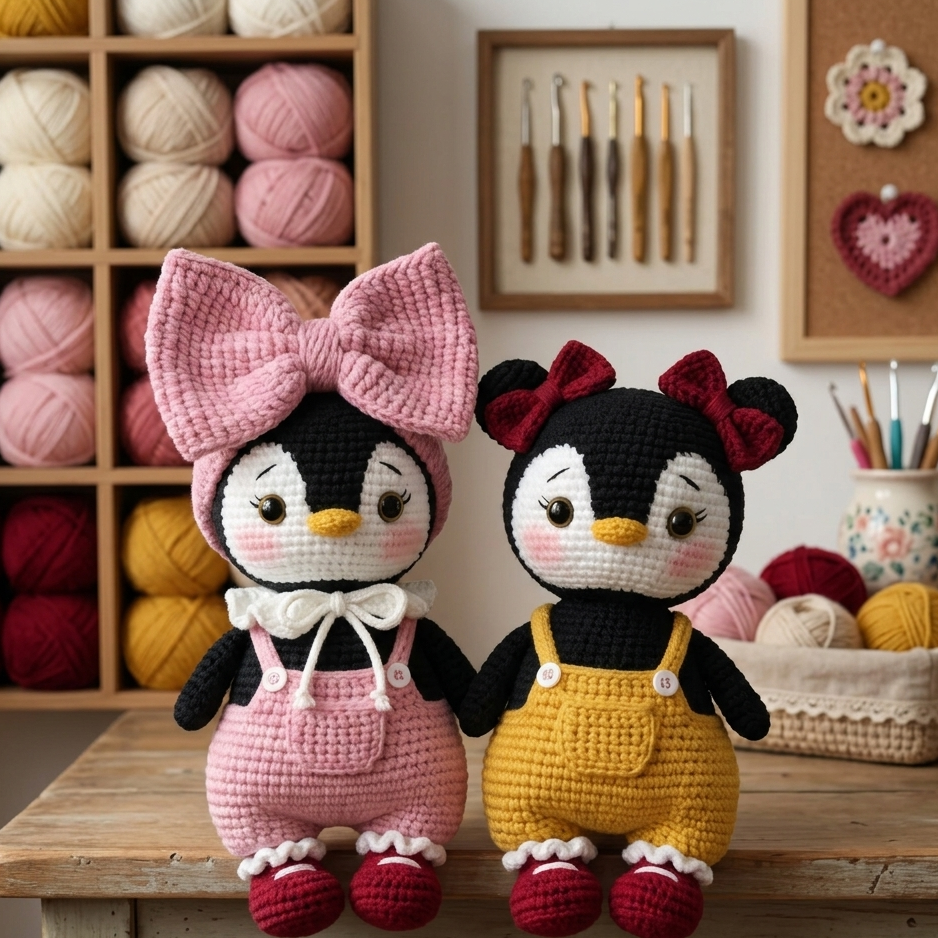
This crochet pattern is designed to be practical and wearable (for the doll, obviously): you’ll build a sturdy black-and-white penguin base, then add clothing pieces that can be switched up with color changes. That means you can make a “pair” (like best friends or siblings), match a baby’s room colors, or create seasonal versions with minimal extra effort.
Below you’ll find a complete, beginner-friendly crochet tutorial style pattern: materials, stitches, very detailed steps, and lots of tips for clean assembly—because with character dolls, the little details make the biggest difference.
Detailed Description of the Crochet Pattern#
This is a classic amigurumi doll-style crochet pattern made from a simple base plus accessories:
- Large round head with a smooth, clean color-blocked face
- Black body with a white face panel for that instantly recognizable penguin look
- Small beak in a warm yellow/gold tone
- Safety eyes with optional lashes for extra “cute” personality
- Blush cheeks (optional, but highly recommended for the sweet look)
- Simple arms attached low for a cuddly, childlike pose
- Big shoes/feet in a contrasting color
- Outfit layer: crocheted overalls or romper-style pants with straps and buttons
- Accessories: bow headband(s), ruffle cuffs, optional collar/scarf details
The clothing is designed to be simple shapes (rectangles, straps, and a curved bib) so you don’t need complex garment construction—just clean stitching and thoughtful placement.
Skill Level Explanation#
This is an easy-to-intermediate crochet pattern.
You can make it as a confident beginner if you’re comfortable with:
- Single crochet in the round
- Increases and decreases
- Color changes (basic)
- Sewing pieces on neatly
It becomes “intermediate” mainly because:
- Symmetry matters (eyes, beak, cheeks, outfit placement)
- Clothing adds extra steps (straps, buttons, optional ruffles)
If you’ve made one or two simple amigurumi projects before, you’ll be in great shape.
Materials Needed#
Yarn
Worsted weight (#4) is a great choice for clean stitches and sturdy dolls. DK (#3) also works for a slightly smaller, more delicate look.
Suggested colors:
- Main color (MC): black (body/head)
- Contrast (CC1): white (face and tummy)
- Beak: mustard/gold/yellow
- Outfit colors: pink (for a pastel overall look), mustard (for a warm neutral overall look)
- Shoes: deep red or burgundy (super cute with both outfits)
- Bow colors: pink for one, deep red for the other (or match outfits)
Yarn tips:
- Use a smooth yarn with good stitch definition for the face panel.
- If your yarn is splitty, go down a hook size for cleaner stitches.
Hook
- 3.0–3.5 mm for worsted weight (tight fabric for stuffing)
- Adjust as needed so stuffing doesn’t show through.
Notions
- Fiberfill stuffing
- Stitch marker
- Yarn needle
- Scissors
- Pins (great for “face mapping”)
- Safety eyes: 10–14 mm (size depends on your doll size)
- Optional: felt for cheeks, embroidery floss for lashes and blush
- Optional: small buttons (for overall straps)
Finished Size
With worsted weight yarn and a 3.25 mm hook, expect approximately 9–12 inches (23–30 cm) tall depending on tension and shoe size.
Stitches & Techniques Explained#
Abbreviations (US terms)
- MR = magic ring
- ch = chain
- sc = single crochet
- inc = increase (2 sc in same stitch)
- dec = invisible decrease (sc2tog through front loops)
- sl st = slip stitch
- BLO/FLO = back/front loop only
- ( ) = repeat
- [ ] = stitch count
Techniques you’ll use
- Invisible decrease: makes the head smooth (highly recommended).
- Color change: change colors on the last yarn-over of the stitch before the new color.
- Face panel placement: pin first, then sew. Symmetry is everything.
- Outfit construction: simple flat pieces sewn onto the body.
Step-by-Step Instructions#
Notes: Work in continuous rounds unless stated. Use a stitch marker for the first stitch of each round. Stuff as you go for the smoothest shape.
Head (black, then add face panel later)
R1: MR, 6 sc [6]
R2: inc x6 [12]
R3: (sc, inc) x6 [18]
R4: (2 sc, inc) x6 [24]
R5: (3 sc, inc) x6 [30]
R6: (4 sc, inc) x6 [36]
R7: (5 sc, inc) x6 [42]
R8: (6 sc, inc) x6 [48]
R9–R14: sc around [48]
If you want a slightly larger head, add 1–2 more even rounds.
Begin closing:
R15: (6 sc, dec) x6 [42]
R16: (5 sc, dec) x6 [36]
R17: (4 sc, dec) x6 [30]
Stuff firmly and shape into a smooth ball.
R18: (3 sc, dec) x6 [24]
R19: (2 sc, dec) x6 [18]
R20: (sc, dec) x6 [12]
R21: dec x6 [6]
Fasten off, weave in.
Face Panel (white oval)
This piece is sewn onto the head to create the classic penguin face.
R1: MR, 6 sc [6]
R2: inc x6 [12]
R3: (sc, inc) x6 [18]
R4: (2 sc, inc) x6 [24]
R5: sc around [24]
R6: (2 sc, dec) x6 [18]
Fasten off leaving a long tail for sewing. Lightly stuff is optional, but usually not needed.
Placement tip:
Center the panel on the lower front of the head. It should sit where cheeks will go, with space above for eyes.
Eyes + Lashes (optional)
- Insert safety eyes through the face panel before sewing it on, or install after sewing if you prefer.
- Position eyes about 6–10 stitches apart depending on your head size.
- Add lashes with 2–3 small embroidery stitches at the outer corners.
Beak (yellow/gold)
A small oval/puff beak looks cutest.
R1: MR, 6 sc [6]
R2: (sc, inc) x3 [9]
R3: sc around [9]
Fasten off with a sewing tail. Lightly stuff or leave flat.
Sew centered below the eyes.
Cheeks (optional but adorable)
- Use pink blush, pink yarn, or small felt ovals.
- Place cheeks on the white panel, slightly below and outward from the eyes.
Body (black)
R1: MR, 6 sc [6]
R2: inc x6 [12]
R3: (sc, inc) x6 [18]
R4: (2 sc, inc) x6 [24]
R5: (3 sc, inc) x6 [30]
R6: (4 sc, inc) x6 [36]
R7–R12: sc around [36]
R13: (4 sc, dec) x6 [30]
R14–R16: sc around [30]
Stuff firmly—especially the bottom so the doll stands.
R17: (3 sc, dec) x6 [24]
R18: (2 sc, dec) x6 [18]
Fasten off with a long tail for attaching head.
Tummy Panel (white, optional but recommended)
Make a simple oval and sew it to the front of the body.
Ch 10.
- In 2nd ch from hook: sc, sc across to last ch, 3 sc in last ch.
- Continue on underside: sc across, 2 sc in last ch to round.
Sl st to join.
Work 1–2 rounds of sc evenly around for thickness.
Fasten off, sew centered.
Arms (make 2, black)
R1: MR, 6 sc [6]
R2: (sc, inc) x3 [9]
R3–R8: sc around [9]
Lightly stuff. Flatten and close with 4–5 sc across. Leave tail.
Legs (make 2, black)
R1: MR, 6 sc [6]
R2: inc x6 [12]
R3: (sc, inc) x6 [18]
R4–R6: sc around [18]
Stuff firmly. Fasten off with tail.
Shoes/Feet (make 2, red/burgundy)
These are rounded “boot” shapes. You can sew legs into them for a clean finish.
R1: MR, 6 sc [6]
R2: inc x6 [12]
R3: (sc, inc) x6 [18]
R4: (2 sc, inc) x6 [24]
R5–R6: sc around [24]
Fasten off leaving a tail.
Insert the leg into the shoe opening and sew around the edge. (This makes the doll sturdier and gives that cute chunky foot look.)
Outfit: Overalls/Romper Base (make 1 per doll)
You’ll crochet a simple “pants body” that wraps around the lower torso.
Pants panel (outfit color):
Ch enough to go around the body (snug but not tight).
Row 1: sc in 2nd ch from hook and across, turn.
Row 2+: ch 1, sc across, turn.
Repeat until the panel height reaches from waist to upper thigh.
Wrap around the doll’s lower body and sew the back seam.
Leg shaping option:
For a puffy romper look, add 2–4 increases along the bottom edge before finishing.
Bib Front (outfit color)
Ch 10–14 (depending on doll width).
Work sc rows until it’s a small rectangle (about 2–3 inches tall).
Sew bib centered on the front of the pants.
Straps (make 2, outfit color)
Ch 18–26 (fit to your doll), sc back down the chain for a sturdy strap.
Sew straps to the front bib top corners and to the back waistline.
Add buttons where straps meet the bib (sew-on buttons or crocheted circles).
Pocket (optional, super cute)
Ch 10–12.
Row 1: sc across.
Row 2: ch 1, sc across.
Sew onto bib or front of pants. Add a small stitch detail for “pocket stitching” if desired.
Ruffle Ankle Cuffs (optional, white)
Join white yarn around the ankle edge of the pants (or around the shoe top).
Work: (sc, inc) repeatedly, or (sc, 2 sc in next st) to create gentle ruffling.
Bow Headband (make 1–2)
Bow center strip: Ch 10, sc back across. Work 4–6 rows to make a small rectangle.
Bow loops: Make a larger rectangle (more rows), fold ends to center, sew.
Wrap the center strip around the middle and stitch down.
Attach bow to a simple band:
Ch to fit around head, sl st to join, sew bow on top.
You can make one doll with a large pastel bow and one with smaller matching bows for a “pair” look.
Common Mistakes and How to Avoid Them#
- Face looks crooked: Pin the face panel, eyes, and beak first. Take a quick photo to check symmetry before sewing.
- Lumpy head/body: Stuff in small pieces and shape with your fingers as you go—especially around decreases.
- Gaps showing stuffing: Use a smaller hook or tighten tension; amigurumi needs dense fabric.
- Outfit doesn’t fit: Make the pants panel by measuring around your doll body (made-to-fit is easier than counting).
- Straps twist or stretch: Use sc straps (not chain-only) and sew them in place.
Expert Tips for Better Results#
- Use stitch markers for “center front.” Mark the front of the body and head so panels align perfectly.
- Choose eye placement first, then build everything around it. The eyes set the whole personality.
- Sew the face panel with even tension. Too tight makes it pucker; too loose makes it wavy.
- Reinforce the head join. Dolls get handled—add extra stitches around the neck seam.
- Buttons: go light. Heavy buttons can pull fabric. Small lightweight buttons or crocheted button dots work great.
Variations and Customization Ideas#
- Swap outfits: Make skirts, dresses, or hoodies using the same penguin base.
- Seasonal colors: Red/green for holidays, pastel for spring, orange/black for Halloween.
- Different bows: Tiny bow clips, oversized statement bow, or a simple beanie hat.
- Add a collar: A white scalloped collar instantly makes it look extra “doll-like.”
- Personalize with initials: Stitch a tiny letter on the pocket for gifts.
- Make a matching pair: Same base, different outfits—perfect for twins/siblings/best friends.
Benefits of This Crochet Project#
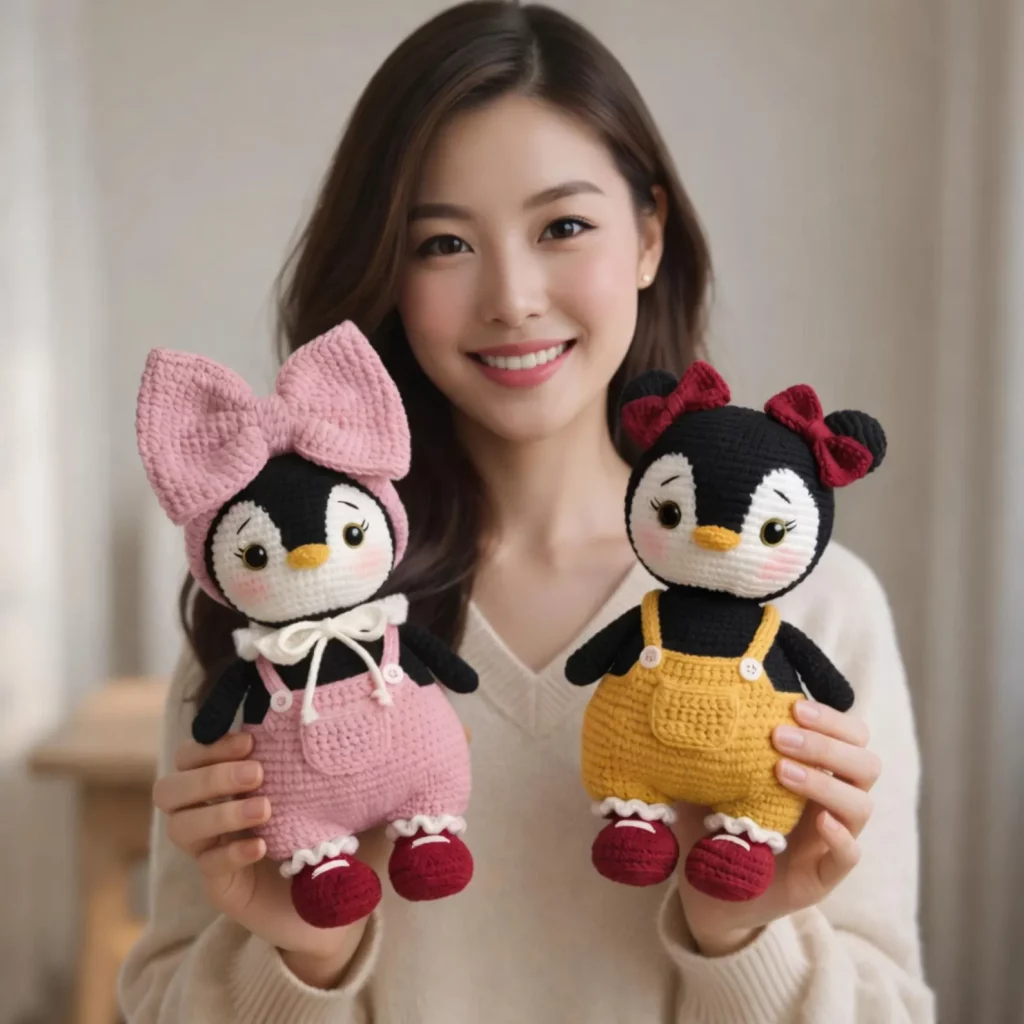
- A high-value DIY crochet make that looks gift-ready
- Builds confidence in amigurumi shaping and clean assembly
- Clothing pieces let you customize endlessly without redoing the base
- Great for craft fairs (people love “outfit options”)
- Works well in many yarn types and color palettes
- A fun way to practice details like bows, straps, and buttons
Internal Linking Suggestions#
If you’re building a crochet blog, these internal links pair perfectly with this project:
- “How to Crochet a Magic Ring for Amigurumi”
- “Invisible Decrease Tutorial (Smooth Amigurumi Shaping)”
- “How to Sew Amigurumi Parts Neatly”
- “Beginner Crochet Doll Clothes: Straps, Buttons, and Bibs”
- “Best Yarn for Amigurumi (Soft + Defined Stitches)”
- “How to Embroider Cute Faces on Crochet Toys”
FAQ Section#
Is this crochet pattern good for beginners?
Yes—especially if you’ve made one small amigurumi before. The base is simple; the “extra” is mostly outfit details.
Can I make this free crochet pattern with plush yarn?
You can, but plush yarn hides stitches, so use stitch markers and count carefully. The result will be bigger and extra cuddly.
How do I keep the head from wobbling?
Stuff the body firmly, sew the head on tightly, and add an extra reinforcement round around the neck seam.
Do the overalls come off?
They can if you build them as removable clothing, but the cleanest look is to sew them on. If you want removable, use snaps or ties instead of sewing.
What if I don’t want to use safety eyes?
Embroidered eyes work great and are a good option for child-safe toys. You can stitch open eyes or keep the sleepy-lash look.
How do I size the outfit correctly?
Measure directly on the doll: wrap a chain around the waist for the pants panel, and adjust strap length by pinning before sewing.
Conclusion#
This dressed-up penguin doll crochet pattern is one of those projects that feels extra special because it’s more than a toy—it’s a character. Once you have the base penguin shape, you can create an entire wardrobe of outfits and accessories, which makes it perfect for gifting, collecting, or selling.
If you want, tell me the yarn weight you’re using (DK, worsted, or plush) and whether you want the outfit removable or sewn-on, and I can tailor the strap lengths, bib sizing, and shoe proportions so your finished dolls come out perfectly balanced and adorable.


