


Introduction#
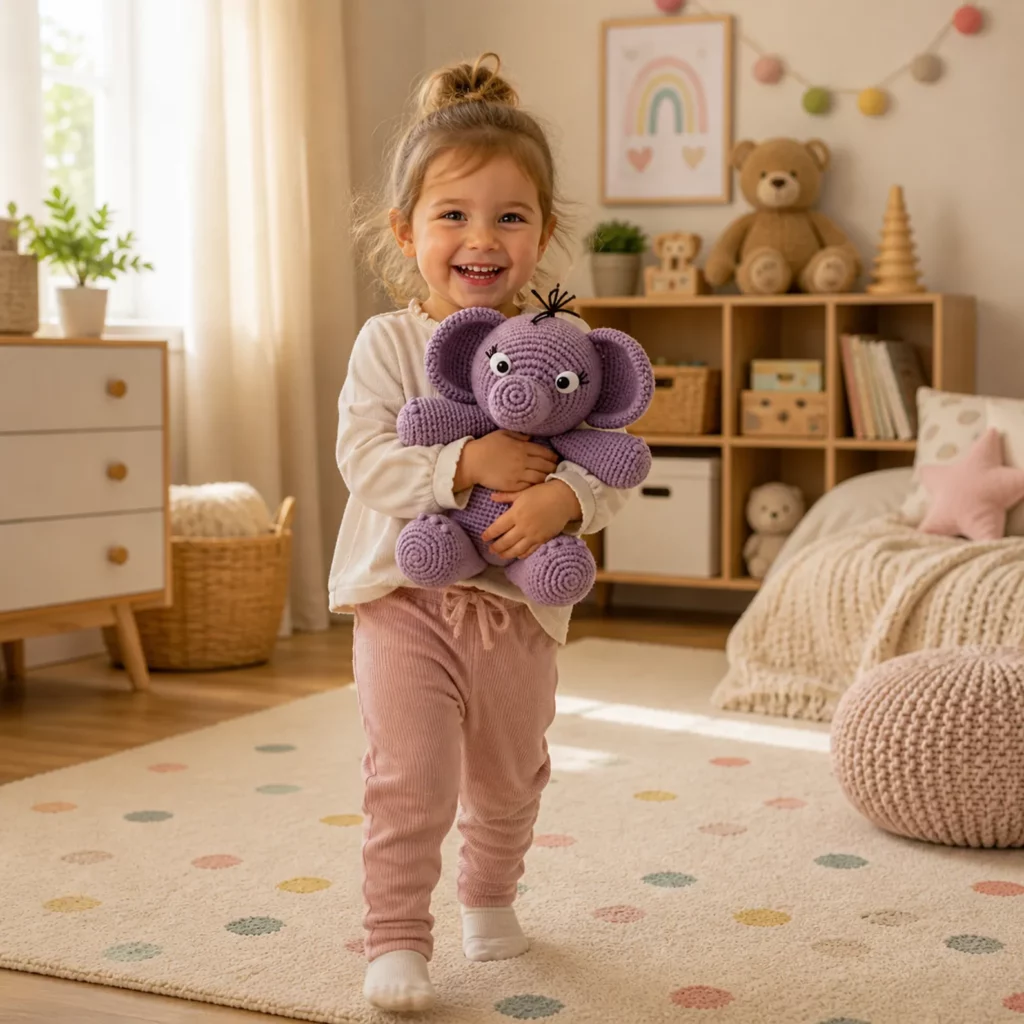
If you’re craving a crochet project that feels instantly lovable (and looks like a gift-shop treasure when finished), a baby elephant amigurumi is hard to beat. Elephants are one of those timeless characters that work for every age—sweet for babies, charming for nursery décor, and still fun for older kids and adults who collect handmade plushies.
Explore more beginner amigurumi crochet patterns in our pattern library.
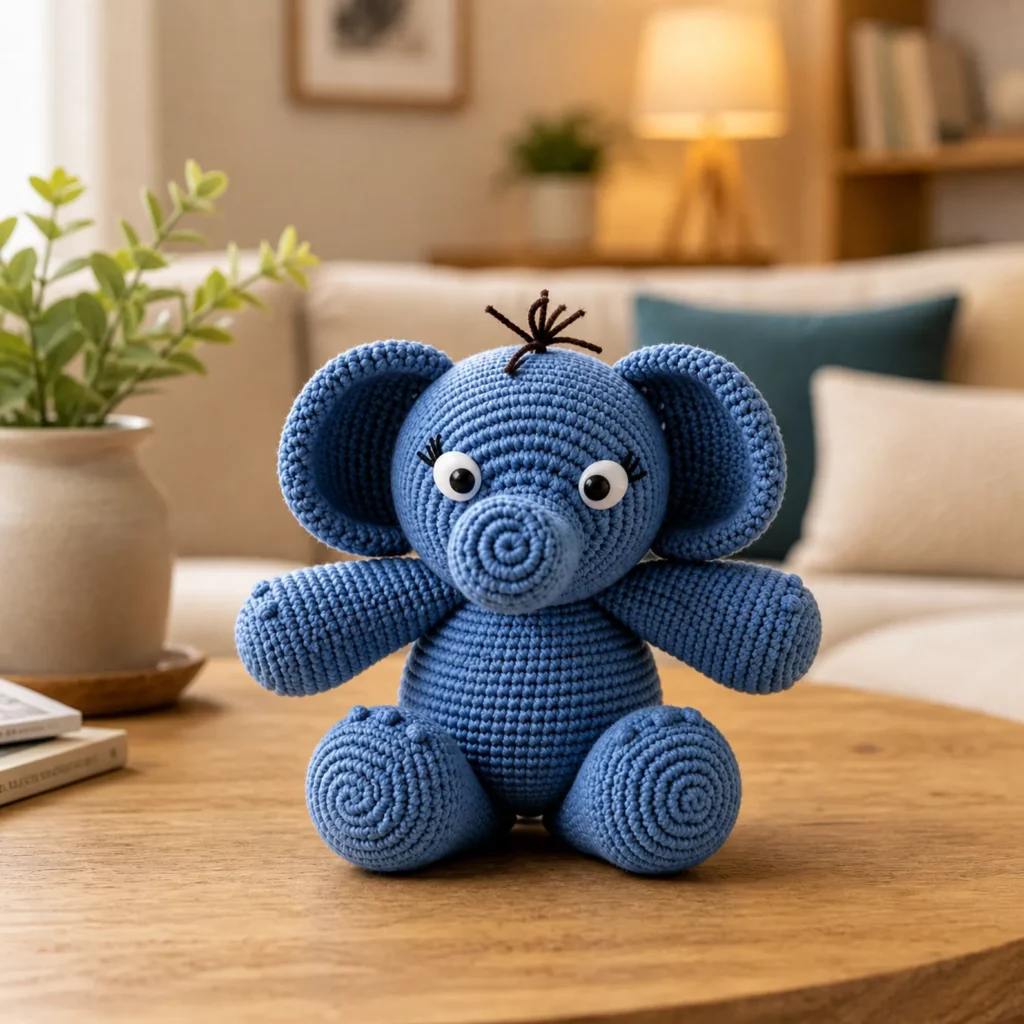
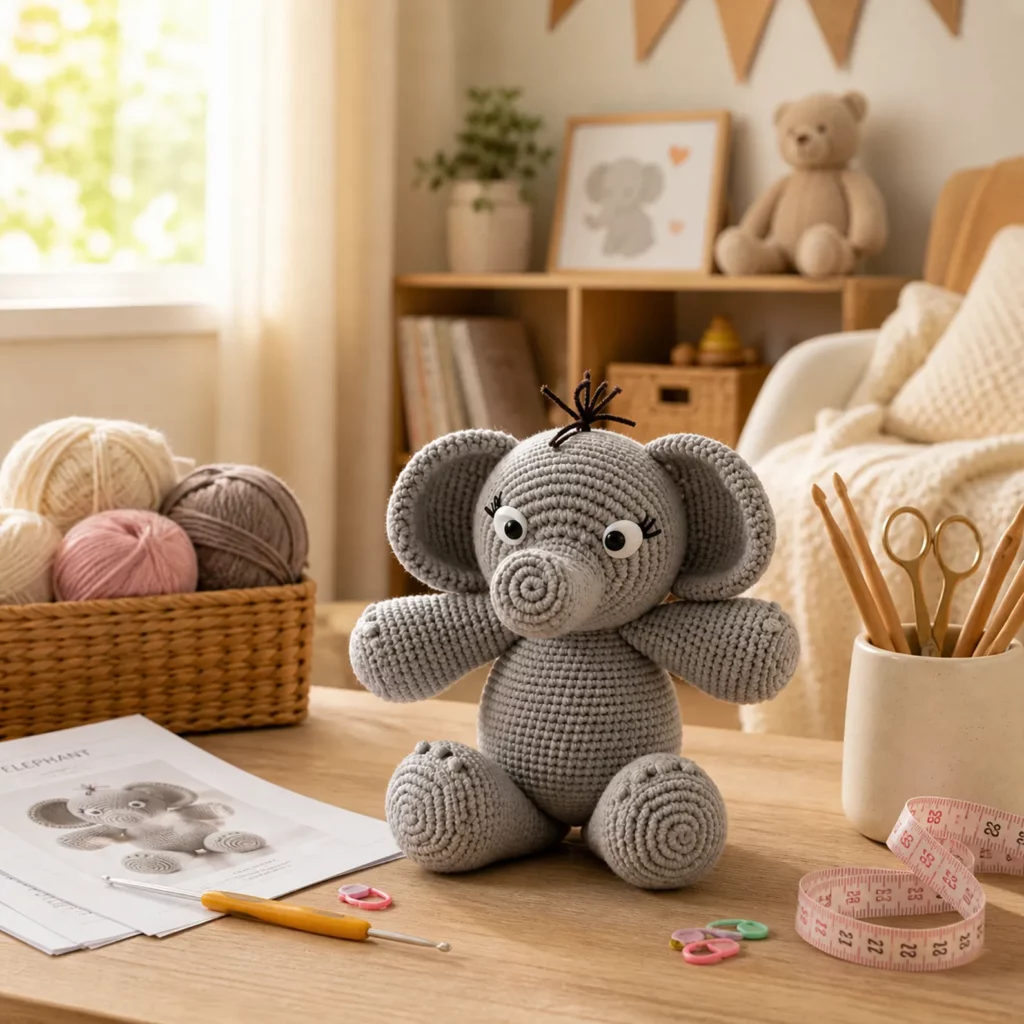
This crochet pattern is designed to help you create a soft, seated elephant with oversized ears, a spiral-style trunk, and chunky feet that give it that “cuddly toy” look. The shaping is straightforward, the pieces are repetitive in a relaxing way, and the final assembly is very doable—even if you’re newer to amigurumi. I’ll also share practical “maker” tips along the way, like how to keep your head smooth, how to attach ears evenly, and how to make the trunk sit nicely without flopping.
Whether you’re making a baby shower gift, a birthday present, or your next DIY crochet plush for your own shelf, this is a free crochet pattern you can return to again and again—because elephants are adorable in every color.
Detailed Description of the Crochet Pattern#
This elephant amigurumi is built from classic shapes that create a polished finish:
- Head: round with gentle tapering near the bottom, so it sits naturally on the body
- Trunk: a spiral-style tube (or tapered tube) attached to the front center of the face
- Ears: large, rounded ears that curve slightly for that iconic elephant silhouette
- Body: egg-shaped and designed to sit (wider at the base)
- Arms: short, soft arms attached slightly forward for a huggable pose
- Legs/feet: chunky pieces that form the seated base and give the elephant stability
- Optional details: tiny tuft of hair on top, embroidered eyelashes, blush cheeks
The overall style uses tight single crochet so the stuffing stays hidden and the plush holds shape well—perfect for amigurumi.
Skill Level Explanation#
This is an easy-to-intermediate crochet pattern.
You’ll be comfortable if you can:
- Crochet in continuous rounds
- Single crochet, increase, and invisible decrease
- Count stitches and use a stitch marker
- Sew amigurumi pieces neatly
- Stuff and shape as you go
The only “extra” technique is the trunk shaping (which is still very beginner-friendly). If you’ve made a simple ball amigurumi before, you can handle this elephant.
Materials Needed#
Yarn
Choose a yarn that feels soft but still shows stitch definition.
Recommended yarn:
- Worsted weight (#4) acrylic or cotton blend
- Or DK (#3) if you want a slightly smaller elephant
Color ideas:
- Classic gray
- Warm taupe or beige (for a neutral nursery style)
- Pastels (mint, blush, lavender)
- Bold “storybook” colors (blue, teal, mustard)
Hook
Use a smaller hook than the yarn label suggests for tight stitches:
- Worsted: 3.0–3.5 mm
- DK: 2.5–3.0 mm
Notions
- Fiberfill stuffing
- Stitch marker
- Yarn needle
- Scissors
- Safety eyes (optional) 10–12 mm for worsted / 8–10 mm for DK
- Black embroidery floss or thin yarn for mouth/eyelashes
- Optional: pink floss for cheeks
- Optional: a small amount of dark gray for shading (not required)
Stitches & Techniques Explained#
Abbreviations (US terms)
- MR = magic ring
- sc = single crochet
- inc = increase (2 sc in same stitch)
- dec = invisible decrease (sc2tog through front loops)
- sl st = slip stitch
- ch = chain
- BLO = back loop only
Invisible decrease
Invisible decreases keep the fabric smooth and reduce gaps—especially important on the head.
Clean stuffing and shaping
Stuff in small tufts, not big chunks. This helps keep the head round and prevents lumps.
Trunk options
You can choose one of these:
- Spiral trunk: a short tube with a slight curl effect
- Tapered trunk: a tube that narrows toward the tip (very classic elephant look)
Step-by-Step Instructions#
Notes before you begin:
- Work in continuous rounds unless stated
- Place a stitch marker in the first stitch of each round
- Numbers in brackets are stitch counts
Head
R1: MR, 6 sc [6]
R2: inc x6 [12]
R3: (sc, inc) x6 [18]
R4: (2 sc, inc) x6 [24]
R5: (3 sc, inc) x6 [30]
R6: (4 sc, inc) x6 [36]
R7: (5 sc, inc) x6 [42]
R8–R12: sc around [42]
Eye placement (if using safety eyes):
- Place between R10 and R11, about 8–10 stitches apart (adjust for your preferred expression).
Start shaping down:
R13: (5 sc, dec) x6 [36]
R14: (4 sc, dec) x6 [30]
R15: (3 sc, dec) x6 [24]
Begin stuffing firmly and shaping into a smooth sphere.
R16: (2 sc, dec) x6 [18]
R17: (sc, dec) x6 [12]
R18: dec x6 [6]
Fasten off, close, weave in.
Trunk
Option A: Tapered trunk (classic)
R1: MR, 6 sc [6]
R2: sc around [6]
R3: (sc, inc) x3 [9]
R4–R7: sc around [9]
R8: (sc, dec) x3 [6]
R9–R10: sc around [6]
Lightly stuff (especially near the base), leave the tip softer. Fasten off with a long tail.
Sew trunk centered below the eyes. If you want a slight curl, stitch the tip down with one small hidden stitch.
Option B: Spiral trunk (cute curl)
R1: MR, 6 sc [6]
R2: inc x6 [12]
R3: sc around [12]
R4: (sc, dec) x4 [8]
R5–R10: sc around [8]
Lightly stuff base only. When sewing on, angle it slightly upward and add one stitch to “pull” the tip into a curl.
Ears (make 2)
Outer ear:
R1: MR, 6 sc [6]
R2: inc x6 [12]
R3: (sc, inc) x6 [18]
R4: (2 sc, inc) x6 [24]
R5: (3 sc, inc) x6 [30]
R6: sc around [30]
R7: sc around [30]
Fasten off with a long tail.
Optional inner ear (contrast):
Make a smaller circle:
R1: MR 6 sc
R2: inc x6 [12]
R3: (sc, inc) x6 [18]
Fasten off and sew centered onto the outer ear.
To shape ears:
Fold the ear slightly and add a couple of stitches at the base so it cups forward.
Body (seated shape)
R1: MR, 6 sc [6]
R2: inc x6 [12]
R3: (sc, inc) x6 [18]
R4: (2 sc, inc) x6 [24]
R5: (3 sc, inc) x6 [30]
R6: (4 sc, inc) x6 [36]
R7–R11: sc around [36]
R12: (4 sc, dec) x6 [30]
R13–R14: sc around [30]
R15: (3 sc, dec) x6 [24]
Start stuffing. Keep the bottom firmer so it sits.
R16: sc around [24]
R17: (2 sc, dec) x6 [18]
R18: (sc, dec) x6 [12]
R19: dec x6 [6]
Fasten off, close, weave in.
Arms (make 2)
R1: MR, 6 sc [6]
R2: (sc, inc) x3 [9]
R3–R8: sc around [9]
Lightly stuff, flatten top, sew closed. Leave tail.
Legs/Feet (make 2)
These are chunky and help with the seated look.
R1: MR, 6 sc [6]
R2: inc x6 [12]
R3: (sc, inc) x6 [18]
R4: sc around [18]
R5: (sc, dec) x6 [12]
R6–R9: sc around [12]
Stuff firmly. Flatten top and sew closed. Leave tail.
Sew legs to the lower front of the body so the elephant looks like it’s sitting with feet forward.
Tail (optional)
Ch 9–13, sc back down chain, fasten off.
Sew to back of body.
Assembly
- Sew trunk onto head (centered).
- Sew ears onto the sides of the head. A good placement is slightly above eye level, angled outward.
- Sew head onto body. Use strong stitching and go around twice for stability.
- Sew arms onto the sides, slightly forward so it looks like the elephant is ready for a hug.
- Sew legs onto the lower front.
- Add optional details: eyelashes, blush cheeks, tiny hair tuft (a few strands tied and secured).
Common Mistakes and How to Avoid Them#
- Head looks lumpy: Stuff in tiny tufts and keep rotating the piece as you stuff. Smooth with your hands often.
- Stuffing shows through: Use a smaller hook and tighter tension. Amigurumi fabric should feel dense.
- Ears look uneven: Pin both ears first, then measure: count stitches from the top center of the head to each ear.
- Trunk flops too much: Add a little more stuffing at the base, or add one hidden stitch to tack the trunk tip to the face.
- Elephant won’t sit: Stuff the body base firmly and position legs slightly forward and wide.
Expert Tips for Better Results#
- Use invisible decreases everywhere you shape down (especially head and body).
- For a super-cute expression, place eyes slightly lower and closer together than you think—then step back and check.
- If you want a “baby elephant” look, make the ears a touch bigger (add one more increase round).
- A tiny embroidered eyebrow line can change the whole mood (sleepy, curious, playful).
- Weave ends deep through the stuffing so they don’t pop out later.
Variations and Customization Ideas#
- Nursery elephant: pastel yarn, embroidered eyes, and a little scarf.
- Party elephant: add a tiny party hat (cone + pom-pom).
- Pocket elephant: use DK yarn and a smaller hook to create a mini version.
- Long trunk circus elephant: extend trunk by 2–4 rounds before tapering.
- Different ear shapes: make ears more oval for an African elephant vibe, more rounded for a cartoon style.
Benefits of This Crochet Project#
- Makes a gift-quality plush that feels special and handmade
- Great practice for shaping, assembly, and facial placement
- Easy to customize in color and size
- Works as nursery décor, toy, keepsake, or market item
- A strong evergreen topic for blogs: “amigurumi crochet pattern” and “crochet for beginners” searches stay popular year-round
Internal Linking Suggestions#
You may also like…
- Magic Ring Crochet Tutorial
- Invisible Decrease Crochet Tutorial
- How to Sew Amigurumi Parts Neatly
- Beginner Amigurumi Animals (bunny, bear, puppy)
- Crochet Safety Eyes Placement Guide
- Easy Crochet Accessories (scarves, bows, tiny hats)
FAQ Section#
Is this crochet pattern suitable for beginners?
Yes. It uses basic single crochet shaping. The trunk and ears are simple, and the main challenge is neat assembly (which gets easier with pinning).
What yarn is best for an elephant amigurumi?
Worsted or DK yarn works best. Soft acrylic is great for cuddles, while cotton blends give crisp stitch definition.
Can I make it baby-safe?
Yes. Use embroidered eyes instead of safety eyes and avoid small detachable parts. Stitch everything securely.
How do I make the elephant bigger or smaller?
Use thicker yarn and a larger hook to size up, or thinner yarn and a smaller hook to size down—keep the same stitch counts.
How do I keep the trunk from drooping?
Stuff the base a bit more firmly and add one hidden tack stitch near the tip to create a gentle curl.
Can I change the posture to standing instead of sitting?
Yes. Make longer legs (add more rounds) and attach them directly under the body rather than in front.
Conclusion#
This baby elephant amigurumi is a cozy, lovable make that looks adorable in any color and works beautifully as a gift. With a round head, big ears, and a sweet trunk, it’s the kind of crochet pattern you’ll want to repeat—especially once you start customizing.
If you tell me your yarn weight (DK or worsted) and your hook size, I can suggest the best eye size and ear placement so your elephant’s proportions come out perfectly.


