


Introduction#
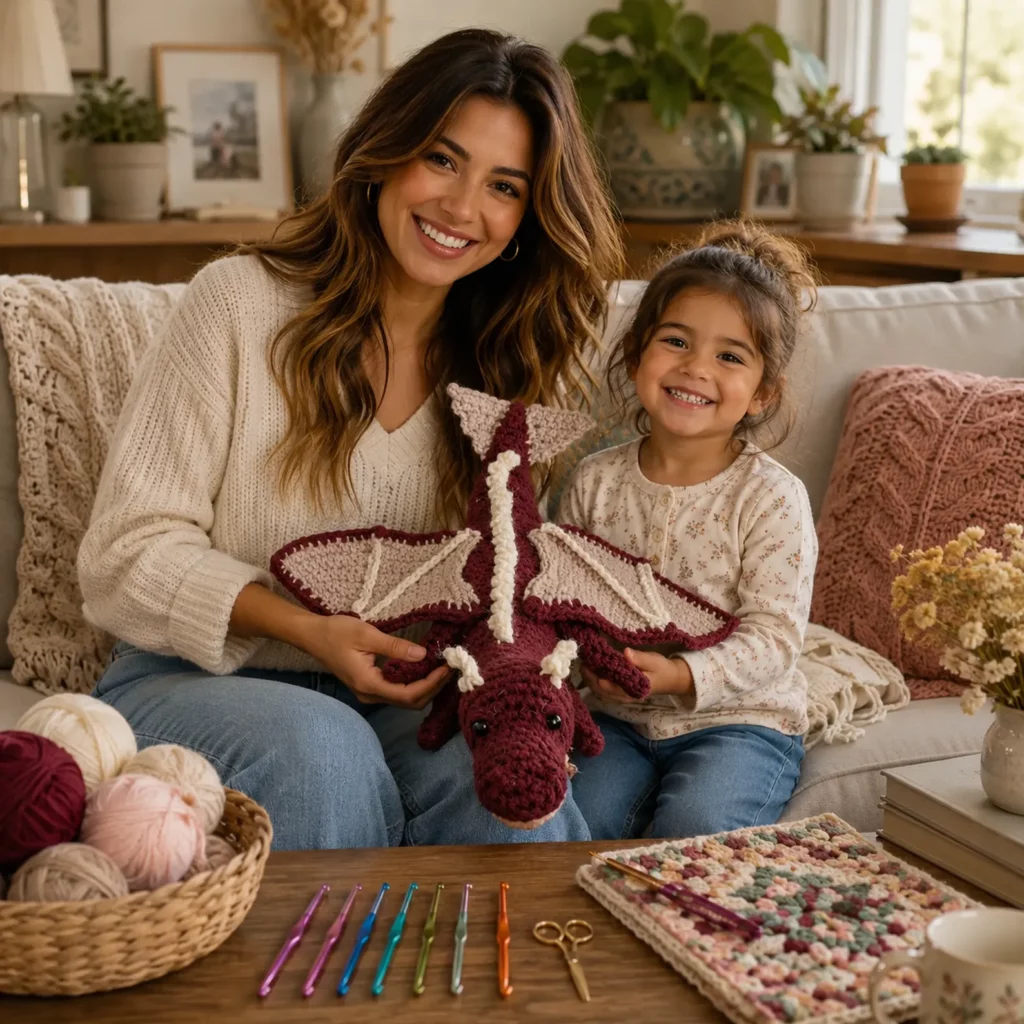
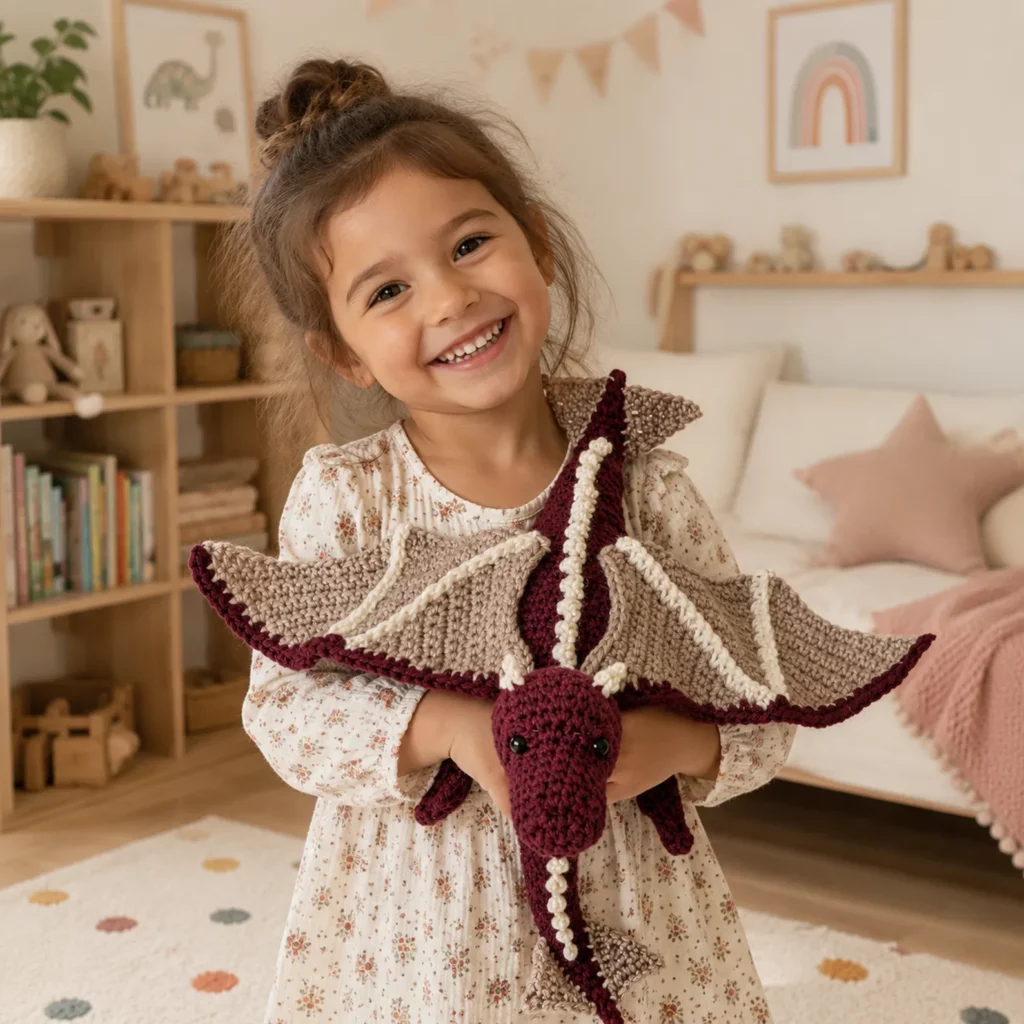
Few crochet projects capture the imagination quite like a handmade dragon. Combining the charm of amigurumi with the excitement of fantasy creatures, this dragon crochet pattern creates a lovable winged companion that is perfect for children, collectors, and fantasy enthusiasts alike.
Explore more intermediate amigurumi crochet patterns in our pattern library.
Featuring a detailed body, sculpted wings, decorative horns, textured spine ridges, and expressive safety eyes, this dragon strikes the perfect balance between realistic creature design and adorable toy appeal. The contrasting wing membranes and raised spine details create dimension and character, making the finished project look impressive while remaining approachable for intermediate crocheters.
Whether you’re searching for a free crochet pattern, a crochet tutorial for amigurumi creatures, or a DIY crochet gift that will delight dragon lovers of all ages, this magical project offers hours of enjoyable crafting and a stunning finished result.

Detailed Description of the Crochet Pattern#
This crochet pattern creates a fantasy dragon designed in a classic amigurumi style.
The design features:
- Long dragon body
- Sculpted head and snout
- Large spread wings
- Decorative horns
- Four sturdy legs
- Textured spine ridge
- Tail with fin detail
- Expressive safety eyes
The dragon’s body is worked primarily in continuous rounds, creating a smooth and seamless appearance. Individual components such as wings, horns, legs, and tail details are crocheted separately before being assembled.
The contrast between the main body color and wing membranes highlights the dragon’s impressive wingspan and gives the finished toy a professional appearance.
The result is a soft, durable crochet dragon that works beautifully as a toy, collectible, nursery decoration, or fantasy-themed gift.
Skill Level Explanation#
Skill Level: Intermediate
This project is suitable for crocheters familiar with:
- Magic ring
- Single crochet
- Slip stitch
- Increases
- Invisible decreases
- Working in rounds
- Basic shaping
Skills you will practice include:
- Amigurumi construction
- Toy assembly
- Wing shaping
- Sculptural crochet
- Symmetrical placement
- Stuffing techniques
Confident beginners may complete this project successfully, but some experience with amigurumi is recommended.
Materials Needed#
Yarn
Use worsted-weight (#4) yarn.
Recommended fibers:
- Acrylic yarn
- Cotton blend yarn
- Soft amigurumi yarn
Main Body Color
- Burgundy
- Red
- Emerald green
- Navy blue
- Purple
Approximate yardage:
- 350–500 yards
Contrast Color
For wings, horns, and spine:
- Cream
- Ivory
- Light gray
- Beige
Approximate yardage:
- 100–150 yards
Hook
Recommended hook sizes:
- 3.5 mm
- 4.0 mm
Use a hook smaller than normally recommended to prevent stuffing from showing.
Additional Supplies
- Safety eyes
- Polyester stuffing
- Stitch markers
- Yarn needle
- Scissors
- Pins for assembly
Stitches & Techniques Explained#
Common Abbreviations
- MR = magic ring
- sc = single crochet
- inc = increase
- dec = invisible decrease
- sl st = slip stitch
- ch = chain
- st = stitch
Magic Ring
The dragon begins with a magic ring to eliminate holes at the starting point.
Invisible Decrease
Invisible decreases create smoother shaping and cleaner amigurumi results.
Continuous Rounds
Most sections are worked without joining rounds.
Using a stitch marker is highly recommended.
Amigurumi Assembly
Parts are sewn together after stuffing.
Pinning pieces before sewing helps achieve symmetry.
Step-by-Step Instructions#
Finished Size
Approximate measurements:
- Length: 12–18 inches
- Wingspan: 14–20 inches
Size varies depending on yarn and hook selection.
Notes Before You Start
- Work in continuous rounds.
- Stuff firmly but evenly.
- Use stitch markers.
- Assemble carefully for symmetry.
Head#
Round 1
6 sc in MR.
Round 2
Inc around.
12 stitches.
Round 3
(Sc, inc) around.
18 stitches.
Round 4
(2 sc, inc) around.
24 stitches.
Continue increasing evenly until desired head width is reached.
Eye Placement
Insert safety eyes before closing the head.
Position them evenly for a balanced expression.
Snout Shaping
Work additional rounds with selective increases and decreases.
Stuff firmly.
Fasten off.
Body#
Round 1
6 sc in MR.
Increase gradually.
Continue until body reaches desired width.
Midsection
Work even rounds.
Stuff as you go.
Tail
Begin decreasing gradually.
Continue until a tapered tail forms.
Fasten off.
Legs (Make 4)#
Round 1
6 sc in MR.
Round 2
Inc around.
Rounds 3–8
Work evenly.
Stuff lightly.
Fasten off leaving sewing tails.
Wings (Make 2)#
Using contrast color:
Foundation
Chain 20.
Row 1
Sc across.
Row 2
Decrease at one edge.
Continue shaping triangular wing sections.
Wing Membranes
Create decorative ridges using:
- Chains
- Single crochet
- Slip stitches
Wing Edge
Work a finishing border around the entire wing.
Fasten off.
Horns (Make 2)#
Using contrast yarn:
Round 1
4 sc in MR.
Round 2
Work evenly.
Continue for several rounds.
Lightly stuff if desired.
Fasten off.
Spine Ridge#
Using contrast yarn:
Chain sufficient length to span:
- Head
- Neck
- Body
- Tail
Create decorative bumps using:
- Slip stitch
- Single crochet
- Bobble stitches
Attach along the center back.
Tail Fin#
Using contrast color:
Create a small triangular shape.
Attach to tail tip.
This creates a dragon-like silhouette.
Assembly#
Step 1
Attach head to body.
Step 2
Attach legs evenly.
Step 3
Sew wings to upper back.
Step 4
Attach horns.
Step 5
Sew spine ridge in place.
Step 6
Attach tail fin.
Check symmetry before securing permanently.
Common Mistakes and How to Avoid Them#
Uneven Stuffing
Lumpy stuffing can distort the dragon’s shape.
Solution:
Add stuffing gradually.
Crooked Wings
Poor placement affects appearance.
Solution:
Pin wings before sewing.
Loose Limbs
Weak attachment points reduce durability.
Solution:
Sew through multiple stitches.
Visible Holes
Hook size may be too large.
Solution:
Use a smaller hook.
Uneven Horn Placement
Misaligned horns can affect symmetry.
Solution:
Measure carefully before attachment.
Expert Tips for Better Results#
- Use invisible decreases throughout.
- Pin every piece before sewing.
- Stuff the head firmly.
- Reinforce wing attachment points.
- Use locking stitch markers.
- Weave ends securely inside the body.
- Take photos during assembly to check symmetry.
Variations and Customization Ideas#
Fire Dragon
Use:
- Red
- Orange
- Gold
Add flame-colored wing details.
Ice Dragon
Use:
- White
- Blue
- Silver
Perfect for winter-themed collections.
Forest Dragon
Use:
- Green
- Brown
- Cream
Create a nature-inspired appearance.
Baby Dragon
Reduce yarn weight and hook size.
Giant Dragon
Use bulky yarn and increase all measurements.
Benefits of This Crochet Project#
- Develops amigurumi skills
- Encourages creative customization
- Creates a unique fantasy toy
- Makes an impressive handmade gift
- Suitable for collectors
- Excellent stash-busting project
- Fun assembly process
- Durable finished product
Internal Linking Suggestions#
- Beginner Amigurumi Crochet Guide
- Crochet Dinosaur Pattern
- Fantasy Creature Crochet Collection
- How to Crochet Wings
- Crochet Dragon Egg Pattern
- Amigurumi Assembly Tutorial
- Best Yarn for Amigurumi
- Crochet Toy Safety Guide
FAQ#
Is this dragon crochet pattern beginner-friendly?
Confident beginners can complete it, but some amigurumi experience is helpful.
What yarn works best?
Worsted-weight acrylic or cotton-blend yarn provides excellent stitch definition.
How large is the finished dragon?
Most finished dragons measure between 12 and 18 inches long.
Can I use different colors?
Absolutely. Dragons look wonderful in nearly any color combination.
Do I need safety eyes?
No. Embroidered eyes are a child-safe alternative.
How long does it take to complete?
Most crocheters finish the project over several evenings or a weekend.
Can I make the wings larger?
Yes. Increase the foundation chain and continue shaping rows for a larger wingspan.
Conclusion#
This dragon amigurumi crochet pattern is a magical project that combines creative construction, fantasy-inspired details, and adorable character design. From its sculpted wings and textured spine to its expressive face and detailed tail, every element contributes to a finished piece that feels both impressive and lovable.
Whether you’re searching for a free crochet pattern, a challenging yet rewarding crochet tutorial, or a DIY crochet gift for a fantasy enthusiast, this dragon offers an enjoyable crafting experience and a stunning finished result. Its customizable colors, detailed features, and timeless appeal make it a project you’ll be proud to display or give as a gift.
Gather your favorite yarn, prepare your hook, and bring this enchanting crochet dragon to life one stitch at a time.


