Introduction#
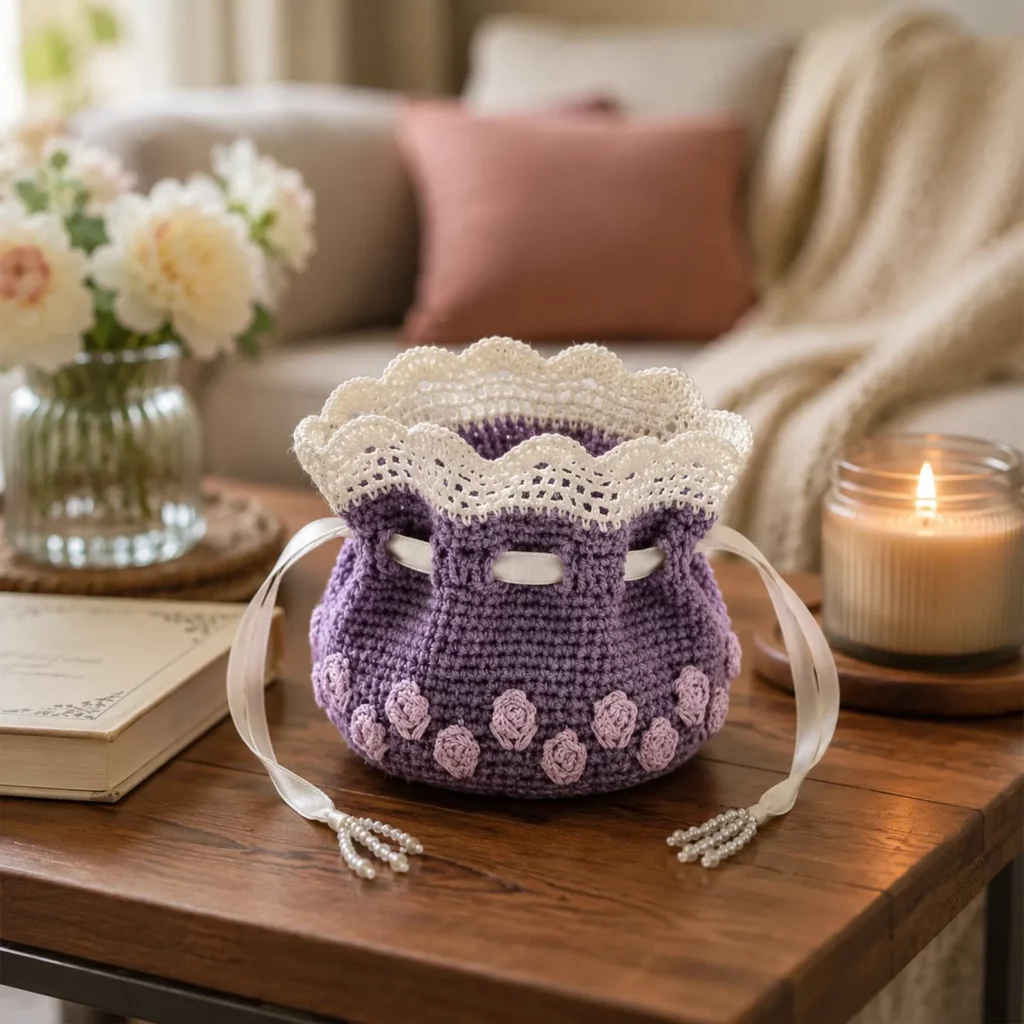
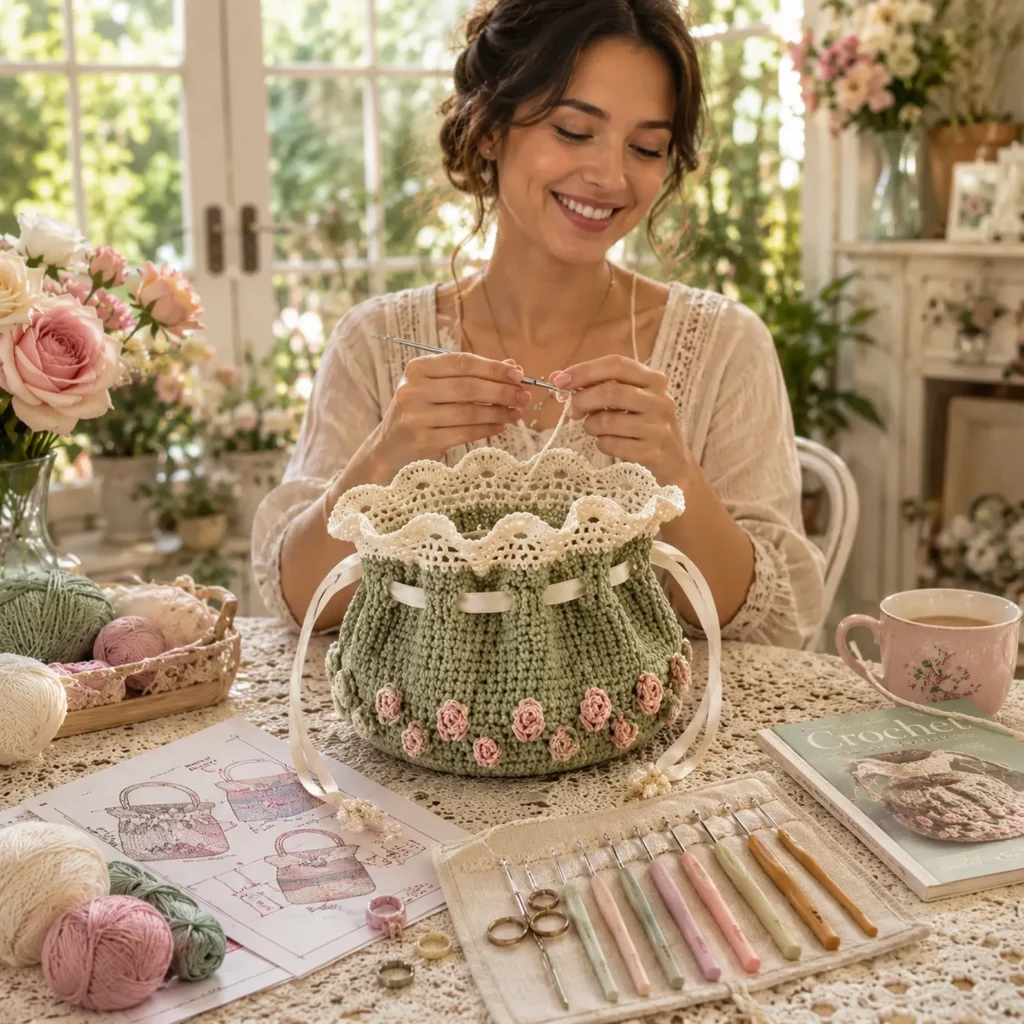
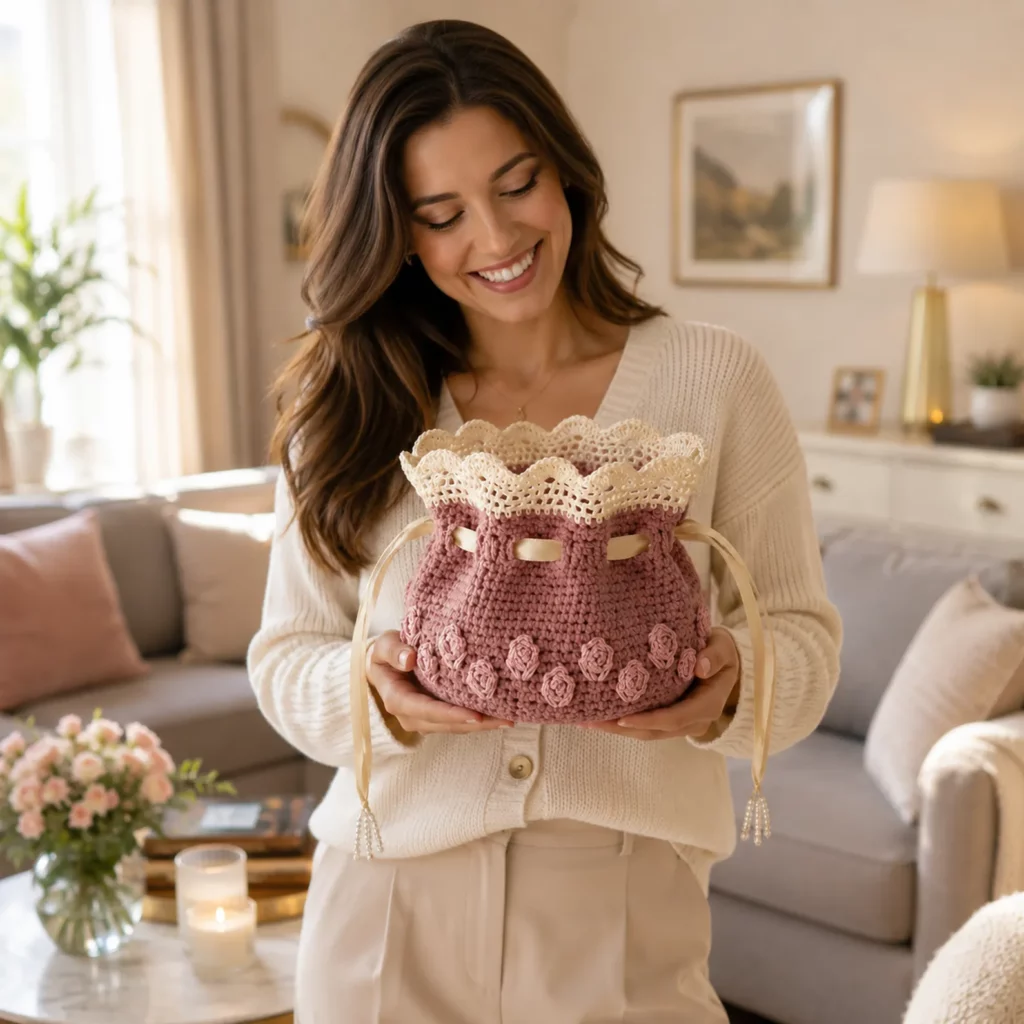
Some crochet projects feel like they belong in a keepsake box. This vintage-style drawstring pouch is exactly that kind of make—romantic, practical, and full of charming details that look far more complicated than they actually are. The deep, rich pouch body gives it structure, while the lacy ruffle top adds a soft, heirloom finish. Then the ribbon tie pulls everything together (literally), making it perfect for gifting, organizing, or decorating your craft corner.
Explore more beginner bags crochet patterns in our pattern library.
If you love crochet that feels delicate but still useful, this is a great “in-between” project: quicker than a sweater, more exciting than a plain pouch, and ideal for using small amounts of yarn. You can make it as a jewelry pouch, notions bag, tea sachet holder, bridal favor bag, or a sweet little gift wrap alternative. The best part is that once you learn the base construction, you can customize size, color, and trim endlessly.
This crochet pattern is written in a crochet tutorial style so you can follow along confidently. You’ll learn how to shape the base, build a smooth pouch body, add a drawstring channel, crochet the lace ruffle, and make those tiny rose details without frustration.
Detailed Description of the Crochet Pattern#
This project is a drawstring pouch with three standout design elements that create the vintage look.
A sturdy round base and smooth body worked in tight, even stitches. The fabric is dense enough to hold shape and keep small items inside, which is important for a functional pouch. The body can be made in single crochet for maximum structure or half double crochet for a slightly softer drape.
A drawstring channel near the top. This is the “engineering” part of the pouch: you’ll create a round with chain spaces (or skipped stitches) that the ribbon weaves through. Once the ribbon is threaded, the pouch cinches neatly.
A lace ruffle collar at the top. The ruffle is worked into a setup round and flares outward with shells or filet-style mesh and scallops. This is what gives the bag that delicate, doily-like finish.
Optional rose trim around the bottom edge. These tiny crocheted roses are small, fast, and extremely effective. They turn a simple pouch into something that looks handmade in a boutique way—like a decorative piece, not just storage.
The overall construction is simple: crochet base → build height → create channel → add lace ruffle → weave ribbon → add roses.
Skill Level Explanation#
Skill Level: Confident Beginner to Intermediate Beginner
You’ll do great if you already know
Chain (ch)
Slip stitch (sl st)
Single crochet (sc)
Double crochet (dc)
Working in the round
Basic sewing with a yarn needle
Newer skills you’ll learn (or practice)
Clean increases for a flat circle base
Creating an evenly spaced drawstring channel
Working shells for lace ruffles
Making small crochet roses (easy once you see the method)
Finishing and shaping for a polished look
Even though this looks intricate, it’s an approachable crochet for beginners-style project as long as you take your time with counting and keep your tension consistent.
Materials Needed#
Yarn
You can make this pouch in many yarn types, but the look changes depending on fiber.
Best yarn choices for the pouch body
Cotton: crisp stitch definition, strong structure, great for pouches
Cotton blends: slightly softer but still stable
Acrylic: works fine and is easy to find, but may be softer and less structured
Recommended yarn weight
DK (Category 3): delicate, refined look (great for gift pouches)
Worsted (Category 4): slightly larger, sturdier pouch (faster to crochet)
Color planning (classic vintage look)
Body color: burgundy, wine, deep plum, or forest green
Lace ruffle: cream, ivory, or white
Roses: dusty pink, blush, or mauve
Ribbon: cream satin, velvet ribbon, or a narrow cotton tape
Yardage estimate
Small pouch (about 4–5″ tall): 80–150 yards total
Medium pouch (about 6–7″ tall): 150–250 yards total
You’ll also need a small amount of contrasting yarn for roses and ruffle.
Hook
DK yarn: 3.0–3.5 mm
Worsted yarn: 4.0–4.5 mm
Tip: For pouches, slightly tighter fabric is better. If you can see holes, go down a hook size.
Notions
Stitch marker
Yarn needle
Scissors
Measuring tape
Ribbon or cord for drawstring (18–30 inches depending on pouch size)
Optional: beads at ribbon ends (display use)
Optional: fabric lining (for extra durability)
Stitches & Techniques Explained#
Common Abbreviations
MR = magic ring
ch = chain
sl st = slip stitch
sc = single crochet
hdc = half double crochet
dc = double crochet
inc = increase (2 stitches in one stitch)
sp = space
st(s) = stitch(es)
( ) = repeat
[ ] = stitch count
Flat Circle Increase Logic
A flat circle grows by adding evenly spaced increases every round. With single crochet, the classic pattern is:
Round 1: 6
Round 2: 12
Round 3: 18
Round 4: 24
…and so on, adding 6 stitches each round by spacing increases farther apart.
This keeps the base flat. If it ruffles, you’re increasing too much. If it cups, you need more increases.
Drawstring Channel Round
The drawstring channel is typically made by repeating chain spaces around the top of the body. One beginner-friendly method:
(sc, ch 1, sk 1) repeated evenly
On the next round, you work stitches into the chain spaces to lock the channel in place.
Lace Shell Ruffle
Shells are groups of dc worked into the same stitch or space. A classic shell is 5 dc in one space. Ruffles happen when you work more stitches into fewer spaces (increasing fabric volume).
Easy Crochet Rose
A tiny rose can be made by crocheting a strip of shells and rolling it up. It looks fancy but the method is simple: shell strip → roll → stitch base.
Step-by-Step Instructions#
Finished Size
This free crochet pattern is adjustable. A typical finished pouch is about 5–7 inches tall and 6–8 inches around, depending on yarn and rounds.
Notes Before You Start
Work in continuous rounds for a smooth pouch body. Use a stitch marker to mark the first stitch of each round.
If you prefer perfectly stacked color changes, use joined rounds for the lace portion.
Weave in ends neatly, especially around the drawstring channel so nothing snags the ribbon.
Color Key
A = Body color (burgundy/wine)
B = Lace ruffle (cream/ivory)
C = Roses (dusty pink/mauve)
Base (Color A)
Round 1: 6 sc in MR [6]
Round 2: inc around [12]
Round 3: (sc, inc) around [18]
Round 4: (2 sc, inc) around [24]
Round 5: (3 sc, inc) around [30]
Round 6: (4 sc, inc) around [36]
This creates a base about 3.5–4.5 inches wide in many yarns. For a larger pouch, continue increasing:
Round 7: (5 sc, inc) around [42]
Round 8: (6 sc, inc) around [48]
Stop increasing when the base diameter is the size you want.
Turn the Corner (Creates the Bottom Edge)
Next round: sc in BLO around
This round forms a crisp ridge that helps the pouch body stand up from the base.
Body (Color A)
Work even rounds (no increases) until you reach your desired height before the channel.
For a small pouch: 10–14 rounds
For a medium pouch: 14–18 rounds
Use sc for a firmer pouch. If you want a slightly softer feel, use hdc instead, but keep tension snug.
Drawstring Channel Setup
Channel Round 1: (sc, ch 1, sk 1) repeat around
If your stitch count is odd and the repeat doesn’t land perfectly, adjust once by using sk 0 or sk 2 at one point. The goal is evenly spaced holes.
Channel Round 2: sc in each sc and sc in each ch-1 space around
This locks the holes into a clean channel.
Upper Band (Still Color A)
Work 2–4 rounds of sc evenly. This strengthens the top and gives a clean base for the lace ruffle.
Fasten off Color A.
Lace Ruffle Top (Color B)
Join Color B at any stitch.
Ruffle Round 1 (foundation for lace):
(ch 3 counts as dc), dc in same st, sk 1, (2 dc in next st, sk 1) repeat around
Join with sl st.
Ruffle Round 2 (shells):
Sl st into space between 2-dc groups, (ch 1, 5 dc in next space, ch 1, sl st in next space) repeat around
Join.
If you want a taller, more dramatic lace collar, add one more round:
Ruffle Round 3 (airy filet scallop):
Sl st to center of shell, ch 4, sc in next shell center, ch 4 repeat around
Then finish with shells into each ch-4 space: (5 dc in ch-4 sp) around.
Fasten off and weave in ends.
Weave the Ribbon
Cut ribbon or cord long enough to tie a bow with tails (18–30 inches).
Thread ribbon through the channel holes, weaving in and out all the way around.
Pull both ends to cinch, then tie a bow.
Pro tip: If you want a smoother drawstring action, use a satin ribbon or round cord rather than a textured ribbon.
Roses (Optional Trim, Color C)
Make 8–14 tiny roses depending on pouch size and how full you want the trim.
Easy Rose Strip
Ch 26 (adjust longer for a bigger rose)
Row 1: sc in 2nd ch from hook, sc across
Row 2: ch 1, turn, (sl st in next st, 5 dc in next st, sl st in next st) repeat across
This creates little shell bumps. Roll the strip tightly from one end to form a rose. Stitch the base with a few secure stitches and leave a tail for sewing.
Sew roses evenly around the lower pouch area, just above the base ridge. Space them consistently for the neatest look.
Common Mistakes and How to Avoid Them#
The base is ruffling
Cause: too many increases or tension too loose
Fix: stop increases one round earlier, or use a smaller hook
The base is cupping
Cause: not enough increases
Fix: add one more increase round, or loosen tension slightly
Drawstring holes are uneven
Cause: inconsistent skips or stitch count drift
Fix: count your repeats and adjust once if needed; blocking the top lightly helps too
Ribbon snags while pulling
Cause: ends not woven in securely near the channel
Fix: weave ends into solid stitches, not through the channel holes, and trim neatly
Lace ruffle curls instead of flaring
Cause: ruffle round too tight or shell count too small
Fix: increase shell size (5 dc to 6–7 dc) or add a chain space between shells
Roses look bulky or messy
Cause: strip too thick or rolled too loosely
Fix: use a shorter chain for smaller roses and roll tightly; secure base firmly before sewing
Expert Tips for Better Results#
Use cotton yarn if you want the pouch to hold shape and keep lace crisp.
For a really polished top edge, add one final round of crab stitch (reverse sc) in the lace color.
If you plan to carry small items, consider lining the pouch with a simple fabric circle base and a tube lining. It prevents stretching and keeps items from poking through stitch gaps.
To make the drawstring smoother, thread ribbon using a safety pin attached to the ribbon end.
If you want the roses to sit flatter, stitch them through the middle and base so they don’t “pop up.”
Wet blocking the lace ruffle lightly (just the top) makes it look dramatically more professional.
Variations and Customization Ideas#
Make it a bridal favor pouch
Use ivory body, white lace, and blush roses. Add a tiny pearl bead to the ribbon ends (display use) or use embroidered beads with French knots.
Turn it into a gift bag alternative
Make it slightly larger and use it as reusable gift packaging. It’s perfect for jewelry, skincare minis, or small handmade soaps.
Add a scalloped lace skirt
Instead of a simple shell ruffle, add a filet lace layer: ch-5 arches, then shells into arches for a taller collar.
Change the closure style
Use an i-cord drawstring for a fully crocheted look
Add two ribbon ties instead of one long ribbon
Add a small button loop on one side for a different vintage vibe
Switch the embellishment
Replace roses with tiny leaves, daisies, or bobble trim
Add surface embroidery vines around the base instead of sewn roses
Adjust the size
For a mini pouch: stop base at 24–30 stitches and keep body height short
For a larger pouch: increase base to 48–60 stitches and add more body rounds
Benefits of This Crochet Project#
A beautiful crochet pattern that feels heirloom and gift-worthy
Small and satisfying, perfect for weekend crafting
Stash-buster friendly (great for leftover yarn and ribbon)
Practical storage for jewelry, notions, makeup, or keepsakes
Customizable for holidays, weddings, baby showers, and handmade markets
Internal Linking Suggestions#
How to Crochet a Flat Circle (No Ruffles, No Cupping)
Beginner Guide to Crochet Lace Shell Stitches
How to Make a Drawstring Channel in Crochet
Easy Crochet Rose Pattern (Mini Flowers for Embellishments)
How to Line a Crochet Bag or Pouch
Weaving in Ends Neatly in Crochet
FAQ#
Is this crochet pattern beginner-friendly?
Yes, especially if you’re comfortable crocheting in the round. The lace ruffle and roses are beginner-friendly embellishments with simple repeats.
What yarn is best for a drawstring crochet pouch?
Cotton is ideal for structure and stitch definition, especially for the lace top. Acrylic works too if you prefer a softer feel.
How do I choose ribbon length?
A good rule is 2.5–3 times the pouch opening circumference. For most small/medium pouches, 18–30 inches works well.
Can I make it without the roses?
Absolutely. The pouch looks lovely with just the lace ruffle and ribbon. You can also replace roses with a simple bobble trim.
How do I keep the lace ruffle crisp?
Light blocking helps a lot. If you want extra structure, use a light spray starch on the lace only.
Can I wash this pouch?
If you use washable yarn, gentle hand washing is safest. Remove ribbon if it’s delicate, reshape the lace while damp, and let it dry flat.
How do I resize the pouch?
Increase the base to your desired diameter, then work more or fewer body rounds. The drawstring channel and lace ruffle can be used at any size.
Conclusion#
This vintage drawstring pouch crochet pattern is the perfect mix of pretty and practical: a sturdy little bag, a romantic lace ruffle top, and optional roses that make it feel truly special. It’s a lovely project for gifts, organizing, or simply enjoying the calm rhythm of working in the round—then finishing with details that feel like “the cherry on top.”
If you tell me the yarn weight you’re using (DK or worsted) and what you want to store in it (jewelry, notions, gift favors), I can suggest an exact base stitch count and a ribbon length so your pouch turns out the perfect size.