


Introduction#
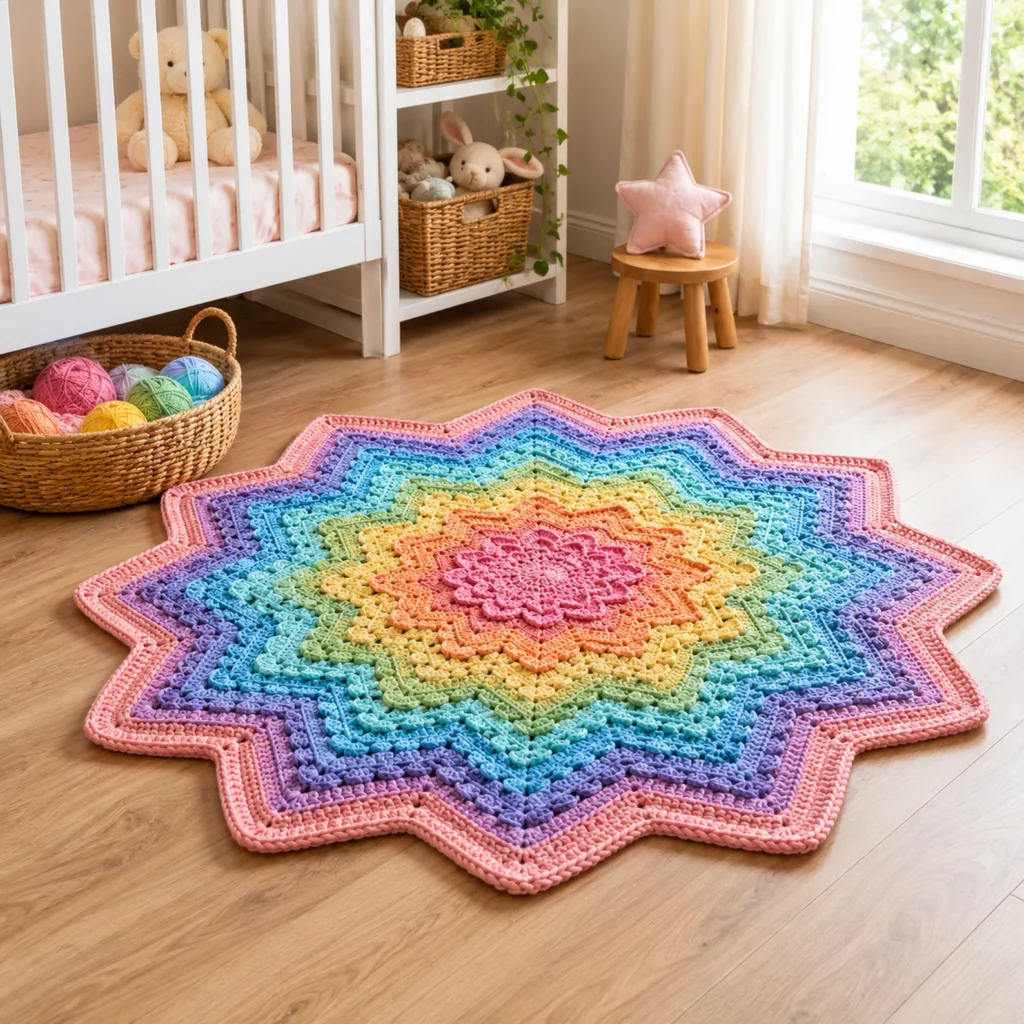
If you’ve ever wished you could crochet one “wow” piece that doubles as nursery décor and an everyday baby essential, a starburst play mat is it. This style of blanket spreads out like a giant soft flower: a plush center, dramatic points around the edge, and textured rounds that make it feel extra cushy for tummy time.
Explore more beginner blankets crochet patterns in our pattern library.
What makes this crochet pattern especially fun is the variety built into the rounds. Instead of working the same stitch for 100 rows, you’ll switch between smooth rounds, puff-texture rounds, and simple shaping rounds that make the points pop. The result looks intricate and expensive, but the construction is actually very logical once you understand where increases belong.
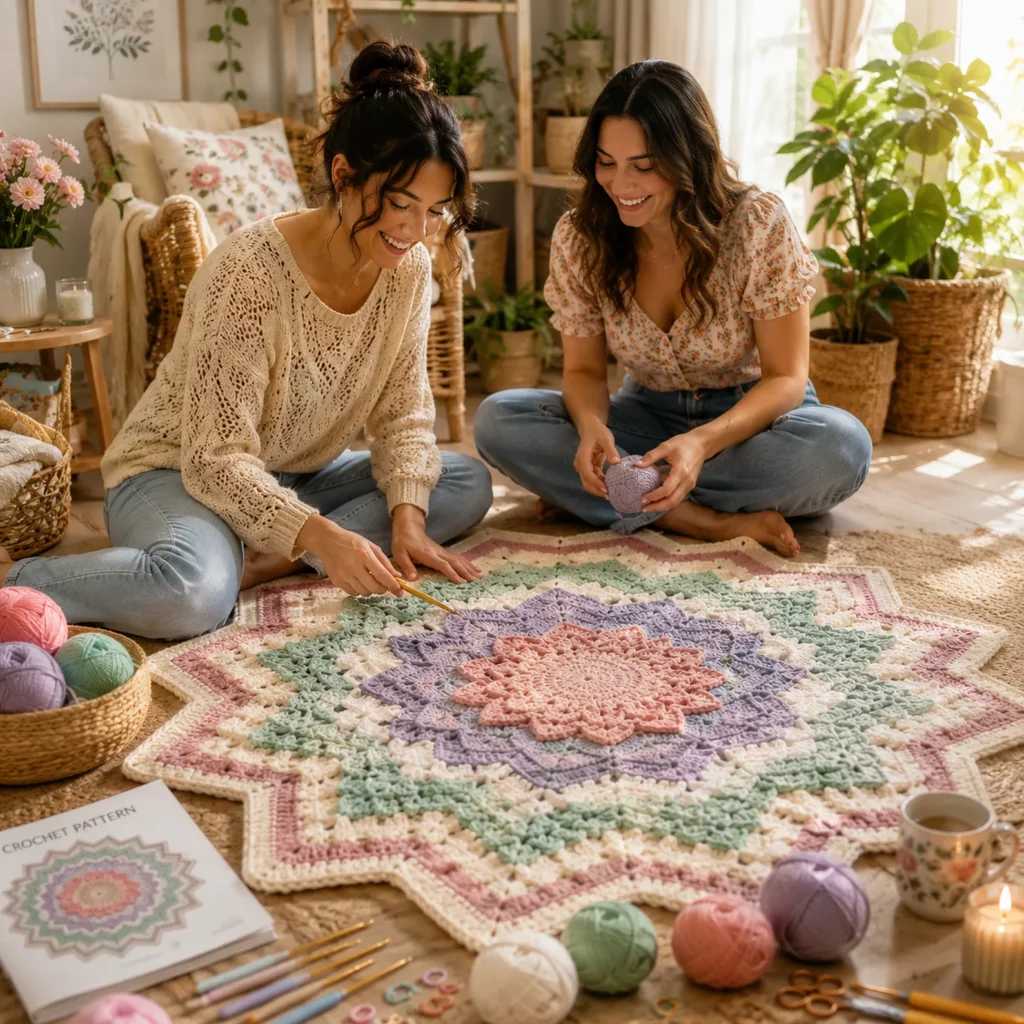
This free crochet pattern is written in a crochet tutorial style so you can confidently make your own starburst mat, customize the colors, and adjust the size for a baby blanket, floor mat, or even a statement throw.
Detailed Description of the Crochet Pattern#
This project is a large, flat, 12-point star blanket worked in rounds. The overall design has four key features.
A flower-like center that starts as a circle and quickly transitions into points.
Layered texture that creates a soft, bouncy surface (great for play mats).
Strong color-blocked “rings” that highlight the geometry of the star.
A finished edge that forms clean points and gentle waves, giving the mat that dramatic, scalloped silhouette.
Most of the shaping happens at consistent “peak” locations. In a 12-point star, you will have 12 peak sections evenly spaced around the circle. Each round either maintains the points (by repeating the same increase placement) or smooths the fabric (by working even stitches or spacing increases differently).
The texture in this style is usually created with puff stitches, popcorn-like clusters, or raised stitch groupings worked into chain spaces. You’ll get that same puffy, layered look using an easy puff-round repeat that stays beginner-friendly.
Skill Level Explanation#
Skill Level: Confident Beginner to Intermediate
You’ll do great if you already know
Chain (ch)
Slip stitch (sl st)
Single crochet (sc)
Double crochet (dc)
Working in the round
Counting repeats
Newer skills you’ll learn (or practice)
Keeping a large circle flat as it grows
Placing increases consistently at peak points
Working puff stitches (or clusters) evenly
Fixing ripples or cupping by adjusting increase spacing
Blocking a large piece so it lays beautifully
If you’ve made a granny square blanket or a simple round baby blanket before, this is a wonderful step up because it teaches structured shaping without complicated chart reading.
Materials Needed#
Yarn
This project looks best in smooth yarn with good stitch definition so the star points and textures show clearly.
Recommended yarn weights
Worsted (Category 4): great balance of softness, warmth, and speed
DK (Category 3): lighter drape, slightly smaller finished size unless you add rounds
Bulky can work for an ultra-plush mat, but the star points become very bold and the mat gets heavy
Fiber suggestions
Acrylic baby yarn: soft, washable, budget-friendly
Cotton blend: breathable with crisp stitch definition
Anti-pilling acrylic: keeps the mat looking fresh after use
Color planning
This style shines with 4–6 colors. A common approach is
Center color (soft peach or blush)
Two mid colors (lavender and periwinkle)
One texture highlight (mint or seafoam)
Outer frame color (butter yellow or cream)
Optional accent stripe (thin contrast line near the edge)
Yardage estimate (approximate)
Baby mat size (about 36–42 inches across points): 1200–1800 yards worsted total
Larger floor mat (45–55 inches across points): 2000–3000 yards worsted total
Exact amounts depend on stitch choice and how many textured rounds you add.
Hook
Worsted: 5.0 mm (H/8) to 5.5 mm (I/9)
DK: 4.0 mm (G/6) to 4.5 mm
If your mat feels stiff, go up a hook size. If it ripples a lot, go down a size and check your increase spacing.
Notions
Stitch markers (highly recommended for marking the 12 peaks)
Yarn needle
Scissors
Measuring tape
Blocking mat and pins (or towels + pins)
Stitches & Techniques Explained#
Common Abbreviations
MR = magic ring
ch = chain
sl st = slip stitch
sc = single crochet
dc = double crochet
hdc = half double crochet
tr = treble crochet
puff = puff stitch
inc = increase (2 stitches in one stitch)
sp = space
( ) = repeat
[ ] = stitch count (optional)
Puff Stitch (beginner-friendly version)
Puff (puff) in a stitch or space
Yarn over, insert hook, pull up a loop
Yarn over, insert hook into same place, pull up a loop
Yarn over, insert hook into same place, pull up a loop
Yarn over, pull through all loops on hook
Ch 1 to lock the puff
Tip: keep the locking chain consistent. If it’s too tight, your fabric will pucker.
How the 12-point shaping works
A 12-point star means your round is divided into 12 repeating sections. Each section has a “peak” where increases happen. If you mark the peaks early, the whole pattern becomes much easier.
Peak marker strategy
After you establish 12 peaks (usually by Round 3 or 4), place a stitch marker at the center stitch of each peak. Every round, move the markers up to the new peak stitch. This prevents mistakes and keeps the points sharp and symmetrical.
Keeping it flat
If your blanket begins to ripple, you have too many increases for your gauge.
If it cups (forms a bowl), you have too few increases.
Fixing this is normal in large round projects. One small adjustment round usually solves it.
Step-by-Step Instructions#
Finished Size
This crochet pattern is adjustable. Your size depends on yarn and number of rounds. A common baby play mat is 36–42 inches across the widest points.
Notes Before You Start
Work in joined rounds for clean color changes, or continuous rounds for speed.
If changing colors often, joined rounds make stripes look neater.
Place markers for 12 peaks as soon as you establish them.
Read through the round “logic” once so you understand which rounds create texture and which rounds stabilize.
Foundation and Center Flower
Start in your center color.
Round 1
12 dc in MR. Join with sl st to first dc. [12]
Round 2
Ch 3 (counts as dc), dc in same st, 2 dc in each st around. Join. [24]
Round 3 (create 12 peak groups)
Ch 3, dc in same st, dc in next st, (2 dc in next st, dc in next st) repeat around. Join.
You now have evenly spaced increases that will become your peaks.
Round 4 (set the peaks clearly)
Ch 3, dc in same st, dc in next 2 sts, (2 dc in next st, dc in next 2 sts) repeat around. Join.
At this point, you can place stitch markers on the increase stitch (the first of the 2 dc at each increase point). Those are your 12 peaks.
Transition into a Starburst Shape
To make points, you’ll start creating taller stitches at peaks and slightly lower stitches between peaks. This creates the “spiky” outline while still keeping the fabric flat.
Round 5 (peak emphasis)
Ch 3, dc in same st, dc in next 2 sts, tr in next st (peak), dc in next 2 sts, (2 dc in next st, dc in next 2, tr in next, dc in next 2) repeat around. Join.
Round 6 (smooth round)
Ch 2, hdc around, placing an extra hdc at each peak stitch (the marked stitch). Join.
This alternation (a shaping/peak round followed by a smoothing round) helps the star form cleanly without ruffling.
Textured Puff Ring (the “petal layer” look)
Switch to your next color if desired.
Round 7 (setup chain spaces for puff texture)
Ch 1, sc in next st, ch 2, sk 1, (sc in next st, ch 2, sk 1) repeat around. Join.
Adjust at the end if needed so the pattern lands evenly.
Round 8 (puff into chain spaces)
Sl st into first ch-2 sp, ch 2, puff in same sp, ch 1, (puff in next ch-2 sp, ch 1) repeat around. Join.
Round 9 (stabilize after puff)
Ch 1, sc in each puff and in each ch-1 sp around. Join.
If you feel the edge tightening, use hdc instead of sc for this round.
Build Out the Star in Color Bands
Now you’ll repeat a simple cycle
One peak/increase round (to keep points defined)
One smoothing round (to keep it flat)
One texture round (optional, for plushness)
Here is a beginner-friendly repeat you can use for the mid section.
Repeat Set A (work this set 2–4 times, changing colors as you like)
Round A1 (peak round): dc around, and at each peak marker do (dc, tr, dc) in the peak stitch
Round A2 (smooth): hdc around evenly
Round A3 (optional texture): sc around in BLO (adds ridges and helps structure)
The (dc, tr, dc) in one stitch creates a subtle pointed “corner” without needing complicated shaping math. If your points aren’t sharp enough, switch the tr to a dtr (double treble). If it’s too dramatic, keep all three stitches as dc.
Outer “Big Point” Section
To get that large, dramatic star outline near the edge, you’ll widen the distance between peaks by adding stitches between them each cycle.
Outer Set B (repeat 2–3 times)
Round B1: dc around, at each peak do (dc, tr, tr, dc) in the peak stitch
Round B2: hdc around
Round B3: dc around (no special peak stitches)
If your mat starts to ripple here, remove one of the tr at the peaks (use dc, tr, dc instead).
Final Framing Rounds
Switch to your outer frame color (often yellow or cream).
Frame Round 1
Sc around evenly.
Frame Round 2 (accent stripe, optional)
Hdc around in a contrast color to create a clean line.
Frame Round 3
Sc around evenly.
Pointed Scallop Edge
To create the wavy/pointed finish, you’ll work shells around the edge and slightly adjust at peaks.
Edge Round
At a valley between points: sl st, (sk 1, 5 dc in next st, sk 1, sl st in next st) repeat around.
At each peak: place the 5 dc shell into the peak stitch or into the peak space (whichever lies flatter).
If the edge ruffles, increase your skip count slightly between shells. If it pulls tight, reduce skips near peaks.
Fasten off and weave in ends.
Blocking
Blocking makes a starburst mat look dramatically better.
Wet blocking
Soak in cool water, gently squeeze out water, lay flat, shape points with your hands, then pin every other point first to establish symmetry. Add pins around each scallop and let dry completely.
Optional starch
For a crisp “heirloom” edge, lightly spray starch on the outer frame and scallops after blocking.
Common Mistakes and How to Avoid Them#
The star ripples as it grows
Cause: too many increases for your tension
Fix: add one full smoothing round with no peak increases, or reduce peak stitches from (dc, tr, tr, dc) to (dc, tr, dc)
The star cups like a bowl
Cause: not enough increases
Fix: add an extra stitch at each peak on the next round, or switch a smoothing round from sc to hdc
Puffs look uneven
Cause: inconsistent loop height
Fix: pull each puff to the same height before closing it; keep the locking chain snug but not tight
Color bands look jagged
Cause: working in a spiral
Fix: switch to joined rounds for the color-change section, or do a “jogless join” by slip stitching back one stitch at the start of the new color
Points drift and lose symmetry
Cause: losing track of peak placement
Fix: use 12 stitch markers and move them every round
The edge curls upward
Cause: too tight edging or not enough stitches along peaks
Fix: use a looser hook for edging, reduce sl sts, or place shells into peak spaces for more room
Expert Tips for Better Results#
Use stitch markers early and keep them in until the last round. They’re the secret to perfect points.
If you want a softer mat, choose acrylic baby yarn and use more puff rounds.
If you want sharper definition, choose cotton or cotton blend and add BLO ridge rounds between texture sections.
For a super clean look, weave ends into the densest rounds (not through open puff chains).
If you’re making this as a nursery floor mat, consider adding a fabric backing or non-slip mat underneath for extra grip and comfort.
To avoid “wavy sides,” block the mat twice: once after you finish the main body, and again after adding the edging.
Variations and Customization Ideas#
Make it a baby blanket instead of a floor mat
Use softer yarn and stop earlier (fewer outer rounds) for a smaller diameter. Skip the stiff scallop edge and finish with a simple sc border.
Make it a statement throw
Continue Outer Set B for additional repeats and add more frame rounds. Keep color bands wide for a modern ombré look.
Change the texture
Instead of puff rounds, try
Bobble stitch rounds for extra pop
Front-post dc rounds for ribbing
Moss stitch rounds for a flatter, modern texture
Change the point count
If you want a simpler silhouette, you can adapt to 8 points by starting with 8 peak groups. If you want more delicate points, increase to 16 peak groups. The concept stays the same: evenly spaced peaks, consistent increases.
Color palette ideas
Soft pastel nursery: blush, lavender, mint, buttercream
Modern neutral: cream, sand, sage, terracotta
Ocean theme: coral, seafoam, sky, navy accents
Rainbow center: bright center with a neutral frame
Benefits of This Crochet Project#
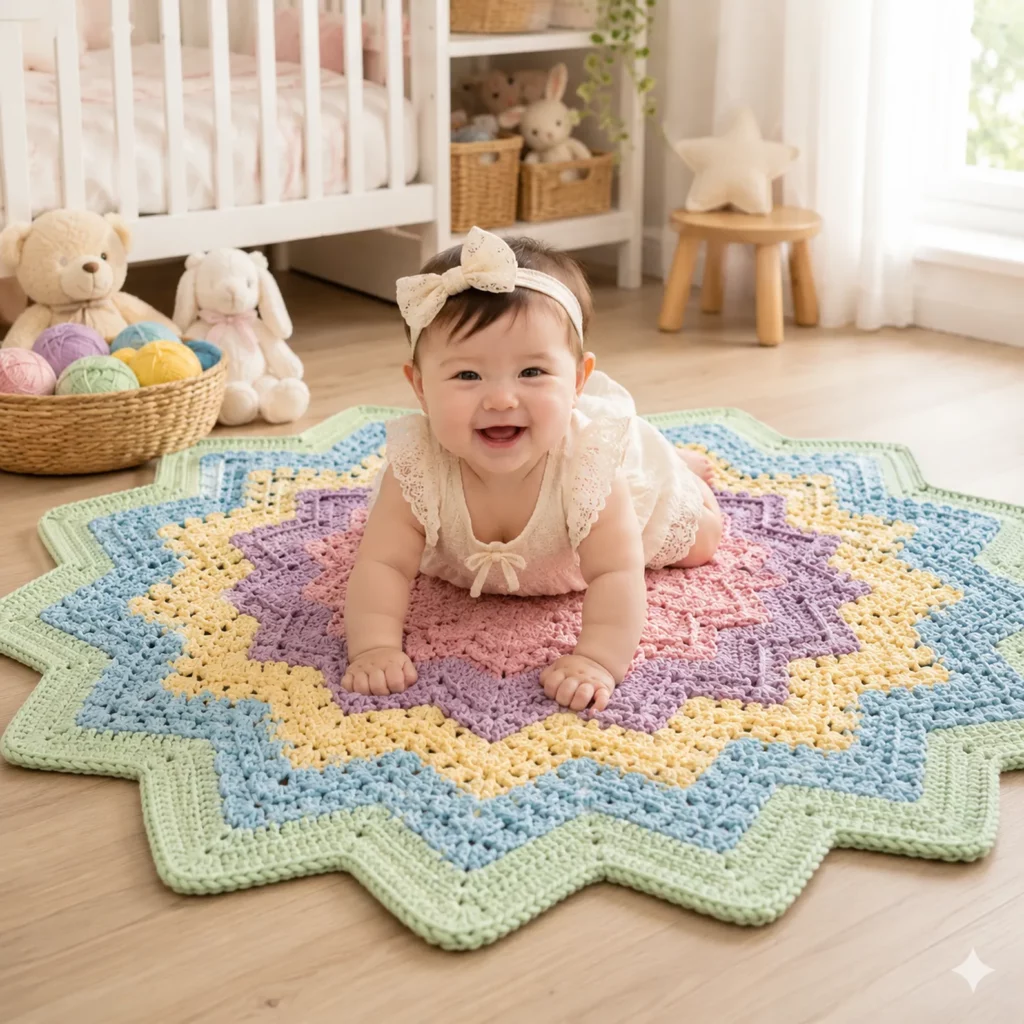
Creates a stunning focal piece for a nursery or play space
Soft texture makes it comfortable for tummy time and floor play
Adjustable sizing makes it versatile for many uses
Great skill builder for shaping, texture, and finishing
Works beautifully as a gift because it looks high-effort and heirloom-worthy
Internal Linking Suggestions#
How to Crochet a Flat Circle Without Ripples
Beginner Puff Stitch Tutorial
How to Change Colors Neatly in Crochet Rounds
Blocking Crochet Blankets: The Complete Guide
Best Yarn for Baby Blankets and Play Mats
FAQ#
Is this crochet pattern suitable for beginners?
Yes for confident beginners. The stitches are simple, but you’ll need to count repeats and keep track of peak placement. Stitch markers make it much easier.
What yarn is best for a baby play mat?
Soft, washable yarn is ideal. Acrylic baby yarn is a popular choice for comfort and easy care. Cotton blends are great if you want crisp stitch definition.
How do I resize the starburst blanket?
Add or subtract repeat sets. More rounds = larger mat. The shape stays the same as long as you keep peak increases consistent.
Why is my starburst ruffling near the edge?
You likely have too many increases for your tension. Reduce the number of tall stitches at peaks or add a smoothing round with no peak increases.
Do I have to block it?
Blocking is strongly recommended. It opens the texture, sharpens the points, and helps the mat lie flat.
Can I wash it in the machine?
If you use machine-washable yarn, yes. Wash gently and reshape while damp. If you used starch, you may need to reapply after washing.
How do I make the edge points sharper?
Use taller peak stitches (tr or dtr), and make sure shells on the edge land at the peak stitch. Blocking also makes points look sharper.
Conclusion#
This starburst baby play mat crochet pattern is the perfect mix of practical and breathtaking: a soft, textured surface for playtime, a bold 12-point silhouette that looks like a giant flower, and color bands that make the geometry shine. Once you understand the peak markers and the smooth-round rhythm, it becomes a relaxing project you can grow as big as you want.
If you tell me the yarn weight you’re using (DK or worsted) and your target size (baby mat, blanket, or throw), I can suggest a round count and a color-band plan that lands right on your measurements.


