


Introduction#
Halloween décor is fun, but the best kind is the kind you can pull out year after year—no wilting, no mess, and no last-minute store runs. That’s why I love crocheting jack-o’-lanterns: you get all the cozy autumn vibes with none of the pumpkin carving stress.
Explore more beginner home decor crochet patterns in our pattern library.
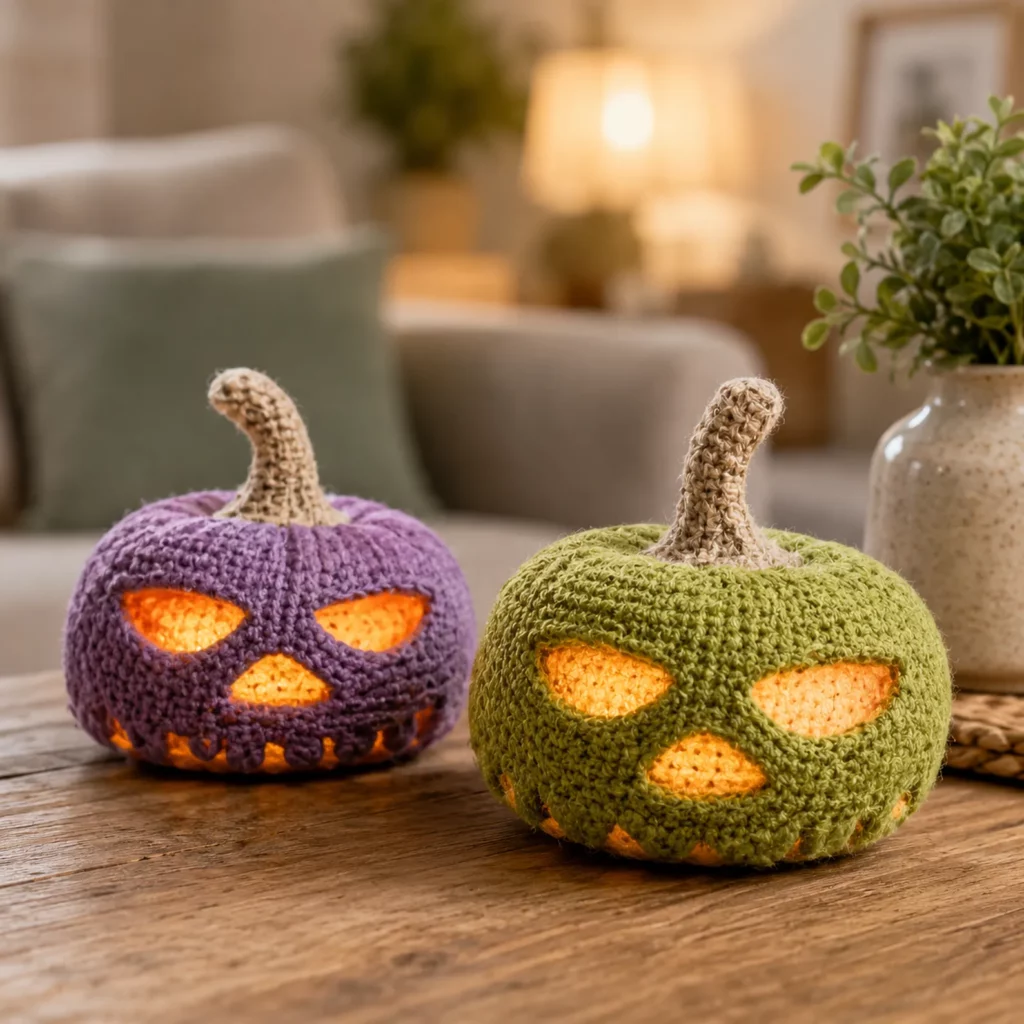
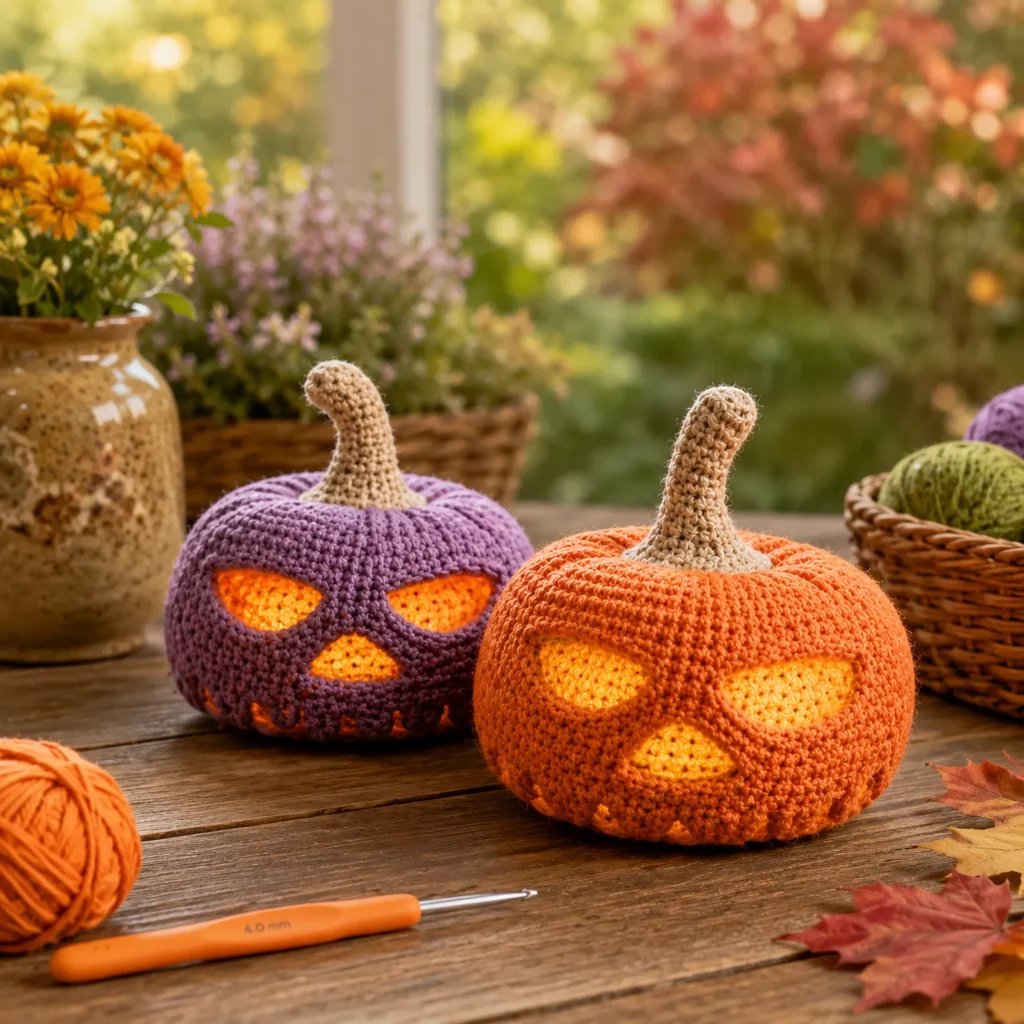
This crochet pattern creates a pair of spooky, carved-look pumpkins with bold cutout-style eyes and a mouth—perfect for tabletops, shelves, entryway baskets, or a mantle. You can make them as plush pumpkins, or turn them into soft “lantern” covers by using a battery tea light inside. The shaping is beginner-friendly (just rounds of single crochet with increases and decreases), and the face details are done with simple appliqués so you don’t have to juggle complicated color changes.
If you’ve been looking for a free crochet pattern that’s seasonal, satisfying, and customizable, this is an easy crochet pattern you’ll want to make in multiple sizes.
Detailed Description of the Crochet Pattern#
These pumpkins are designed to look like classic jack-o’-lanterns with a slightly spooky expression. The finished pieces have:
- A round pumpkin body with subtle shaping that suggests pumpkin ridges
- A tall textured stem (worked as a small tube)
- Carved-style face cutouts (eyes + nose + mouth) created with dark appliqués or cutout windows
- An optional “glow” effect if you insert a battery tea light or small LED
Two ways to create the “carved” look
You can choose the method that fits your comfort level:
- Appliqué Face (Beginner-Easiest):
Crochet the pumpkin body in orange and sew on black/dark brown face pieces. It reads as carved faces and is sturdy for kids and pets. - Lantern Cutout Face (Intermediate Upgrade):
Crochet the pumpkin body, then crochet face shapes directly as holes (chain spaces) and add a dark lining behind the openings (or leave open and use an LED inside).
This tutorial focuses on the appliqué method (most beginner-friendly), with notes on how to upgrade to cutouts.
Skill Level Explanation#
This is an easy-to-intermediate crochet project.
Beginner-friendly skills:
- single crochet in the round
- increases and decreases
- basic sewing/assembly
Intermediate upgrades (optional):
- creating cutout windows with chain spaces
- adding a lining or LED “glow”
- adding defined ridges with surface crochet
If you’ve made a simple amigurumi ball before, you’re ready for this crochet tutorial.
Materials Needed#
Yarn
For décor pumpkins, you can use almost any yarn, but the “carved” look is clearest with smooth yarn.
Best yarn choices
- Worsted weight (#4) acrylic (easy, affordable, good stitch definition)
- Worsted cotton (crisp stitch definition, holds shape well)
- Chunky (#5) yarn for larger pumpkins
Colors
- Orange (pumpkin body)
- Dark brown or black (face appliqués)
- Taupe, gray, or brown (stem)
- Optional: yellow/orange scrap yarn for a “glow” lining
Yardage estimate (2 pumpkins)
- Orange: 200–350 yards (depending on size)
- Dark color: 20–40 yards
- Stem color: 20–40 yards
Hook
Pick a hook that creates a fairly tight fabric:
- Worsted: 3.5–4.5 mm
- Chunky: 5.0–6.5 mm
Notions
- Stitch marker
- Yarn needle
- Scissors
- Fiberfill stuffing (for plush version)
- Optional: battery tea light (for lantern version)
- Optional: felt circle for base reinforcement
Stitches & Techniques Explained#
Abbreviations (US terms)
- MR = magic ring
- ch = chain
- sl st = slip stitch
- sc = single crochet
- hdc = half double crochet
- dc = double crochet
- inc = increase (2 sc in one stitch)
- dec = decrease (sc2tog or invisible decrease)
- BLO = back loop only
- st(s) = stitch(es)
Invisible decrease (recommended)
Invisible decreases help keep the pumpkin smooth and round (especially if you use lighter yarn colors).
Optional ridge technique (adds realism)
After the pumpkin is stuffed and closed, you can run yarn from top to bottom several times, pulling slightly to create pumpkin segments (explained below).
Step-by-Step Instructions#
Pattern notes
- Worked in continuous rounds (use a stitch marker)
- Stuff firmly for a plump pumpkin
- Make one or two pumpkins in different sizes for a cute set
Size guide (easy scaling)
- Small pumpkin: stop increases at 36 sts
- Medium pumpkin: stop increases at 42 sts
- Large pumpkin: stop increases at 48 sts
Below is the medium size (42 sts). Adjust up/down using the notes.
Part 1: Pumpkin Body (Orange)
Rnd 1: MR, 6 sc (6)
Rnd 2: inc around (12)
Rnd 3: (sc, inc) around (18)
Rnd 4: (2 sc, inc) around (24)
Rnd 5: (3 sc, inc) around (30)
Rnd 6: (4 sc, inc) around (36)
Rnd 7: (5 sc, inc) around (42)
Rnd 8–16: sc around (42) for 9 rounds
(For a taller pumpkin, add 1–3 more rounds.)
Start decreasing:
Rnd 17: (5 sc, dec) around (36)
Rnd 18: (4 sc, dec) around (30)
Rnd 19: (3 sc, dec) around (24)
Stuff firmly, shaping into a rounded pumpkin.
Rnd 20: (2 sc, dec) around (18)
Rnd 21: (sc, dec) around (12)
Rnd 22: dec around (6)
Fasten off, close, weave in ends.
Part 2: Stem (Brown/Taupe)
This stem is a simple tube. You can make it short and chunky or taller and twisty.
Rnd 1: MR, 6 sc (6)
Rnd 2–8: sc around (6) for 7 rounds
(For a taller stem, add more rounds.)
Optional texture: work Rnds 2–8 in BLO for subtle ridges.
Stuff lightly (optional), flatten bottom edge slightly, and sew to the top center of the pumpkin.
Part 3: Carved Face Appliqués (Dark Brown/Black)
You can mix and match eye/mouth shapes to create different expressions. Below are easy shapes that look “carved” when sewn on.
Triangle Eye (make 2)
Ch 4
Row 1: sc in 2nd ch, sc, sc (3). Turn
Row 2: ch 1, dec, sc (2). Turn
Row 3: ch 1, dec (1). Fasten off
Oval/“Angry” Eye (make 2)
Ch 6
Row 1: sc in 2nd ch and across (5). Turn
Row 2: ch 1, sc across (5). Turn
Row 3: ch 1, dec, sc, dec (3). Turn
Row 4: ch 1, sc across (3). Fasten off
(Angle it slightly when sewing for a spooky look.)
Small Nose (triangle)
Use the same Triangle Eye pattern, but stop at Row 2 (leave it a bit wider).
Mouth Options
Option A: Simple Scary Smile (curved strip)
Ch 14–20 (depending on pumpkin size)
Sl st in 2nd ch and each ch across to create a slightly curved strip.
For teeth: add 3–6 tiny triangles (Triangle Eye) and sew along the lower edge.
Option B: “Jack” Toothy Mouth (wider panel)
Ch 18
Row 1: sc across (17). Turn
Row 2: ch 1, sc across (17). Turn
Row 3: ch 1, sc across (17).
Fasten off.
Add teeth by stitching vertical lines or sewing tiny triangles.
Part 4: Assemble the Face
- Place eyes first (symmetrical placement).
- Add the nose centered below the eyes.
- Place the mouth lower on the pumpkin, leaving enough space so the expression reads clearly.
Pro placement tip:
Before sewing, use stitch markers or pins to “audition” the face. Tiny shifts change the expression a lot.
Sew each piece with small whip stitches. Weave ends securely inside.
Part 5: Optional Pumpkin Ridges (Highly Recommended for realism)
Thread a long strand of orange yarn on a yarn needle.
- Insert needle at the top center (near the stem), go down to the bottom center.
- Pull snugly (not too tight) to create a slight indent.
- Repeat 5–7 times evenly around, creating segments.
Knot securely inside near the stem area and weave in ends.
Part 6: Optional Lantern Glow Upgrade
If you want the face to “glow” without cutting holes:
- Crochet a small yellow/orange backing circle and sew it behind the face pieces, so it peeks through around the edges.
- Or place a battery tea light at the base and keep the pumpkin lightly stuffed only around the sides, leaving a hollow center.
For a true lantern cutout, create the eyes/mouth as openings (chain spaces) during the body rounds, then line the inside with yellow felt or crocheted fabric.
Common Mistakes and How to Avoid Them#
- Pumpkin looks lopsided: Stuff gradually and “massage” the shape as you fill.
- Stitches show big holes: Use a smaller hook and keep tension firm.
- Face looks uneven: Count stitches from center line; pin everything before sewing.
- Stem flops: Sew with multiple passes and lightly stuff the stem.
- Ridges look too deep: Pull ridge yarn gently—small indentations look more realistic.
- Appliqués curl: Add one round of sc around the appliqué edge or lightly steam-block them.
Expert Tips for Better Results#
- Use cotton yarn for a more “sculpted” pumpkin look.
- Add a small felt circle inside the bottom to keep the base flat.
- Make a set: one pumpkin with triangle eyes, one with oval “angry” eyes for variety.
- For cleaner seams, use invisible decreases and keep your stitch marker accurate.
- If making lanterns, use only battery-operated lights.
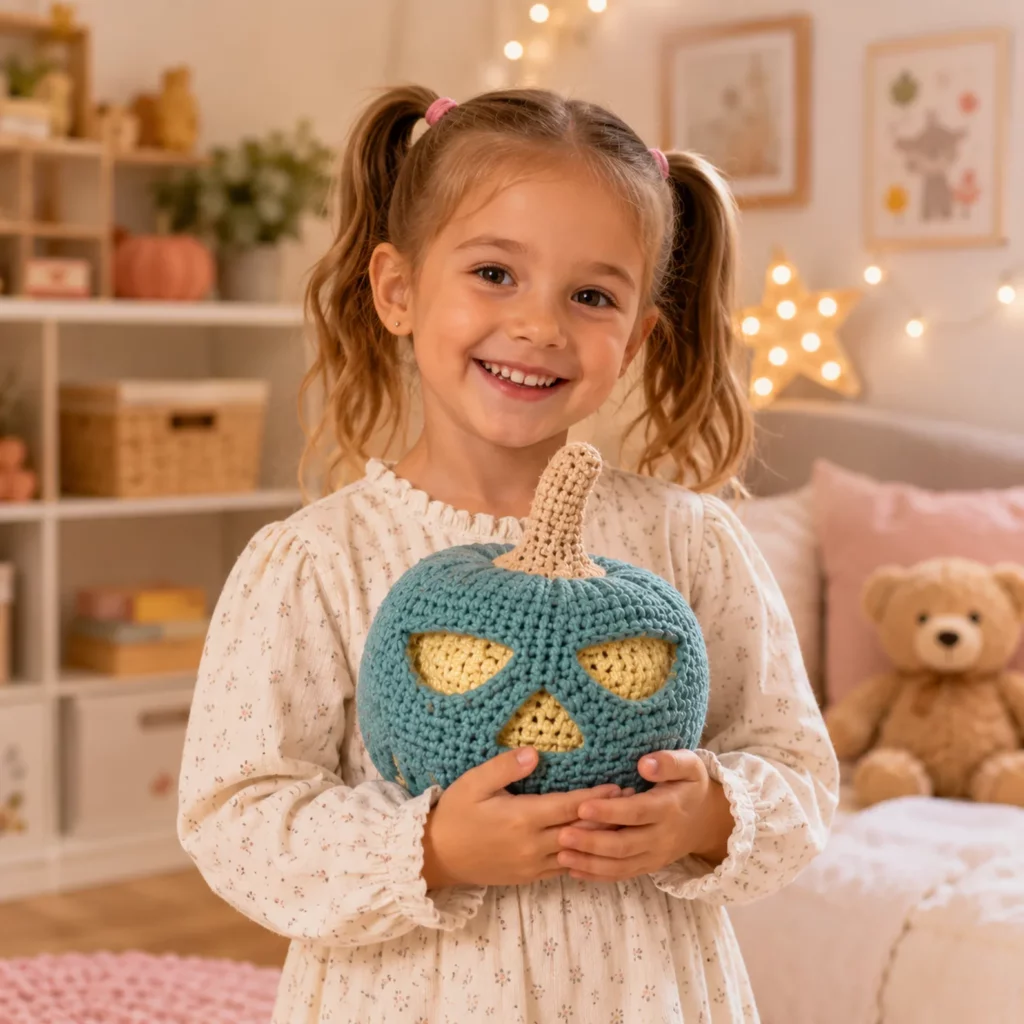
Variations and Customization Ideas#
- Cute pumpkin: swap the scary mouth for a tiny smile and add rosy cheeks.
- Mini pumpkins: stop increases at 30 or 36 stitches for quick decor.
- Warty pumpkin: add bobble stitches randomly in orange or green.
- White “ghost pumpkin”: use cream yarn with black face pieces.
- Harvest pumpkin: skip the face and add leaves/vines around the stem.
- Hanging ornament: add a chain loop at the stem for a tree or garland.
Benefits of This Crochet Project#
- Fast, satisfying seasonal make
- Great stash-buster for orange and brown yarn
- Safer and longer-lasting than real carved pumpkins
- Customizable expressions (cute to spooky)
- Perfect for gifting and craft fairs
- Can be plush décor or an LED lantern accent
Internal Linking Suggestions#
You may also like…
- Free Crochet Pattern: Mini Crochet Pumpkin Garland
- Crochet Tutorial: Invisible Decrease for Smooth Amigurumi
- DIY Crochet: How to Add Ridges to Crochet Pumpkins
- Free Crochet Pattern: Halloween Ghost Amigurumi
- Crochet for Beginners: Working in Continuous Rounds
- Free Crochet Pattern Roundup: Easy Halloween Crochet Projects
FAQ Section#
What yarn is best for a jack-o’-lantern crochet pattern?
Worsted cotton or acrylic works great. Cotton gives extra structure; acrylic is soft and easy-care. Use a smaller hook for a tighter fabric.
Is this an easy crochet pattern for beginners?
Yes. The pumpkin body is simple rounds of single crochet with increases and decreases. The face pieces are small appliqués that sew on easily.
How do I make the pumpkin bigger or smaller?
Stop increasing earlier for a smaller pumpkin (36 sts) or add another increase round for larger (48 sts). Add more even rounds to make it taller.
Can I make this into a lantern?
Yes—use a battery tea light. For a glow effect, keep the center less stuffed or add a lining/backing behind the face openings.
How do I keep the pumpkin standing upright?
Stuff firmly, flatten the base while shaping, and add a felt or plastic base insert inside if needed.
How do I keep the face pieces from peeling up?
Sew around the edges with small stitches and weave ends deep inside. If your yarn is slippery, stitch around twice.
Conclusion#
A crocheted jack-o’-lantern is the perfect Halloween make: cozy, reusable, and customizable from cute to spooky with just a few face changes. This free crochet pattern gives you a sturdy pumpkin body, a clean stem, and easy appliqué faces that instantly create that carved look.
If you tell me what size you want (mini, medium, large) and whether you want it to work as an LED lantern, I can adjust the stitch counts and suggest the best face layout so your crochet pattern turns out exactly the vibe you’re aiming for.


