Introduction#
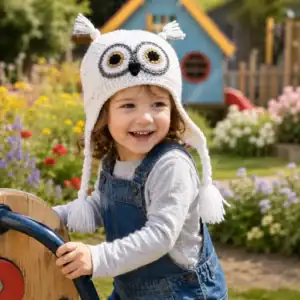
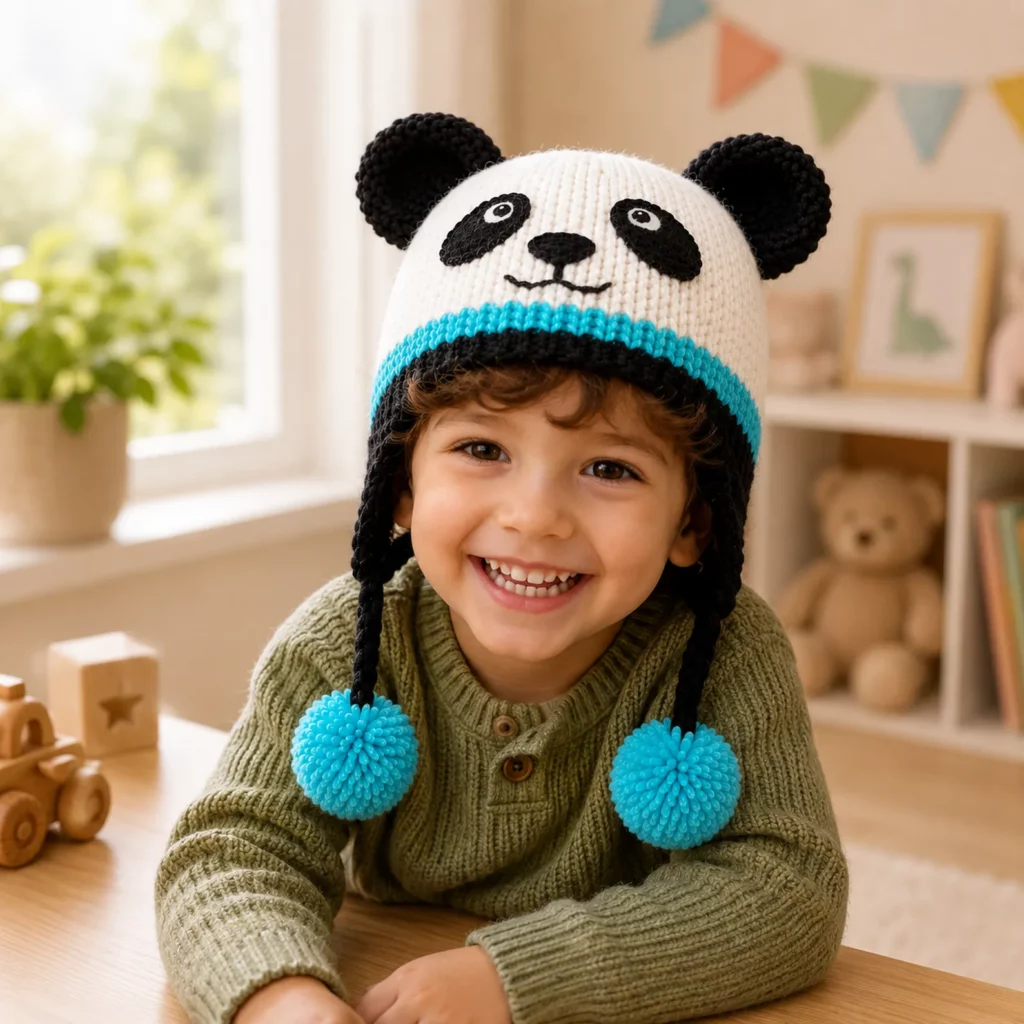
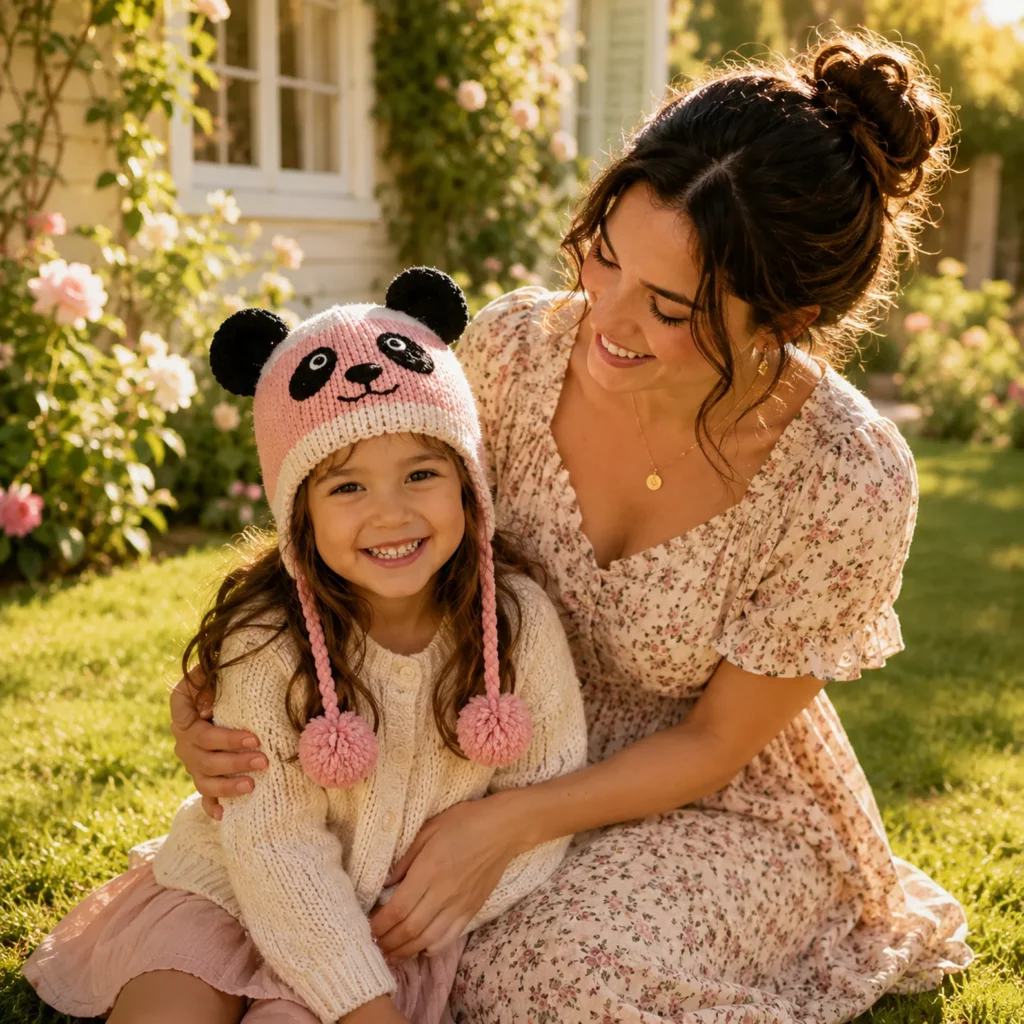
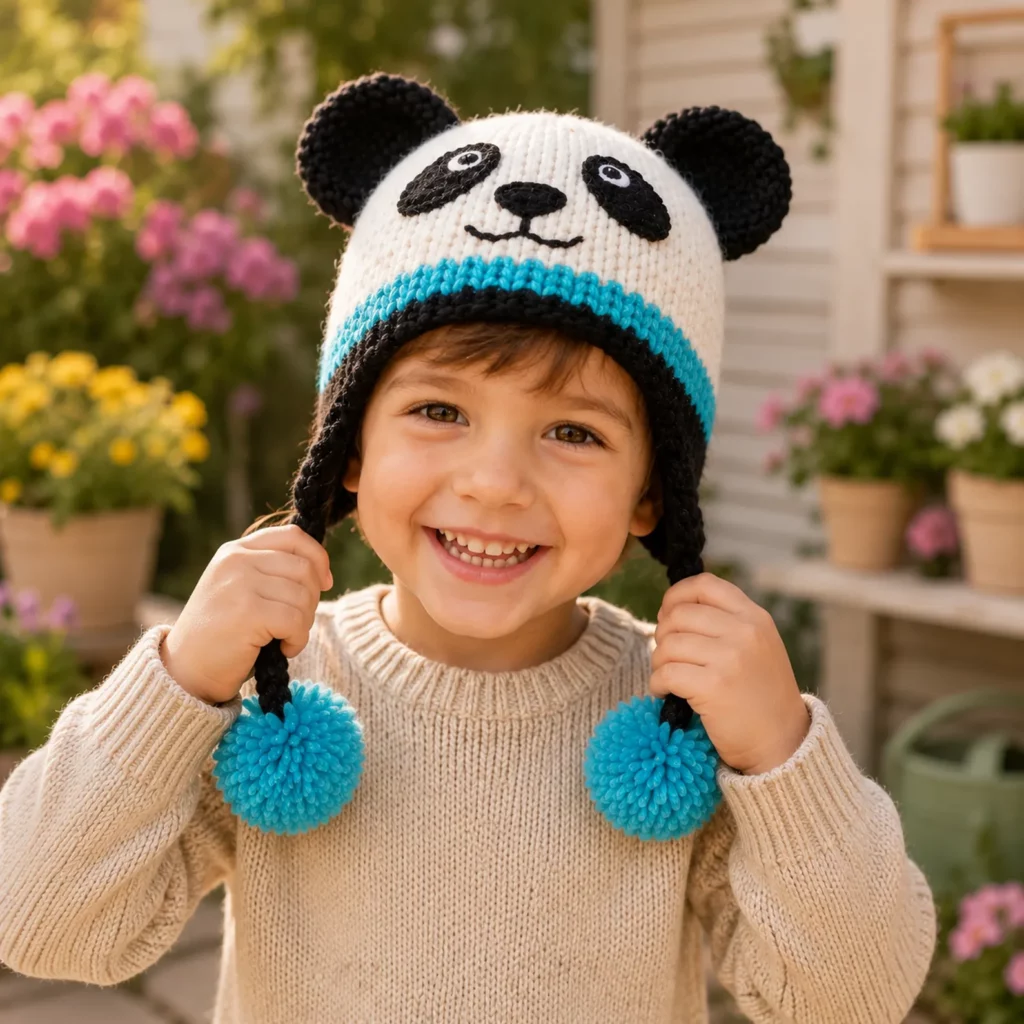
There’s something about an animal hat that instantly turns “I don’t want to wear a hat” into “Can I wear it all day?” A panda earflap beanie is one of the best examples—simple, bold colors, unmistakably cute, and genuinely practical for chilly days.
Explore more beginner hats crochet patterns in our pattern library.
This crochet pattern is designed to give you a warm, comfortable hat with a snug ribbed band, a clean white “panda head” crown, rounded black ears, and a sweet panda face on the front. The earflaps add extra warmth, and the long ties finish in big fluffy pom-poms that make the whole hat feel playful and special.
Even better: this is an easy crochet pattern you can adapt to different ages just by changing the hat circumference and earflap placement. You’ll learn a repeatable method for sizing, plus simple techniques for neat stripes, strong earflap joins, and clean facial appliqués.
Detailed Description of the Crochet Pattern#
This panda hat is a classic winter beanie shape with three standout elements:
A snug ribbed brim (worked in black) that keeps the hat secure and warm
A smooth main body (worked in white) that forms the panda “head”
Finishing pieces: two black ears, panda eye patches, a small nose, optional embroidered smile, plus earflaps and ties with pom-poms
The hat is typically crocheted from the bottom up in the round. Earflaps are added by working short rows on each side of the hat edge, then ties are attached to the earflaps. The face details are sewn on at the end.
You can make this hat in many styles:
Classic panda (black/white)
Pastel panda (cream + charcoal + blush accents)
Bright accent panda (add a teal stripe above the brim like a pop of color)
Skill Level Explanation#
Skill Level: Beginner to Confident Beginner
You’ll do well if you already know:
Chain (ch)
Single crochet (sc)
Half double crochet (hdc) or double crochet (dc)
Slip stitch (sl st)
Working in the round
Basic sewing with a yarn needle
You’ll also practice:
Simple ribbing (working in back loops)
Clean color changes for stripes
Shaping earflaps with decreases
Attaching appliqués neatly (eye patches and nose)
Making pom-poms and secure hat ties
This crochet tutorial is written so crochet for beginners can follow along with stitch counts and placement tips.
Materials Needed#
Yarn
Worsted weight (Category 4) yarn is ideal for a warm, sturdy hat. DK works too for a lighter hat, but you’ll want to adjust the stitch count or use a smaller hook for similar sizing.
Colors:
Black (brim, ears, eye patches, optional ties)
White (main hat)
Optional accent (teal/blue) for a stripe
Optional small amount of white felt or embroidery floss for eye highlights
Fiber tips:
Acrylic or wool-blend works great for warmth and durability
Choose a soft yarn for kids (no scratchy fibers)
High-contrast yarns make the panda face pop
Estimated yardage (worsted):
Toddler: 120–170 yards total
Child: 150–220 yards total
Most of the yardage will be the main white color
Hook
Use a hook that gives you a firm fabric (important for warmth and for keeping the hat from stretching out).
Suggested hook sizes:
Worsted: 4.5 mm to 5.5 mm
DK: 4.0 mm to 4.5 mm
If the hat feels loose, go down 0.5 mm. If it feels stiff, go up 0.5 mm.
Notions
Stitch marker
Yarn needle
Scissors
Measuring tape
Pom-pom maker (optional, but helpful)
Optional: felt for eye patches and nose (sew-on only if child-safe for your use case)
Stitches & Techniques Explained#
Common Abbreviations
ch = chain
sl st = slip stitch
sc = single crochet
hdc = half double crochet
dc = double crochet
inc = increase (2 sts in same st)
dec = decrease (2 sts together)
BLO = back loop only
FLO = front loop only
RS/WS = right side / wrong side
( ) = repeat
[ ] = stitch count
Ribbing for the Brim
A simple ribbed band can be made by working short rows in single crochet BLO, then joining the band into a ring. This creates a stretchy brim that hugs the head.
Joining a Hat Body to the Brim
Once the ribbed band is joined into a circle, you crochet around the long edge of the band to begin the hat body. This makes the brim look polished and professional.
Earflap Placement (Simple Method)
Earflaps look best when they sit slightly forward of the side seams, not directly on the sides. A helpful trick is to place the first earflap, then count across the back of the hat to place the second earflap evenly.
Appliqué Sewing Tip
When sewing eye patches and the nose, stitch through the top loops of the hat stitches and the edge stitches of the appliqué. Use small stitches and pull snugly so the shapes lie flat.
Step-by-Step Instructions#
Sizing Notes
This pattern includes two core sizes plus a simple method to adjust.
Typical head circumferences:
Toddler: 18–19.5 in (46–50 cm)
Child: 19.5–21 in (50–54 cm)
Hat circumference should be about 1 in (2.5 cm) smaller than head circumference for a snug fit (negative ease).
Finished Fit Goals
Brim depth: 2–2.5 in (5–6.5 cm)
Total hat height (without earflaps):
Toddler: 6.5–7 in (16.5–18 cm)
Child: 7–7.5 in (18–19 cm)
Brim Ribbing (Black)
Make a band that fits around the head with slight stretch.
Ch 9 (for ~2.5 in brim) or ch 8 (for ~2 in brim)
Row 1: sc in 2nd ch from hook and across (8 sc if ch 9)
ch 1, turn
Row 2: sc BLO across
ch 1, turn
Repeat Row 2 until the band fits around the head comfortably when stretched.
Row count guide (approximate, depends on yarn and tension):
Toddler: 50–56 rows
Child: 56–62 rows
Join the short ends:
Hold ends together, sl st through both layers across to form a ring. Do not twist.
Hat Body Setup Round (Join White)
Turn the brim ring so the seam is at the back.
Round 1: ch 1, sc evenly around the long edge of the brim
Aim for one sc at the end of each row of ribbing
Join with sl st and place a marker
Stitch count goal:
Toddler: 60–66 sc around
Child: 66–72 sc around
If your ribbing rows are different, don’t stress—what matters is a round number that feels right for your size. Keep it even and not rippled.
Hat Body (White)
You can work in sc for a tighter, warmer hat, or hdc for a slightly quicker build. For a panda hat look with neat stitch definition, sc is a great choice.
Rounds 2–(height): sc around
Continue until the hat measures:
Toddler: about 5 in (12.5 cm) from the brim edge
Child: about 5.5 in (14 cm) from the brim edge
Optional accent stripe:
Add 1–2 rounds of teal/blue after Round 2 or 3, then switch back to white. This creates a bright band detail without changing the panda theme.
Crown Shaping (Top Decreases)
When your hat is nearly tall enough, begin decreases to close the top smoothly.
For stitch counts around 60:
Round 1: (8 sc, dec) repeat around
Round 2: sc around
Round 3: (7 sc, dec) repeat around
Round 4: sc around
Round 5: (6 sc, dec) repeat around
Round 6: (5 sc, dec) repeat around
Round 7: (4 sc, dec) repeat around
Round 8: (3 sc, dec) repeat around
Round 9: (2 sc, dec) repeat around
Round 10: (sc, dec) repeat around
Round 11: dec around
Fasten off with a long tail. Thread tail through remaining stitches and pull tight to close. Weave in securely.
If your stitch count is higher (66–72), start with (9 sc, dec) and reduce gradually the same way.
Ears (Make 2, Black)
The ears are simple circles slightly cupped by sewing.
Round 1: 6 sc in a magic ring [6]
Round 2: inc around [12]
Round 3: (sc, inc) around [18]
Round 4: (2 sc, inc) around [24]
Round 5: (3 sc, inc) around [30]
Round 6: sc around [30] (optional for bigger ears)
Fasten off leaving a long tail.
To shape: fold the circle slightly in half and stitch a small “pinch” at the bottom edge so it stands like a rounded ear.
Placement: sew ears near the top sides of the hat, slightly forward of the center line for a cute look.
Earflaps (Make 2, Black)
Earflaps are worked onto the hat after the body is complete.
Put the hat on a flat surface with the seam at the back. Mark where you want the flaps with stitch markers.
Toddler earflap width: 10–12 stitches
Child earflap width: 12–14 stitches
Join black yarn at the first marker.
Row 1 (RS): sc across the marked stitches, ch 1, turn
Row 2: dec, sc across to last 2 sts, dec, ch 1, turn
Row 3: sc across, ch 1, turn
Repeat Rows 2–3 until the earflap is about 3.5–4.5 in long (9–11 cm), ending with a small top of about 4–6 stitches.
Fasten off, weave in.
Repeat on the other side, making sure both flaps match in length.
Ties (Make 2, Black)
Attach yarn at the tip of an earflap.
Option A (simple chain tie):
Ch 35–45 (longer for child size)
Sl st back down the chain for a thicker cord
Fasten off
Option B (braided tie, classic earflap look):
Cut 6 long strands (about 30–36 in each)
Fold in half, attach through earflap tip, braid into 3 sections
Tie off at end
Pom-Poms (Make 2, Accent Color or Black)
Big pom-poms make the hat feel extra playful.
Wrap yarn around a pom-pom maker or around your fingers 60–100 times depending on yarn thickness.
Tie tightly in the center, cut loops, and trim into a round ball.
Sew one pom-pom to the end of each tie securely.
For a bold pop, use teal/blue pom-poms even if your ties are black.
Panda Face Details
You can do this with crochet appliqués or with felt shapes (sewn only). Crochet is the most durable for playwear.
Eye Patches (Make 2, Black)
Ch 6
Round 1: sc in 2nd ch from hook and across, 3 sc in last ch, work back along other side, 2 sc in last ch, join
This creates a small oval.
Fasten off leaving a tail.
If you want larger eye patches, start with ch 7 or ch 8.
Nose (Black)
Option A (tiny oval):
Ch 4, sc in 2nd ch and across, 3 sc in last ch, sc back down, join
Fasten off
Option B (embroidered nose):
Stitch a small triangle or oval with black yarn.
Eyes
You can embroider eyes with black and add tiny white highlights, or use small buttons (not recommended for young children). Many makers stitch simple circles on the patches for a friendly cartoon look.
Mouth
Embroider a gentle curved smile under the nose with black yarn.
Placement tip for a cute expression:
Position eye patches slightly angled (not perfectly straight) so the face looks friendly rather than “surprised.” Place the nose centered below.
Common Mistakes and How to Avoid Them#
Hat is too loose
Reduce brim rows slightly or use a smaller hook
Make sure the brim has negative ease (stretchy but snug)
Avoid using hdc if you crochet loosely; sc gives a tighter fit
Hat is too tall or too short
Measure from the brim edge before starting crown decreases
If too tall, begin decreases earlier
If too short, add 1–2 plain rounds before decreasing
Earflaps don’t match
Count rows and write them down for the first earflap
Use the same starting stitch width for both
Pin and check symmetry before finishing the second flap
Face looks off-center
Mark the front center stitch before sewing
Pin eye patches and nose first, then step back and check
Sew eye patches first, then nose, then mouth
Pom-poms fall off
Always sew pom-poms on with multiple passes
Tie the pom-pom center string to the tie end before sewing
Use strong yarn or embroidery floss for extra security
Expert Tips for Better Results#
Use a foundation single crochet (instead of chain) for the brim band if you want an even stretchier edge
To make the top smoother, add a plain sc round between decrease rounds early on, then decrease every round near the end
For a professional finish, surface slip stitch a thin smile line and add tiny white eye highlights with embroidery floss
If you want extra warmth, line the inside brim with a strip of fleece hand-stitched in place
Block the earflaps lightly with steam so they lie flat (avoid high heat on acrylic)
Variations and Customization Ideas#
Classic panda hat: black brim, white top, black ears, black eye patches
Blue accent panda: add a teal stripe and teal pom-poms for a playful pop
Girl panda version: add a small bow near one ear
Baby panda: use cream instead of white and soften the contrast with charcoal gray
Adult panda: increase brim rows and total stitch count; keep the same ear and face concept
No earflaps version: skip the flaps and ties and make a simple beanie with ears and face
Texture version: work the white body in hdc BLO for a subtle knit-like look
Benefits of This Crochet Project#
A practical crochet pattern that kids actually want to wear
Warm earflaps make it great for cold weather
Quick-to-finish pieces (ears, patches) give fast progress
Easy to customize colors and sizing
Perfect handmade gift for winter birthdays and holidays
A fun way to practice clean color changes and simple appliqué work
Internal Linking Suggestions#
How to Crochet a Ribbed Brim That Fits Perfectly
Easy Crochet Earflap Hat Pattern Basics (Placement and Shaping)
How to Make Pom-Poms That Don’t Fall Apart
Best Yarn for Kids’ Hats (Soft and Washable Options)
Beginner Guide to Sewing Crochet Appliqués Neatly
Crochet Hat Size Chart for Babies, Toddlers, and Kids
FAQ#
Is this panda earflap hat crochet pattern beginner-friendly?
Yes. It’s an easy crochet pattern using basic stitches and simple shaping. The face is made with straightforward appliqués and embroidery.
What yarn is best for a kid’s winter hat?
Soft acrylic or a washable wool blend works well. The key is comfort and easy care, especially for children’s accessories.
How do I make sure the hat fits?
Measure head circumference and make the brim about 1 inch smaller so it stretches to fit. Try on the brim before starting the hat body.
Can I make this without earflaps?
Absolutely. Just crochet the beanie, add ears, and sew on the panda face. You’ll still get the panda look with a simpler finish.
How do I place earflaps evenly?
Mark the center front and center back, then place earflaps slightly forward of the side points. Pin both first and adjust until they look balanced.
Are pom-poms safe for little kids?
Pom-poms can be safe if sewn very securely, but for toddlers who might tug, consider smaller pom-poms or skip them entirely. For very young children, always supervise and use your best judgment.
How can I make the face look cuter?
Angle the eye patches slightly, add tiny white eye highlights, and keep the mouth small and curved. A small blush detail also helps a lot.
Conclusion#
A panda earflap hat is the kind of crochet project that checks every box: it’s warm, wearable, cute, and fun to customize. With a snug ribbed brim, cozy earflaps, big pom-poms, and an instantly recognizable panda face, this free crochet pattern makes a winter accessory that feels handmade in the best way.
If you tell me the head circumference you’re making (toddler or child) and your yarn brand/weight, I can recommend the exact brim row count and the best starting stitch count for the hat body so your fit turns out spot-on.