


Introduction#
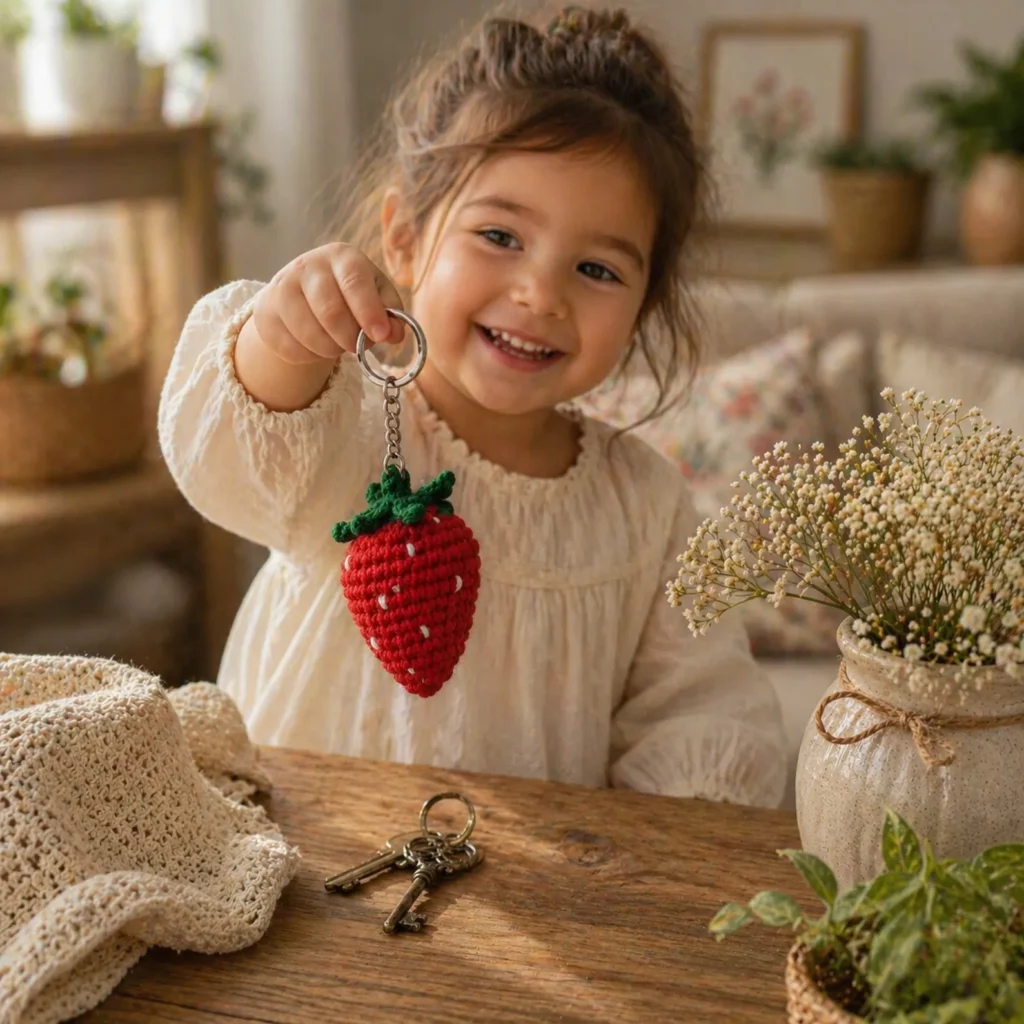
Tiny crochet projects are the best kind of “instant gratification.” You can start with a small scrap of yarn, crochet for a short session, and end up with something you can actually use—like a cute keychain that lives on your keys, bag, pencil case, or zipper pull.
Explore more beginner home decor crochet patterns in our pattern library.
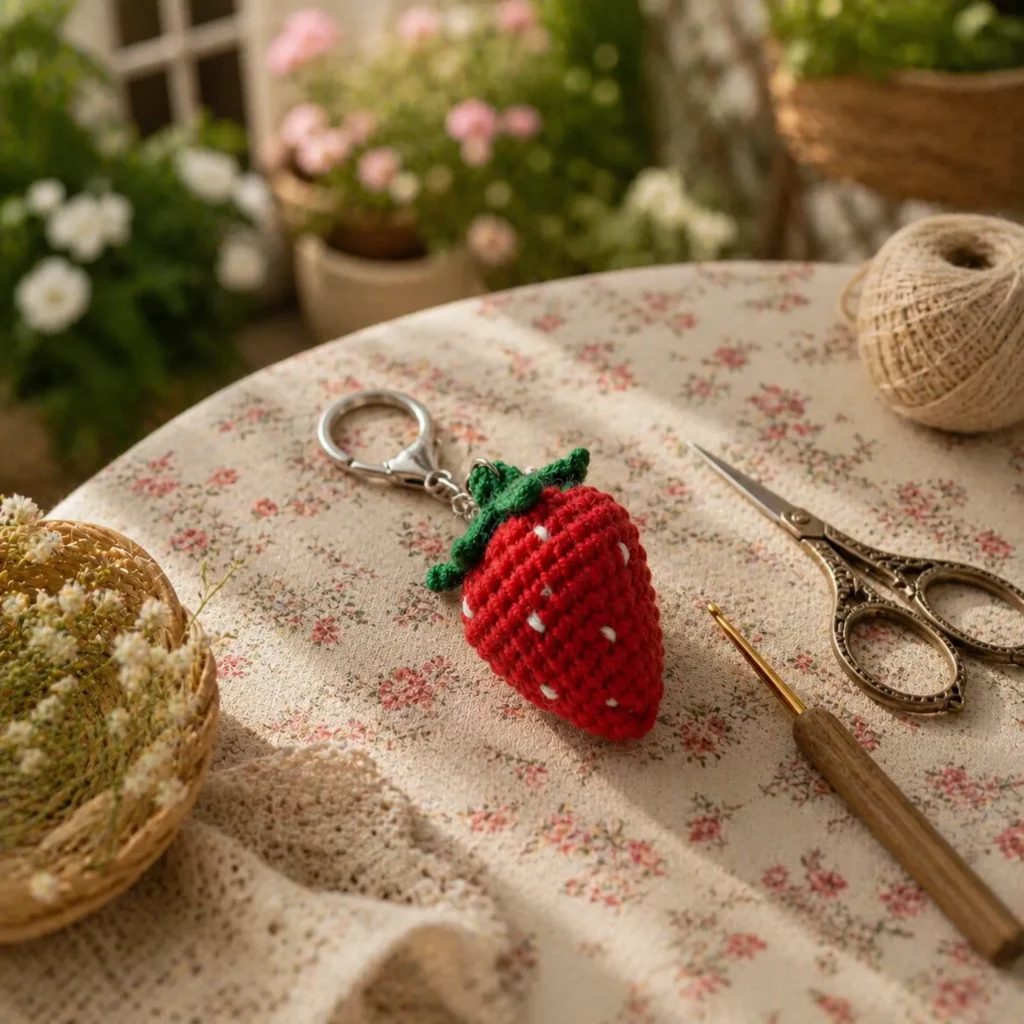
This mini strawberry is a perfect example of a small project that feels extra special. It’s compact, three-dimensional, and packed with detail: the rounded berry shape, the green leafy cap, and those signature little “seeds” that make it instantly recognizable. It also makes a wonderful gift add-on—tie it to a present, tuck it into a greeting card, or make a set for party favors.
In this crochet tutorial, you’ll learn how to build the strawberry body with simple amigurumi shaping, how to add quick seed stitches without bulky knots, and how to attach the leafy top so it looks neat from every angle. This is a crochet pattern you’ll want to repeat, because once you make one, you’ll realize you can make ten.

Detailed Description of the Crochet Pattern#
This free crochet pattern creates a mini 3D strawberry designed for keychains and bag charms. The construction is straightforward:
- Strawberry body: worked in continuous rounds as a tapered shape (wider at the top, narrower at the tip).
- Stuffing: lightly stuffed to keep the berry plush but still compact.
- Seeds: added using tiny embroidery stitches or surface “specks” (fast and clean).
- Leafy cap: a small green circle with pointed leaf tips (sepals), sewn onto the top of the berry.
- Hanging loop: optional—either a crocheted loop or a metal jump ring/keychain hardware attachment.
The end result is a sturdy little charm with a smooth finish—perfect for daily use.
Skill Level Explanation#
This is an easy crochet pattern for beginners.
You’ll practice:
- Single crochet in the round
- Increasing and invisible decreasing
- Counting stitches with a stitch marker
- Light stuffing
- Simple sewing and embroidery
Even if you’re new to amigurumi, the small size keeps it manageable, and the shaping is forgiving.
Materials Needed#
Yarn
For a mini keychain, use yarn that holds its shape and shows stitches clearly.
Recommended yarn:
- Worsted weight (#4) cotton or acrylic
- DK (#3) for an even smaller strawberry
Color suggestions:
- Red (berry)
- Green (leaf cap)
- White or pale yellow (seeds)
Cotton is especially nice for small keychains because it keeps crisp stitch definition and resists pilling.
Hook
Use a smaller hook for tight stitches (important for keychains so stuffing won’t show):
- Worsted (#4): 2.75–3.5 mm
- DK (#3): 2.5–3.0 mm
Notions
- Stitch marker
- Yarn needle
- Scissors
- Small amount of fiberfill stuffing
- Optional: fabric glue (for securing knots inside, not required)
- Keychain hardware: split ring or lobster clasp + jump ring
- Optional: embroidery floss for seeds (white or pale yellow)
Stitches & Techniques Explained#
Abbreviations (US terms)
- MR = magic ring
- sc = single crochet
- inc = increase (2 sc in same stitch)
- dec = invisible decrease (sc2tog through front loops)
- sl st = slip stitch
- ch = chain
- ( ) = repeat
- = stitch count
Invisible decrease
For a smooth mini shape, invisible decreases are worth using:
- Insert hook into front loop of next stitch, then front loop of following stitch, yarn over and pull through, yarn over and pull through two.
How to add “seeds” neatly
You have two great options:
- Embroidery seeds (cleanest): Use a yarn needle and make tiny straight stitches (like little dashes) scattered around the berry.
- Surface specks (fastest): Insert hook or needle from inside to outside, pull a tiny loop of white yarn out, then go back in right next to it and tie off inside. (Great for chunky “seed dots,” but use sparingly.)
For keychains that get handled a lot, embroidery seeds are usually the most durable and least bulky.
Step-by-Step Instructions#
Notes:
- Work in continuous rounds unless stated.
- Use a stitch marker in the first stitch of each round.
- Stuff lightly—overstuffing can stretch stitches and distort the strawberry shape.
Strawberry Body (red)
Round 1: MR, 6 sc [6]
Round 2: inc x6 [12]
Round 3: (sc, inc) x6 [18]
Round 4: (2 sc, inc) x6 [24]
This gives you the widest part of the strawberry near the top.
Round 5–Round 7: sc around [24]
Now taper gradually toward the tip:
Round 8: (2 sc, dec) x6 [18]
Round 9: sc around [18]
Round 10: (sc, dec) x6 [12]
Start stuffing lightly here. Shape the berry with your fingers so it stays rounded.
Round 11: sc around [12]
Round 12: dec x6 [6]
Fasten off, close the opening, weave in end.
Leaf Cap (green)
The leaf cap should be slightly smaller than the top of the strawberry so it hugs nicely.
Round 1: MR, 6 sc [6]
Round 2: inc x6 [12]
Round 3: (sc, inc) x6 [18]
Sl st to join and begin leaves.
Leaf Tips (sepals)
Work leaf points around the circle. In each of 6 evenly spaced spots, make:
- sl st, ch 3, sc in 2nd ch from hook, hdc in next ch, sl st back into the same base stitch
Space them by skipping 2 stitches between leaves (adjust spacing so leaves are evenly placed).
Fasten off leaving a long tail for sewing.
Hanging Loop (optional)
Choose one:
Crochet loop:
Attach green yarn at the center of the leaf cap, ch 10–14 (depending on hardware size), sl st back into the same spot. Weave in ends securely.
Hardware loop:
Sew a small jump ring onto the top center through a few stitches of the leaf cap and the strawberry top for strength.
Seeds (white or pale yellow)
Using a yarn needle and embroidery floss/yarn:
- Make small straight stitches (about 2–3 mm long) scattered around the berry.
- Keep them evenly spaced. A good pattern is staggered rows like real strawberry seeds.
Tie off securely inside the berry.
Common Mistakes and How to Avoid Them#
- Berry looks too round (like a ball): Add one extra taper round (repeat Round 10 once more: (sc, dec) x4 or x5 depending on stitch count) to create a sharper strawberry point.
- Berry looks too pointy: Add one extra even round at 18 stitches (repeat Round 9) to soften the taper.
- Stuffing shows through: Use a smaller hook or tighten tension. Mini items need dense stitches.
- Leaf cap won’t sit flat: Your leaf cap may be too small or too tight. Go up a hook size for the leaf, or add another increase round (to 24 stitches) for a fuller cap.
- Seeds look messy: Switch to embroidery seeds (tiny dashes) instead of dot loops.
Expert Tips for Better Results#
- Stuff in tiny tufts: This prevents lumps in small amigurumi pieces.
- Shape as you go: After stuffing, roll the strawberry gently between your palms to even out curves.
- Secure the leaf cap strongly: Keychains get tugged. Sew the cap on with a full round of stitching, not just a few points.
- Use cotton for definition: Cotton yarn makes stitches and seeds look crisp and keeps the strawberry looking “fresh” longer.
- Add a tiny stem: If you want a more realistic look, crochet a small green i-cord (ch 6, sl st back, or a thin sc tube) and sew it under the leaf cap center.
Variations and Customization Ideas#
- Strawberry bag charm: Make the same pattern with thicker yarn or add one extra increase round (up to 30 stitches) for a larger charm.
- Chocolate strawberry: Use brown yarn and add white “drizzle” embroidery.
- Kawaii face strawberry: Add two tiny safety eyes or embroidered eyes and a smile on the front.
- Two-tone strawberry: Use a lighter red near the tip, or add a blush gradient with yarn choices.
- Strawberry keychain set: Make mini versions in different reds/pinks and mix leaf shades (olive, bright green, mint).
- Strawberry earrings: Use thread or very fine yarn, skip stuffing, and attach earring hooks (lightweight and cute).
Benefits of This Crochet Project#
- Fast and beginner-friendly
- Great stash-buster (tiny amounts of yarn)
- Perfect gift add-on and craft-fair item
- Highly customizable with colors and details
- Practical use as a zipper pull, charm, or keychain
- Makes excellent “evergreen” blog content because people constantly search for small crochet gift ideas
Internal Linking Suggestions#
If you’re building a crochet blog, link this post to:
- Magic Ring Tutorial for Beginners
- Invisible Decrease for Amigurumi
- How to Crochet Keychains and Bag Charms
- Best Yarns for Amigurumi
- Quick Crochet Gifts You Can Make in One Sitting
- Easy Crochet Fruit Patterns (apple, lemon, cherry)
FAQ Section#
What yarn is best for a crochet strawberry keychain?
Cotton or cotton blends are ideal because they hold shape, show stitches clearly, and resist fuzzing from handling.
Can beginners make this crochet pattern?
Yes. It uses simple single crochet shaping and basic assembly. It’s a great first amigurumi project.
How do I make the strawberry bigger or smaller?
Change yarn weight and hook size to scale the strawberry. For bigger sizes, you can also add another increase round and a few extra even rounds.
What can I use instead of stuffing for a keychain?
You can use yarn scraps, fabric scraps, or a small amount of fiberfill. For a firm charm, stuff slightly more but avoid stretching stitches.
How do I attach the keychain hardware securely?
Sew the jump ring through several stitches at the top, and anchor it through both the leaf cap and strawberry body so it won’t tear out.
How do I add seeds without making knots on the outside?
Use embroidery seeds (tiny straight stitches). Tie off inside the strawberry and weave the end through stuffing to hide it.
Conclusion#
A mini strawberry keychain is the kind of crochet pattern that’s small but mighty—quick to make, adorable to use, and endlessly giftable. Once you’ve made one, you’ll realize it’s perfect for sets: a few strawberries for friends, matching charms for kids’ backpacks, or a basket of mini fruit charms for craft fairs.
If you want, tell me what yarn weight you’re using (DK or worsted) and what hardware size you have (small split ring or lobster clasp), and I can adjust the loop length and stitch counts so your strawberry fits your keychain perfectly.


