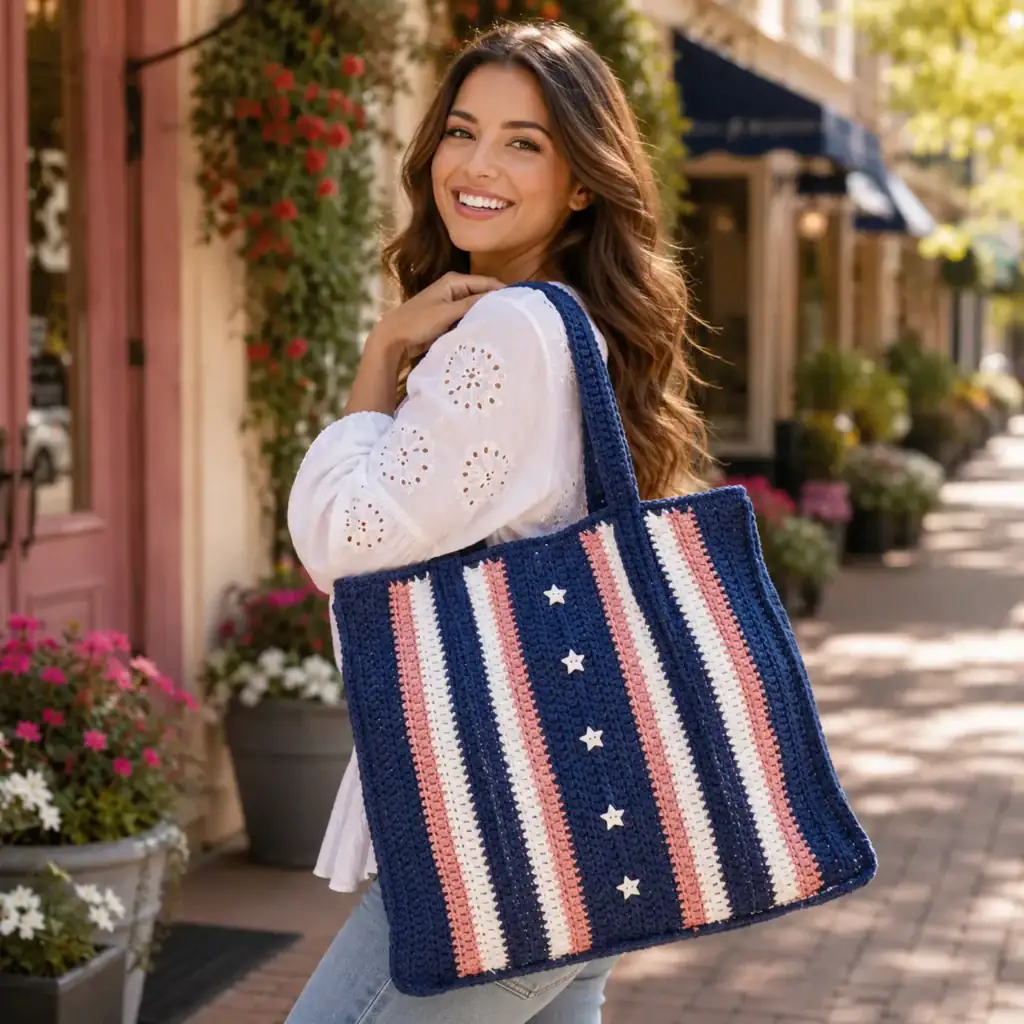
Introduction#
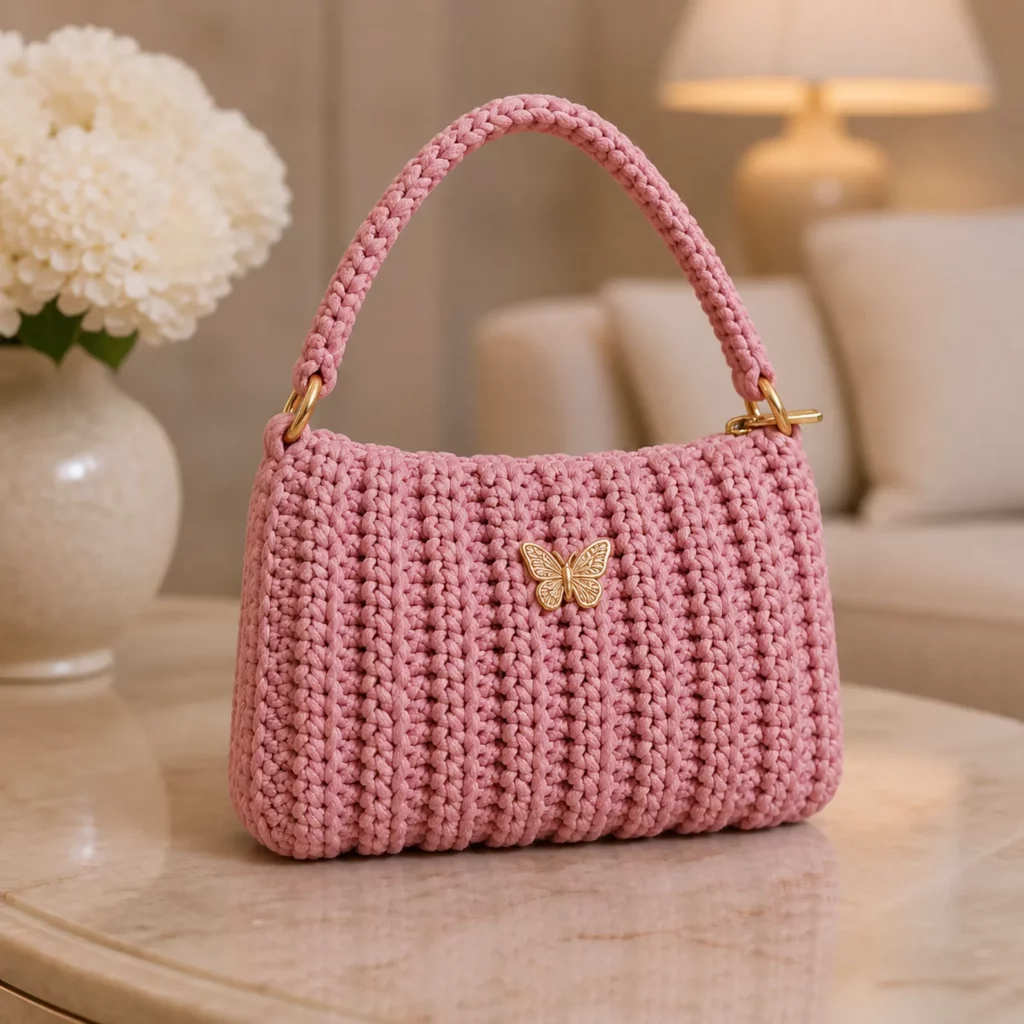
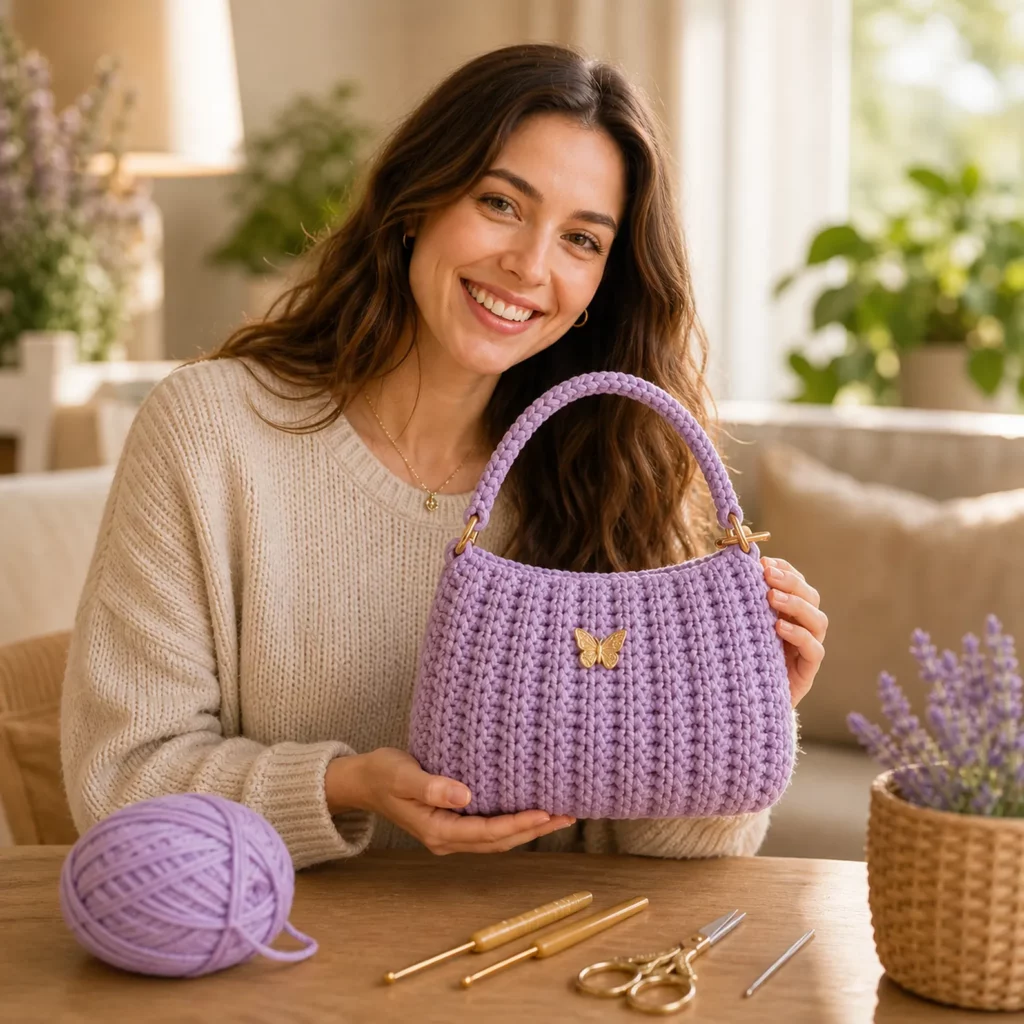
A mini handbag is one of those crochet projects that looks simple—until you try to make one that actually holds its shape, sits nicely, and doesn’t stretch out after a few uses. The good news? You don’t need complicated shaping to get a boutique-style result. What you do need is the right stitch texture, firm tension, and a clean construction plan.
Explore more beginner bags crochet patterns in our pattern library.
This crochet pattern walks you through an on-trend mini handbag with a structured body and bold vertical ribbing. It’s the perfect “small but impressive” project: you’ll build a sturdy fabric using a rib stitch that naturally firms up the bag, then add a clean top edge and a comfortable handle. You can finish it with a clasp or a zipper—and even add hardware if you want it to feel extra polished.
If you’re looking for a free crochet pattern that’s wearable, giftable, and beginner-friendly (with optional upgrades), you’re in the right place.
Detailed Description of the Crochet Pattern#
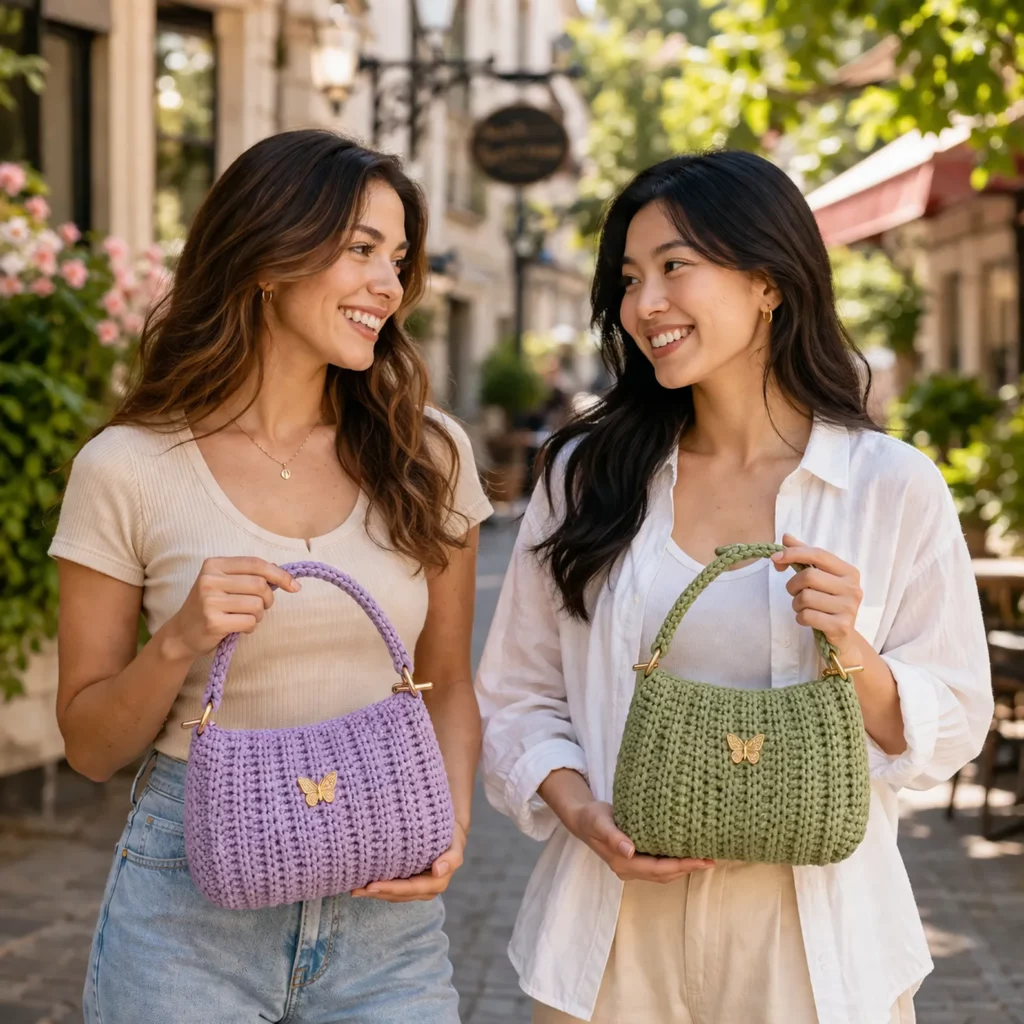
This mini handbag has a clean rectangular silhouette with a strong ribbed texture running vertically. The ribbing gives it a modern, structured look—almost like a designer “pleated” bag—while also helping the fabric resist stretching.
Design features you’ll love
- Ribbed body texture: Creates thick, sturdy fabric with strong stitch definition.
- Simple construction: One main panel folded and seamed (or two panels seamed together).
- Sturdy handle: Crocheted as a reinforced strap/cord for comfort and durability.
- Structured top edge: A finishing round keeps the opening crisp.
- Hardware-ready: Add D-rings, a clasp, or a zipper (optional) for a professional finish.
How it’s made (at a glance)
You’ll crochet a long ribbed rectangle, then:
- Fold and seam into a bag body
- Add a neat top edge/trim
- Create and attach the handle
- Add closure (optional but recommended)
- Optional lining for long-term durability
This easy crochet pattern is designed so the stitch choice provides structure, meaning you don’t have to wrestle with stiffeners unless you want a super firm bag.
Skill Level Explanation#
This is an easy-to-intermediate crochet project.
Great for confident beginners who can:
- work basic stitches in rows
- keep consistent stitch counts
- seam edges neatly with a yarn needle
- crochet a strap/handle and attach it securely
Intermediate upgrades (optional):
- attaching a clasp or zipper
- adding a fabric lining
- installing hardware like D-rings or swivel hooks
If you’ve made a scarf, pouch, or simple basket and want a “real accessory” next, this crochet for beginners handbag is a perfect step up.
Materials Needed#
Yarn
For a structured mini bag, choose yarn with body and minimal stretch.
Best options:
- Braided cotton cord (3–5 mm) (most structured, modern look)
- Macramé cotton cord (sturdy and smooth)
- T-shirt yarn (thick, fast, structured—great for bags)
- Worsted cotton held double (budget-friendly alternative)
Avoid (unless lining heavily):
- very soft acrylic (can stretch)
- fuzzy yarn (hides stitch definition and softens structure)
Yardage estimate (mini bag):
- Cotton cord / T-shirt yarn: 120–220 yards depending on size and strap
- Worsted cotton: 250–400 yards (if held double, you’ll use more)
Hook
Pick a hook size that makes dense stitches:
- 3–5 mm cord: 4.5–6.0 mm
- T-shirt yarn: 6.0–8.0 mm
- Worsted cotton held double: 5.0–6.5 mm
Tip: If your fabric feels drapey, go down a hook size.
Notions
- Stitch markers
- Yarn needle
- Scissors
- Measuring tape
Closure + hardware (optional but elevates the look)
Choose one closure style:
- Sew-on clasp
- Magnetic snap
- Zipper (most secure)
Optional hardware:
- 2 D-rings (½”–¾”)
- 2 swivel hooks (if using removable strap)
- Small rectangular brand plate or charm (optional)
Optional lining supplies (recommended)
- Cotton fabric
- Needle + thread or sewing machine
- Optional: lightweight fusible interfacing
Stitches & Techniques Explained#
Abbreviations (US terms)
- ch = chain
- sc = single crochet
- hdc = half double crochet
- sl st = slip stitch
- BLO = back loop only
- FLO = front loop only
- rep = repeat
- st(s) = stitch(es)
The ribbed stitch (the “secret” to structure)
For that bold vertical ribbing, you’ll use one of these reliable rib options:
Option A (most structured): Slip Stitch BLO Ribbing
- Worked in rows: sl st in BLO across
- Creates tight, elastic ribbing with strong ridges
- Takes longer but looks very “designer”
Option B (faster, still sturdy): Single Crochet BLO Ribbing
- Worked in rows: sc in BLO across
- Slightly thicker and faster than slip stitch
- Great for cord and T-shirt yarn
In this pattern, I’ll teach Option B (sc BLO) because it’s beginner-friendly and still gives a strong rib look. If you want even tighter ribs, you can swap sc BLO for sl st BLO using the same construction.
Keeping edges neat with ribbing
Ribbing rows can look uneven if your ends drift. Two easy fixes:
- Use a stitch marker in the first stitch of each row
- Make sure your turning chain stays consistent (this pattern uses ch 1 and does not count as a stitch)
Strong seams for bags
A bag needs seams that won’t split under weight. Best options:
- Whip stitch seam (fast and sturdy)
- Mattress stitch seam (neat and nearly invisible)
For thicker cord yarn, whip stitch is usually perfect.
Step-by-Step Instructions#
Pattern notes
- Written in US terms
- The bag is built from a ribbed rectangle, folded and seamed
- Keep tension firm for structure
- Finished mini size (example): about 8″ wide x 6″ tall x 2″ deep (adjustable)
Part 1: Crochet the Ribbed Main Panel
This panel becomes the front, bottom, and back of the bag in one piece.
Foundation: Ch 21
(This controls bag height. Want a taller bag? Chain more. A smaller mini? Chain fewer.)
Row 1: Sc in 2nd ch from hook and across. (20) Turn.
Row 2: Ch 1, sc BLO across. (20) Turn.
Row 3: Ch 1, sc BLO across. Turn.
Repeat Row 2 until your panel length equals:
- Front height + bottom depth + back height
A good starting measurement for a mini bag:
- Front: 6″
- Bottom depth: 2″
- Back: 6″
Total panel length: 14″
So, keep crocheting rib rows until your rectangle measures about 14″ long (lengthwise), while the starting chain side measures about 6–7″ tall.
Fasten off, weave in ends.
Part 2: Create the Bag Shape (Fold Lines)
Lay the panel flat with ribs running vertically.
Measure from one short end:
- Mark 6″ (front panel)
- Then mark 2″ (bottom depth)
- Remaining section is the back panel
Fold at the marks so it forms a bag shape: front + bottom + back.
Part 3: Seam the Sides
With the bag folded, seam both side edges from bottom to top.
Option 1: Whip stitch (sturdy)
- Thread yarn needle with matching yarn
- Stitch through both layers evenly
- Keep tension firm but don’t cinch too tight
Option 2: Mattress stitch (neater)
- Great if you want seams to “disappear” into the ribs
Turn right side out.
Part 4: Stabilize the Top Edge
Join yarn at one side seam at the opening.
Round 1: Ch 1, sc evenly around the top opening.
- Work 1 sc per row-end on the short sides
- Work 1 sc in each stitch across front and back top edges
Join with sl st.
Round 2: Ch 1, sc around again. Join.
Fasten off and weave in ends.
Optional designer finish:
Work one more round of sl st for a crisp “bound” edge.
Part 5: Crochet the Handle (Sturdy + Comfortable)
A good handle should be thick enough to hold shape and comfortable in the hand.
Option A: Tube/cord handle (very sturdy)
Ch 61 (adjust length as desired)
Row 1: Sc in 2nd ch from hook and across. Turn.
Row 2: Ch 1, sc BLO across. Turn.
Repeat Row 2 until handle strip is about 1″ wide (usually 4–6 rows).
Fold the strip lengthwise and seam along the long edge to form a tube. Turn right side out if possible (or just seam neatly and flatten).
Option B: Thermal stitch handle (no-stretch strap)
Thermal stitch is excellent for bags because it’s thick and stable.
(If you want this method, you can use a thermal strap tutorial internally on your blog later.)
Part 6: Attach the Handle
You can attach the handle directly to the bag or use D-rings.
Direct attachment (simple):
- Position handle ends on the inside upper corners
- Sew securely with multiple passes (box stitch pattern)
- Reinforce by stitching through the top edging rounds
With D-rings (more professional):
- Crochet 2 small tabs:
- Ch 9
- Row 1: sc across (8)
- Rows 2–5: sc across
- Thread tab through D-ring, fold, sew to bag upper corners
- Attach handle to D-rings (sewn or clipped)
Part 7: Add a Closure (Optional but Recommended)
Option A: Magnetic snap
- Mark center of front panel just below top edge
- Reinforce with felt/interfacing behind crochet
- Install snap
Option B: Sew-on clasp
- Sew to inner top edge at the center, reinforce well
Option C: Zipper (most secure)
- Sew zipper into lining, then stitch lining into bag
Part 8: Optional Lining (Makes It Last)
A lining is the best upgrade for a mini handbag.
Simple lining steps
- Measure bag interior width, height, and depth
- Sew a fabric pouch (box the corners for depth)
- Insert lining, fold top edge under
- Hand stitch lining to the inside of the crochet top edge
- Add extra stitches where handle attaches
Common Mistakes and How to Avoid Them#
- Bag looks floppy:
Use cotton cord/T-shirt yarn, tighter tension, and add a lining. - Sides are uneven:
Count rib rows and use stitch markers at fold points before seaming. - Top edge ripples:
Too many sc around. Redo edging with fewer stitches along row-ends. - Handle stretches:
Use cord yarn, keep stitches tight, or use thermal stitch. Reinforce attachment points. - Seams look bulky:
Mattress stitch helps, or seam with fewer/cleaner passes and block lightly. - Ribbing looks inconsistent:
Make sure every row is BLO and your turning chain is consistent.
Expert Tips for Better Results#
- Go smaller on the hook: Bag fabric should feel denser than garments.
- Block the rectangle before folding: It makes the final bag look sharper.
- Reinforce stress points: Handle ends, corners, and closure area need extra stitching.
- Add structure without plastic: Lining + firm yarn + tight stitches is usually enough.
- Keep branding minimal: A small centered tag or charm looks best on textured ribs.
- Weave in ends aggressively: Bags get tugged; secure tails in multiple directions.
Variations and Customization Ideas#
- Make it a shoulder bag: Increase handle length or add D-rings + longer strap.
- Turn it into a crossbody: Attach a chain strap or webbing strap.
- Add a flap: Crochet a flap from the back top edge and secure with snap.
- Change the rib texture:
- slip stitch BLO rib (tighter, more elastic rib)
- hdc BLO rib (chunkier, faster)
- Color-block version: One color for body, contrasting handle and trim.
- Add a structured base: Insert plastic canvas in the lining for a crisp bottom.
Benefits of This Crochet Project#
- A wearable accessory that looks modern and polished
- Ribbing gives structure without complicated shaping
- Quick, satisfying make (great weekend project)
- Easy to resize and customize
- Teaches real bag skills: seaming, edging, handles, closures
- Makes a beautiful gift that feels “designer” with lining + hardware
Internal Linking Suggestions#
You may also like…
- Free Crochet Pattern: Beginner Crochet Pouch (Fast + Simple)
- Crochet Tutorial: How to Crochet Slip Stitch Ribbing (BLO)
- Best Yarn for Crochet Bags (Cotton Cord vs T-shirt Yarn)
- Crochet Tutorial: How to Add a Fabric Lining to a Crochet Bag
- DIY Crochet: Installing Magnetic Snaps and Bag Hardware
- Free Crochet Pattern Roundup: Quick Crochet Bags and Purses
FAQ Section#
What yarn is best for a structured crochet handbag pattern?
Braided cotton cord and T-shirt yarn are the best for structure. They resist stretching and give strong stitch definition, which makes ribbing look clean.
Is this an easy crochet pattern for beginners?
Yes. The stitches are simple and repetitive, and the shape is made by folding and seaming. The optional lining and hardware are upgrades you can add when ready.
How do I make the bag bigger or smaller?
Adjust the starting chain to change height, and add or remove rib rows to change overall length. Keep the fold measurements consistent: front + bottom + back.
Why does my top edge ripple?
You probably added too many single crochets around the opening (especially along row-ends). Redo the edging with fewer stitches on the sides.
How do I stop the handle from stretching?
Use cord yarn, crochet with tight tension, and reinforce the handle attachments. A thermal stitch strap is also excellent for no-stretch handles.
Do I need to add a lining?
Not required, but highly recommended. A lining improves durability, reduces stretching, and gives the bag a professional interior—especially if you add a snap or zipper.
Conclusion#
A mini ribbed handbag is the perfect crochet project when you want something modern, structured, and genuinely wearable. This free crochet pattern keeps the construction simple while focusing on the details that make a bag look boutique: dense ribbing, clean top edging, and a sturdy handle.
If you tell me your yarn type (cotton cord thickness or T-shirt yarn) and the finished size you want (mini / medium / larger), I can adjust the starting chain and row counts so your crochet pattern comes out perfectly proportioned.