


Introduction#
If you’ve ever wanted to crochet something that looks like it came from a boutique—bold color, rich texture, and that unmistakable “handmade luxury” vibe—this long granny square coat is the project. It’s a wearable statement piece that still uses friendly, familiar stitches. The magic is in the build: you create a collection of floral granny squares, join them into panels, then finish the coat with a structured border, cuffs, collar, and button band.
Explore more beginner granny squares crochet patterns in our pattern library.
This type of crochet pattern is popular for a reason. It’s modular (you can crochet one square at a time), easy to customize for size and length, and it’s perfect for using leftover yarn without looking “random.” With the right layout and a unifying border color, you get a polished coat that feels intentional, not scrappy.
In this crochet tutorial, you’ll learn exactly how to make a long granny square coat from start to finish: how to crochet the squares, how to join them neatly, how to shape sleeves without fuss, and how to add a sturdy button band and collar. You’ll also get sizing guidance, finishing tips, and beginner-friendly troubleshooting so your coat comes out wearable and comfortable.
Detailed Description of the Crochet Pattern#
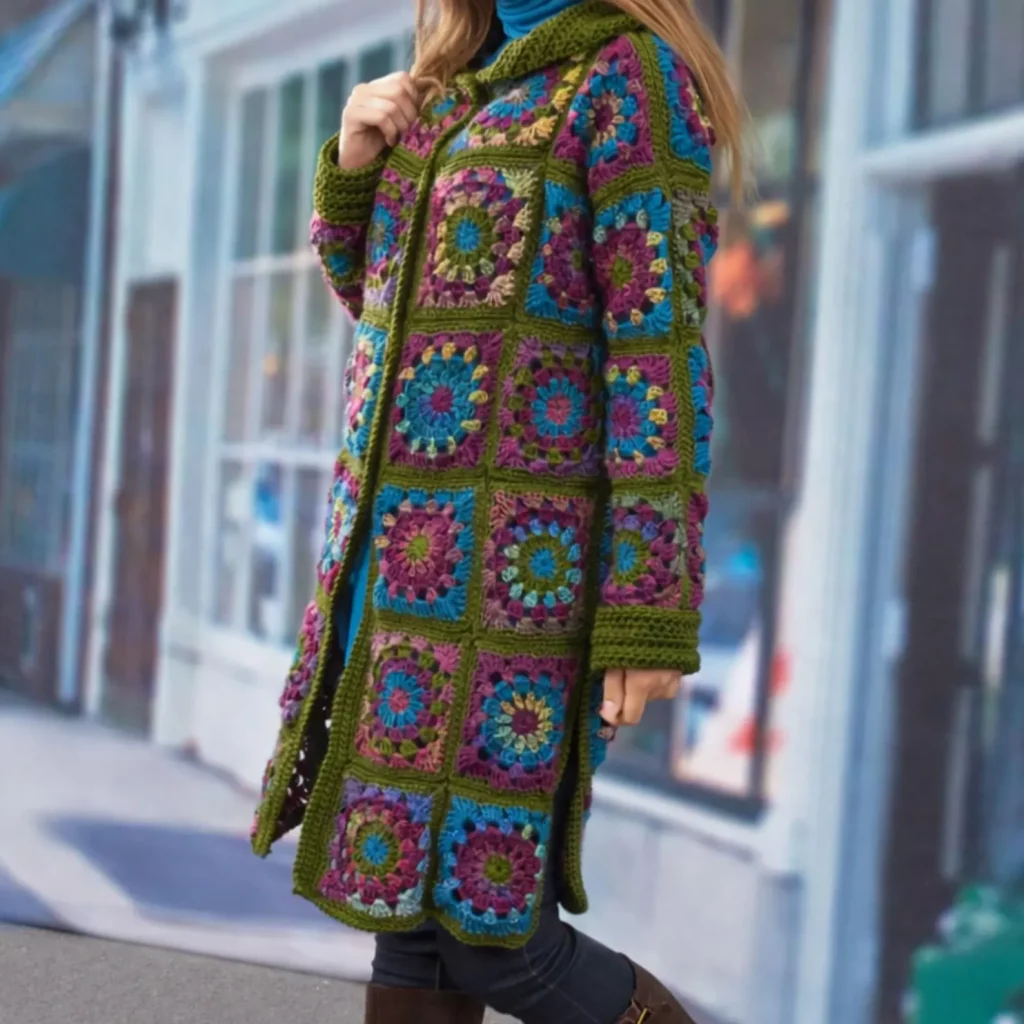
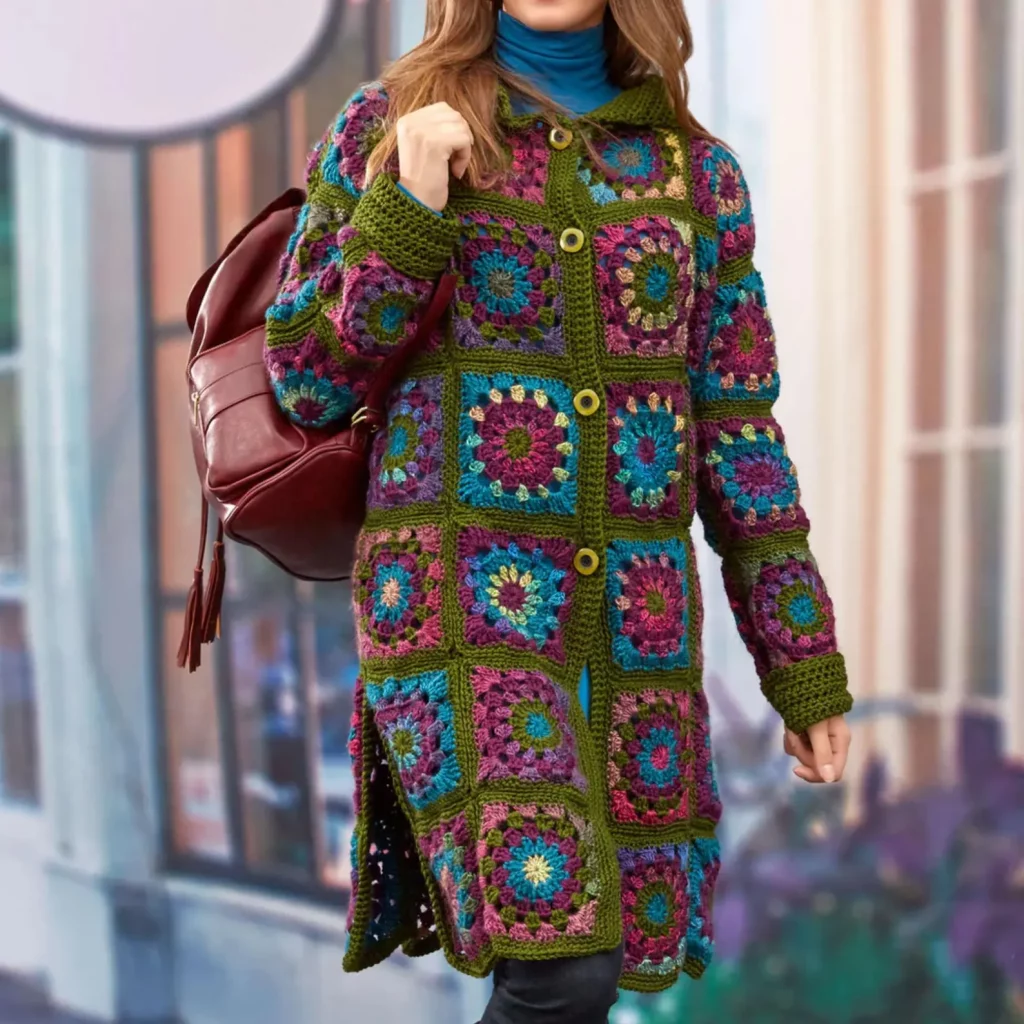
This free crochet pattern creates a long, button-front coat made from floral granny squares framed by a solid joining color (often green/olive, but you can choose any “frame” shade). The look is structured and warm, with a slightly oversized fit that layers beautifully over a turtleneck or tee.
Design features you’ll build:
- Floral granny squares with multiple color rounds (center flower + petal ring + background)
- A strong joining color that outlines each square and creates a grid effect
- Longline silhouette that reaches hip-to-knee (customizable)
- Button-front opening with a firm band so it doesn’t sag
- Collar crocheted onto the neckline for a jacket-like finish
- Cuffs and optional hem border for a clean, tailored edge
- Comfortable sleeves made from squares and/or extension rows for a smooth fit
The stitchwork is primarily granny stitch (double crochet clusters), so you get a cozy fabric with slight drape. The finishing rounds and borders are what elevate it from “cardigan” to “coat.”
Skill Level Explanation#
This is an easy-to-intermediate crochet pattern.
It’s beginner-friendly if you can:
- Crochet a granny square (or learn it—this tutorial shows you the structure)
- Change colors and weave ends neatly
- Join motifs with a simple seam
- Measure for garment fit
- Crochet clean borders (single crochet and double crochet)
It leans intermediate because:
- Garments require planning (layout + sizing)
- Assembly needs patience (blocking and seaming)
- Button band and collar benefit from neat edge work
If you’ve made a blanket or a bag using granny squares, you’re already most of the way there. The main new skill is turning squares into a wearable coat shape.
Materials Needed#
Yarn
For a long coat, choose yarn that balances warmth and drape. You want it cozy, but not stiff.
Best yarn choices:
- Worsted weight (#4) acrylic or wool blend (classic choice)
- DK weight (#3) for a lighter coat with more drape
- Wool blend for warmth and a premium feel
- Acrylic if you want easy-care and budget-friendly
Color planning (highly recommended):
- Pick one “frame” color to unify everything (olive/green, navy, black, cream—anything)
- Pick 3–6 accent colors for your flower squares
- Keep the last square round consistent (either always frame color or always background color)
Yardage estimate (very approximate):
- DK weight: 1800–3200 yards depending on size/length
- Worsted: 2200–4000 yards depending on size/length
Long coats vary a lot based on length and sleeve width. If you’re unsure, buy extra of your frame color—borders and joining eat more yarn than people expect.
Hook
- DK: 4.0–5.0 mm
- Worsted: 5.0–6.0 mm
Choose a hook that gives you drape but still looks tidy. If the fabric feels stiff, go up a hook size. If it feels too holey, go down.
Notions
- Stitch markers
- Measuring tape
- Yarn needle
- Scissors
- Blocking mat and pins (strongly recommended)
- Buttons (3–6 depending on coat length and spacing)
- Optional: snap buttons for hidden closure
- Optional: lightweight fabric for lining (advanced finishing)
Stitches & Techniques Explained#
Abbreviations (US terms)
- ch = chain
- sl st = slip stitch
- sc = single crochet
- dc = double crochet
- sp = space
- sk = skip
- rep = repeat
- RS/WS = right side / wrong side
Granny stitch refresher
- Cluster: 3 dc in the same space
- Corner: (3 dc, ch 2, 3 dc) in the same corner space
- Between corners: 3 dc in each chain space across the side
Joining methods
Choose one and stick to it for consistency:
- Whip stitch seam: flat and sturdy (great for coats)
- Slip stitch join: slightly raised ridge (decorative and strong)
- Join-as-you-go: faster later, but requires focus while crocheting
For a coat, whip stitch or slip stitch is reliable and easy to repair if needed.
Blocking matters here
Blocking is the difference between “homemade” and “professional.” Granny squares look smoother, the coat drapes better, and seams line up more easily.
Step-by-Step Instructions#
This crochet tutorial uses a made-to-measure approach so you can get a good fit without complicated size charts. You’ll build:
- Floral squares
- Layout plan
- Join into back + fronts + sleeves
- Add borders, cuffs, collar, button band
Sizing and fit plan
Decide how you want your coat to fit:
- Relaxed/oversized: 4–8 inches of positive ease
- Standard: 2–4 inches of positive ease
Measure:
- Bust (or chest)
- Hip (important for long coats)
- Desired length (shoulder to hem)
- Sleeve length
Your square size controls everything. A typical coat uses squares around 6–9 inches (after blocking).
Crochet the floral granny squares
You can use any flower-style granny square you like. Here’s a reliable structure that creates a floral center and a square background.
Round 1 (center, Color A):
MR, ch 3 (counts as dc), 2 dc in ring, ch 2; repeat (3 dc, ch 2) three more times. Join.
Round 2 (petals, Color B):
Sl st into corner space. (ch 3, 2 dc, ch 2, 3 dc) in corner.
In each corner space repeat. Join.
Round 3 (flower texture, Color C):
In each side space, work clusters to create fuller petals.
(Example: 3 dc in each side space; corners remain (3 dc, ch 2, 3 dc).) Join.
Round 4 (background to square, frame or background color):
Work classic granny round: clusters in each space, corners in corners. Join.
Keep adding rounds until you reach your square size. Many coats use 5–7 rounds total.
Pro cohesion tip:
Use your frame color as the final round on every square. Even if the inner flower colors vary, consistent outer rounds make the whole coat look intentional.
Block your squares
Block every square to the same size. This prevents a coat that twists or waves.
- Steam block acrylic lightly
- Wet block cotton/wool and pin flat
- Measure corners and sides so each square matches
Plan your layout
A long coat typically uses:
- Back panel: a rectangle of squares
- Two front panels: rectangles that mirror each other
- Sleeves: either square tubes or square + extension method
A common starting layout (adjust for your square size and body measurements):
- Back panel: 3 squares wide × 4 squares tall
- Each front panel: 2 squares wide × 4 squares tall
That’s 3×4 = 12 for back, plus 2×4×2 = 16 for fronts = 28 squares, before sleeves.
For a shorter coat, reduce height. For a wider coat, add a column to back or fronts.
Sizing shortcut:
Lay blocked squares on the floor. Build a back panel width close to your bust/hip measurement with ease. This visual method is easier than math.
Join the panels
Join squares into:
- back panel
- left front panel
- right front panel
Use whip stitch for a flat seam, or slip stitch join for a raised grid look.
Whip stitch join (simple):
- Hold squares WS together
- Stitch through matching loops along the edge
- Keep tension even (don’t pull too tight)
Assemble the body
- Seam shoulders: join front panels to back panel at the top edges, leaving a neck opening.
- Seam sides: join from underarm down to hem, leaving armholes.
Armhole depth: typically 7–10 inches depending on size and desired drape.
Sleeves
Two beginner-friendly sleeve options:
Square tube sleeves
- Join squares into a tube (often 2 squares around, 2–3 squares long)
- Attach tube to armhole
- Add cuff rounds to lengthen and finish
This is the easiest method but can feel boxy.
Square + extension sleeves (more tailored)
- Start with 1–2 squares at upper arm
- Attach to armhole
- Crochet rounds/rows around sleeve opening to taper slightly toward wrist
- Finish with cuff
This method reduces bulk at the wrist and looks more coat-like.
Attach sleeves
With coat inside out:
- Match sleeve seam to side seam
- Pin evenly around armhole
- Seam securely
Try on before finishing cuffs. Sleeve length is easiest to adjust now.
Add cuffs
Cuffs keep sleeves neat and wearable.
Join frame color at wrist opening:
- Work 4–10 rounds of sc or hdc (depending on desired cuff height)
- For a ribbed look, use BLO sc rows and sew into a ring, then attach
Add hem border
A solid border stabilizes the coat and adds “weight” so it hangs nicely.
Join frame color around bottom hem:
- Work 2–6 rounds of sc or hdc evenly
- For a more structured hem, do sc rounds rather than dc
Add button band and front edging
This step makes the coat look finished and prevents the fronts from stretching.
Work along the entire front opening:
- Up the right front edge
- Around the neckline
- Down the left front edge
Do 2–4 rounds of sc.
Buttonholes:
Decide where buttons will go. On the buttonhole side, create small gaps:
- Work sc to the button spot
- ch 2–3 (depending on button size), sk same number of stitches
- continue sc
Next round, sc into the chain space to reinforce.
Add collar
A collar can be simple and effective:
- Pick up stitches around neckline
- Work 4–10 rows of sc/hdc back and forth
- Add short-row shaping if you want the collar to fold nicely (optional)
A collar looks best in the frame color for a cohesive “coat” finish.
Sew on buttons
Use strong thread or yarn. Reinforce by sewing through the fabric multiple times.
Common Mistakes and How to Avoid Them#
- Squares are different sizes: Block them before joining. This is non-negotiable for coats.
- Coat fronts flare open: Use sc edging with a slightly smaller hook, and consider adding one reinforcement slip stitch row.
- Sleeves feel too bulky: Use the square + extension sleeve method or reduce square count around the wrist.
- Seams look messy: Use the frame color for joining so seams blend into the grid.
- Coat feels heavy: Choose DK weight yarn or limit border thickness. Long coats add weight fast.
Expert Tips for Better Results#
- Weave ends as you go. A coat can have dozens of color changes—don’t save them all for the end.
- Keep the final square round consistent to unify colors.
- Add a hidden reinforcement row: one round of slip stitch along the inside of the button band helps prevent stretching.
- Use slightly tighter stitches for bands and cuffs so they keep shape.
- If you want the coat to hang straighter, add a slightly wider hem border (it acts like gentle weighting).
Variations and Customization Ideas#
- Longline duster: add another row of squares to the bottom
- Short jacket: reduce height, keep sleeves full
- Hooded version: crochet a hood from a rectangle of granny stitch and attach at neckline
- No buttons: make it open-front and skip buttonholes, just add edging
- Pocket squares: sew one or two granny squares onto the front panels
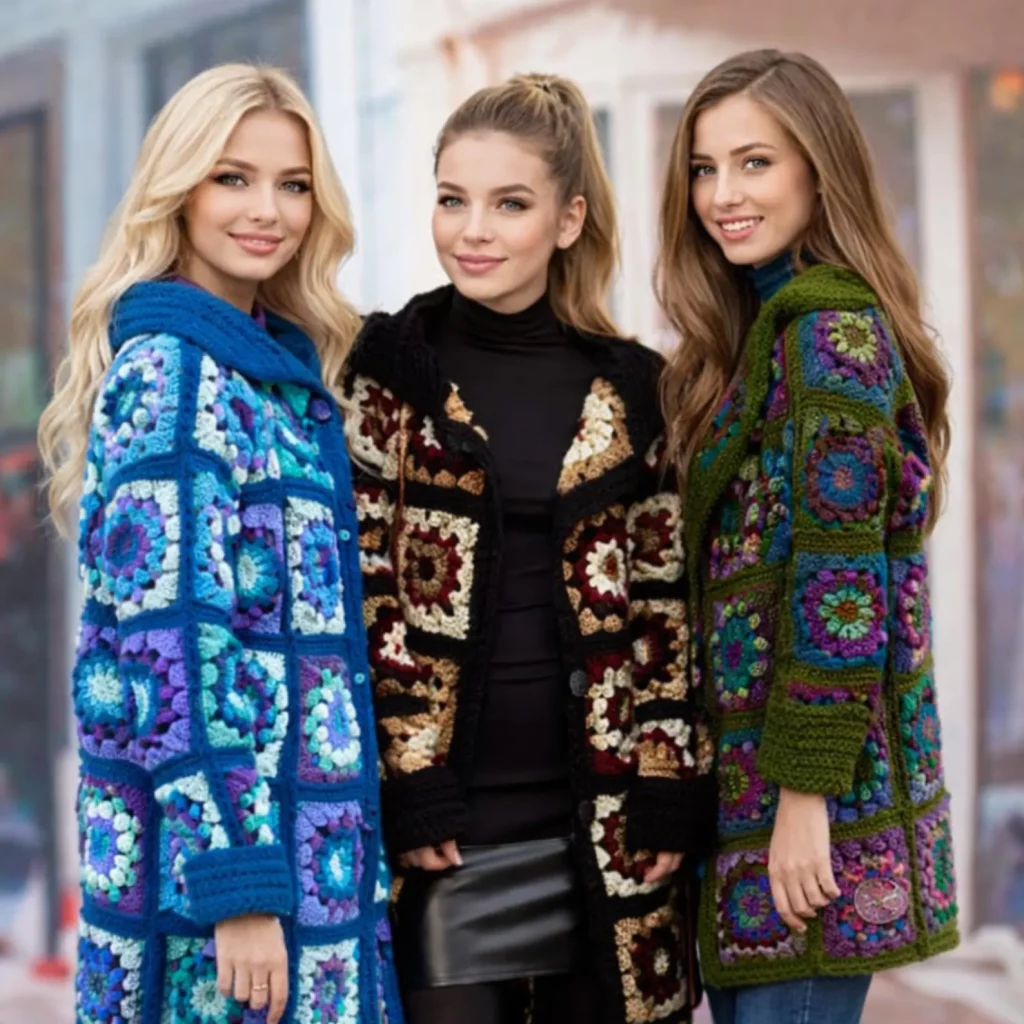
- Color story themes: jewel tones, cottagecore pastels, earthy neutrals, or monochrome with one pop color
Benefits of This Crochet Project#
- Creates a show-stopping wearable that looks high-end
- Granny squares make progress easy and motivating
- Customizable fit and length without complex grading
- Great stash-buster while still looking cohesive
- Teaches garment construction skills in a friendly way
- A strong blog-friendly crochet pattern with real educational value
Internal Linking Suggestions#
If you’re building a crochet blog, link this post to:
- How to Crochet a Granny Square for Beginners
- Best Ways to Join Granny Squares (Whip Stitch vs Slip Stitch)
- How to Block Granny Squares
- Crochet Garment Sizing Basics
- How to Add Buttonholes to Crochet
- Easy Crochet Collar Tutorial
FAQ Section#
Is this granny square coat crochet pattern beginner-friendly?
Yes. The stitches are simple. The main skills are consistent squares, blocking, and patient assembly.
How many squares do I need for a long coat?
It depends on your square size and desired length. Many long coats use 25–45 squares plus additional yarn for borders and sleeves.
What yarn is best for a granny square coat?
Worsted acrylic or wool blends are common for warmth and structure. DK makes a lighter coat with more drape.
How do I keep the front edges from stretching?
Use single crochet edging, consider a smaller hook for the band, and add a reinforcement slip stitch row along the inside.
Can I make the sleeves less boxy?
Yes. Attach the sleeve and then crochet downward to taper. This reduces bulk and makes it look more tailored.
Can I wash the coat?
That depends on yarn. Acrylic is often machine washable; wool usually needs gentle care. Always follow your yarn label and lay flat to dry.
Conclusion#
A long granny square coat is the kind of crochet pattern that feels like an achievement—bold, wearable, and completely customizable. The best part is that it’s built from manageable pieces, so you can crochet it one square at a time without needing long uninterrupted crafting sessions. With a consistent frame color, careful blocking, and clean borders, you’ll end up with a coat that looks polished, intentional, and truly handmade in the best way.
If you want, tell me your bust measurement and the size of your blocked square (in inches), and I can suggest a square layout (rows × columns) that will give you the exact coat length and fit you’re aiming for.


