


Introduction#
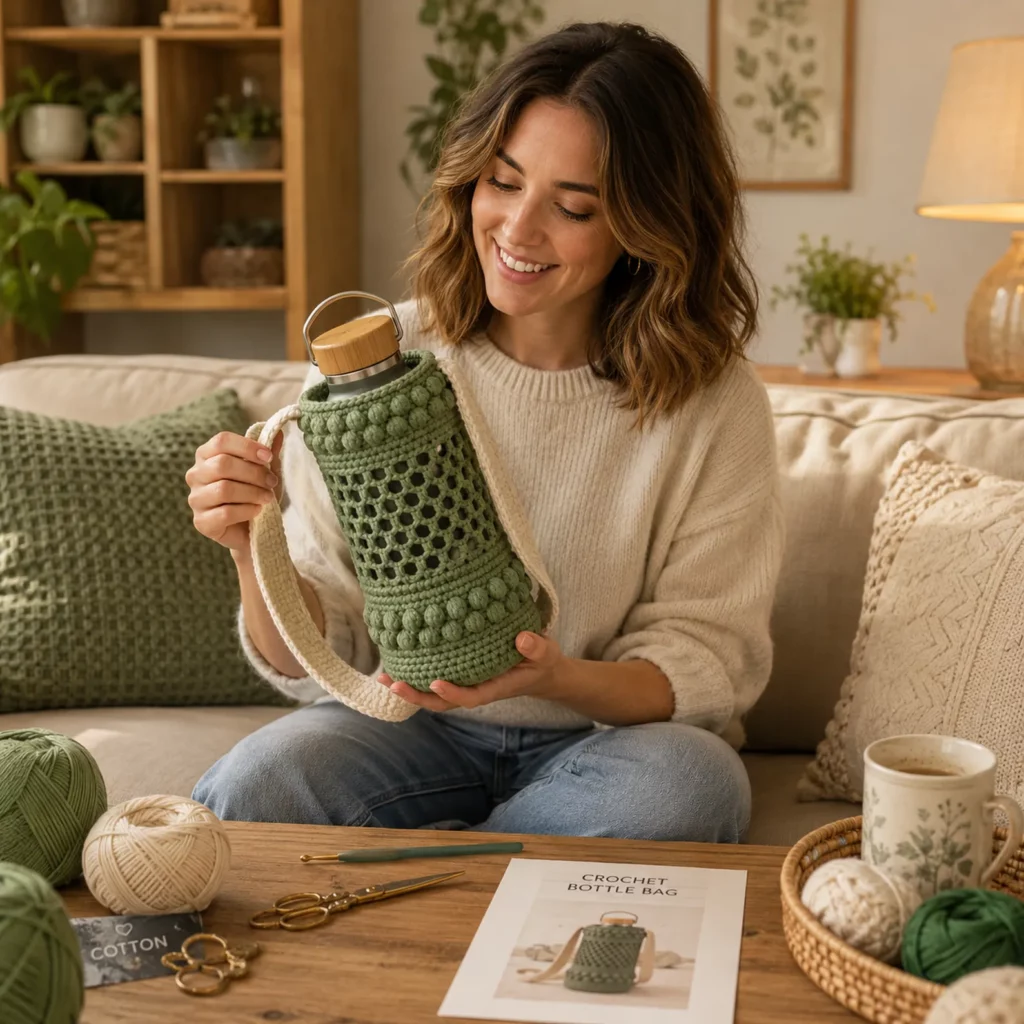
A good water bottle is basically a daily companion, but carrying it in your hands gets old fast. A crochet water bottle holder solves that problem in the cutest way possible. It keeps your bottle secure, frees up your hands, and gives you a wearable accessory you can take on walks, errands, hikes, school runs, festivals, and travel days.
Explore more beginner home decor crochet patterns in our pattern library.
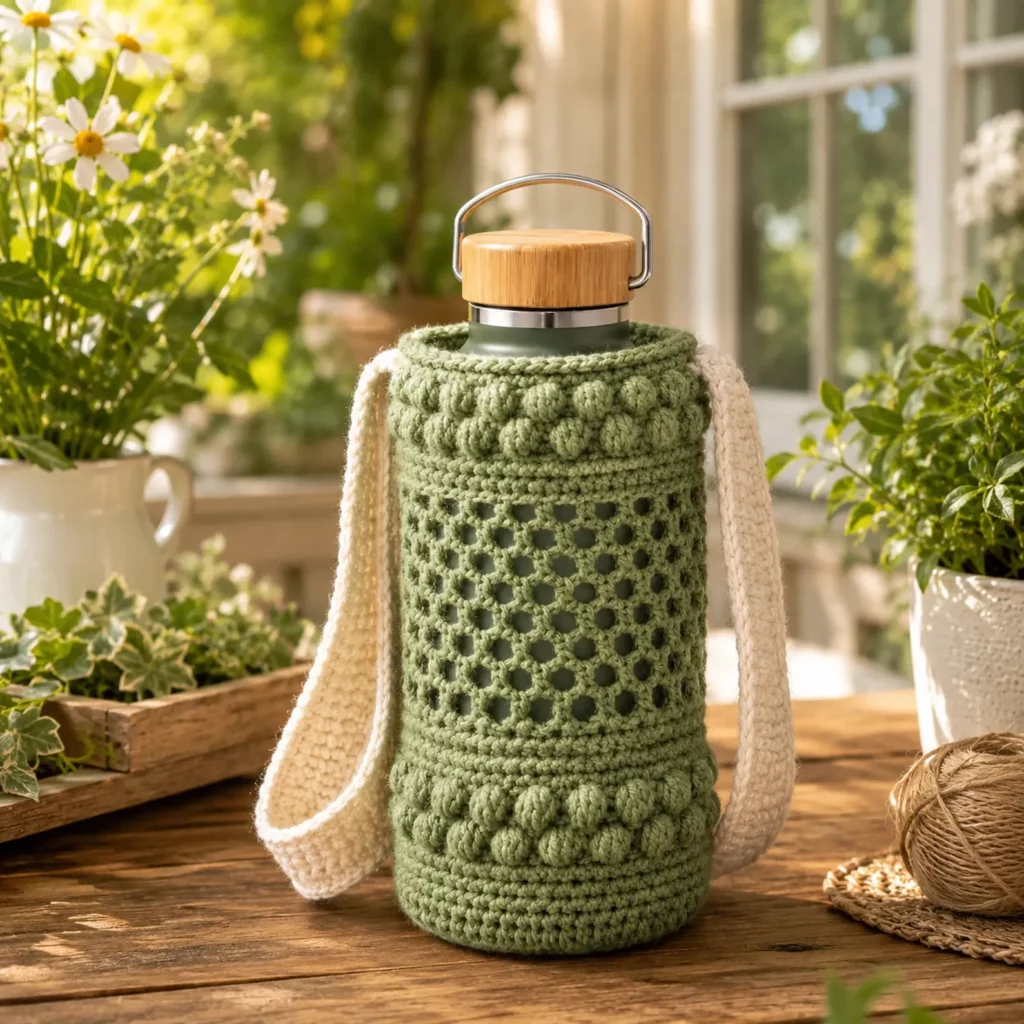
This crochet pattern is especially fun because it’s quick, practical, and easy to customize. You can make it snug for a slim bottle, widen it for a big insulated tumbler, add a long crossbody strap, or keep it short like a handle. The design you’ll learn here has three standout features that make it feel “store-bought”: a sturdy base, a breathable mesh middle, and bold bobble bands that add texture and strength where it matters most.
If you’re looking for an easy crochet pattern that’s actually useful, this is it.
Detailed Description of the Crochet Pattern#
This water bottle sling is built in three sections.
Base
- A tight, sturdy round base that supports the weight of the bottle
- Made with single crochet increases so it stays dense and durable
Lower texture band
- A solid section with bobble stitches for a cozy, grippy look
- Adds extra thickness near the bottom where bottles bump into things
Mesh body
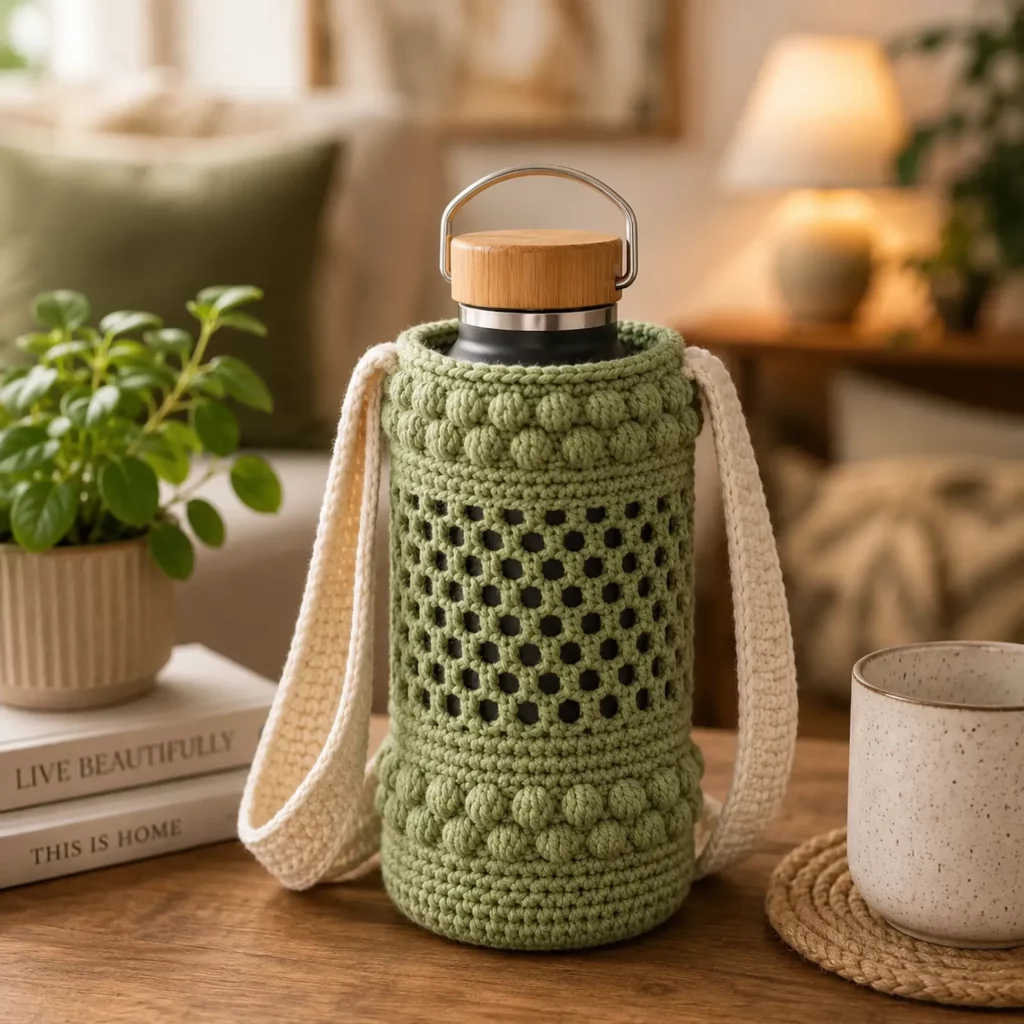
- An airy, lightweight mesh that hugs the bottle without adding bulk
- Great for warm weather and easy to see inside for cleaning
Upper texture band and rim
- Another bobble band near the top for style and structure
- A firm rim that helps the bottle slide in and out smoothly
Strap
- A comfortable strap worked in dense stitches so it doesn’t stretch too much
- Adjustable length options: hand-carry, shoulder, or crossbody
- Optional strap attachment loops for a cleaner finish
Overall, this crochet tutorial gives you a functional bottle carrier that looks polished and feels strong.
Skill Level Explanation#
Skill Level: Beginner-Friendly to Confident Beginner
You’ll be comfortable if you know
- Chain (ch)
- Single crochet (sc)
- Double crochet (dc)
- Slip stitch (sl st)
- Working in the round
You’ll learn or practice
- Increasing evenly for a flat base
- Simple mesh stitch in rounds
- Bobble stitch placement
- Making straps that resist stretching
- Sizing a project to fit different bottle diameters
This is a crochet for beginners friendly project because the shape is forgiving and the stitch patterns are repetitive.
Materials Needed#
Yarn
Choose a yarn that can handle friction, weight, and frequent use.
Best yarn types
- 100% cotton or cotton blend (most durable and least stretchy)
- Cotton-acrylic blend (softer but still strong)
- Recycled cotton (great eco option, slightly heavier)
Suggested yarn weight
- Worsted (Category 4) for a sturdy everyday holder
- DK (Category 3) for a lighter, slimmer look
Yardage estimate
- Small to medium bottle: 120–180 yards (110–165 m)
- Large bottle/tumbler: 180–260 yards (165–240 m)
- Add 40–80 yards (37–73 m) if you want a long crossbody strap
Color ideas
- Solid neutral for a minimalist look
- Two-tone strap for contrast
- Bold color for a statement accessory
Hook
Use a hook that creates a firm fabric.
Typical hook sizes
- DK cotton: 3.5–4.0 mm
- Worsted cotton: 4.0–5.0 mm
If your mesh looks too loose, go down a hook size.
Notions
- Stitch marker
- Tapestry needle
- Scissors
- Measuring tape
- Optional: D-rings or swivel hooks (if you want removable straps)
- Optional: cord stopper (if you choose a drawstring top variation)
Stitches & Techniques Explained#
Common Abbreviations
- ch = chain
- sc = single crochet
- dc = double crochet
- sl st = slip stitch
- inc = increase (2 sc in same stitch)
- bobble = bobble stitch
- sp = space
- ( ) = repeat
- = stitch count
Bobble Stitch
A classic crochet bobble is made by partially completing multiple dc stitches in the same stitch, then closing them together.
Simple bobble (5-dc bobble)
- Yarn over, insert hook, pull up loop, yarn over, pull through 2 (partial dc made)
- Repeat that partial dc 4 more times in the same stitch
- Yarn over, pull through all loops on hook
- Ch 1 to lock the bobble (this lock chain counts as part of the bobble structure)
Bobble tip
Keep your bobbles facing the outside by pushing them forward as you work.
Mesh Stitch for the Body
This pattern uses a simple, strong mesh.
Mesh round
- (dc, ch 1, skip 1) repeat around
Next round anchors by working dc into dc and into chain spaces.
This creates breathable holes without making the fabric too fragile.
Preventing Strap Stretch
The number one complaint about crocheted straps is stretching. Fix that by
- using single crochet or slip stitch straps
- working straps in back loop only for ribbed strength
- adding a simple reinforcing row
- using cotton yarn rather than stretchy acrylic
Step-by-Step Instructions#
Before You Start: Measure Your Bottle
Measure two things
- Bottle circumference (around the widest part)
- Bottle height you want to cover (usually up to the shoulder)
Quick sizing rule
- Your holder circumference should be slightly smaller than the bottle circumference so it hugs the bottle.
Pattern Notes
- Work in continuous rounds unless stated
- Use a stitch marker for the first stitch of each round
- Stitch counts matter most on the base; mesh rounds are forgiving
Base (Sturdy Bottom)
Start with a magic ring.
Round 1: 6 sc in MR [6]
Round 2: inc around [12]
Round 3: (sc, inc) around [18]
Round 4: (2 sc, inc) around [24]
Round 5: (3 sc, inc) around [30]
Round 6: (4 sc, inc) around [36]
Stop increasing when your base circle is about the same diameter as the bottom of your bottle.
If your bottle bottom is bigger
Continue increasing
- Round 7: (5 sc, inc) around [42]
- Round 8: (6 sc, inc) around [48]
Transition Round (Turn the Base Upward)
This round helps the base become a “cup.”
Round: sc in BLO around
Working in the back loop only creates a ridge and makes the sides turn upward cleanly.
Lower Solid Section
Rounds 1–3: sc around
This creates a strong wall before the bobble band.
Bobble Band 1
Round: (sc 2, bobble) repeat around
Adjust the spacing so the bobbles land evenly. If your stitch count doesn’t divide nicely, just keep the bobbles evenly spaced by eye.
Next round: sc around
This “locks” the bobbles in place and stabilizes the fabric.
Mesh Body Section
Switch to mesh rounds.
Mesh Round A
- Ch 3 (counts as dc), dc in next stitch
- (ch 1, skip 1, dc in next stitch) repeat around
Join with sl st to the top of beginning ch-3
Mesh Round B
- Ch 3, dc in each dc and dc in each ch-1 space around
Join
Repeat Mesh Rounds A and B until the holder reaches the height you want.
Common height guide
- For a standard bottle: cover about 60–75% of the bottle height
- For a tall bottle: stop 2–3 inches below the bottle cap area so it’s easy to grab
Bobble Band 2 (Near the Top)
After your mesh section, add structure again.
Round: sc around
Round: (sc 2, bobble) repeat around
Round: sc around
Top Rim
Work 1–2 rounds of sc for a firm opening.
Optional tighter rim
Work the final rim round as sl st around for a firmer edge (great if your cotton is soft and the rim feels loose).
Strap Attachment Points
You can attach the strap in two simple ways.
Option A: Attach strap directly to the rim
- Pick two opposite points on the rim
- Join yarn and start strap from one point
- Sew the other end to the opposite point
Option B: Create strap tabs (cleaner look)
Make 2 small tabs
- Ch 8
- Row 1: sc in 2nd ch and across (7)
- Rows 2–3: sc across
Sew one tab to each side of the rim, then attach strap to tabs.
Strap (Adjustable Length)
Strap width options
- Slim strap: 6–8 sc wide
- Wider comfy strap: 10–12 sc wide
Basic sturdy strap (recommended)
Ch to your desired strap length.
Row 1: sc in 2nd ch from hook and across, ch 1, turn
Row 2: sc BLO across, ch 1, turn
Repeat Row 2 until strap reaches your desired width.
If you want the strap to be extra stretch-resistant
Add one final row of sl st across the long edge of the strap.
Length guide
- Hand carry: 10–14 in (25–36 cm)
- Shoulder: 24–32 in (61–81 cm)
- Crossbody: 38–50 in (97–127 cm)
Attach strap ends
Sew securely with multiple passes. This is a high-stress area, so take your time.
Common Mistakes and How to Avoid Them#
Holder feels too loose
- Use a smaller hook
- Reduce one increase round on the base
- Add an extra sc round before mesh starts
- Make fewer chain spaces in mesh by using (dc, ch 1, dc) style tighter mesh
Holder feels too tight
- Add one more base increase round
- Add one more mesh repeat before the top band
- Use a slightly larger hook for mesh section only
Base turns into a bowl or ripples
- Bowl shape: not enough increases, add one more increase round
- Ripples: too many increases, remove an increase round and continue
Strap stretches
- Use cotton yarn
- Work sc or sc BLO rather than dc
- Add a slip stitch reinforcing edge
- Consider adding a thin cord inside the strap during the last row
Bobbles look messy
- Keep bobble tension consistent
- Lock each bobble with a chain
- Add a full sc round immediately after bobbles to stabilize
Expert Tips for Better Results#
- Use cotton for the best balance of durability and structure.
- If your bottle is heavy, make the mesh section shorter and add more solid sc rounds.
- Add a simple lining strip (fabric or ribbon) to the strap underside if you want extra comfort for long walks.
- If you want a snug “no-slip” fit, add one round of surface slip stitches around the mid-body for gentle grip.
- Weigh down the bottom with a slightly thicker base by using two sc rounds after the BLO turning round.
Variations and Customization Ideas#
- Drawstring top version
Add a round of ch-1 spaces near the top and thread a cord through, then tie to close. - Pocket add-on
Crochet a small rectangle pocket in sc and sew to the outside for keys or lip balm. - Phone sling style
Widen the body and add a longer strap for a crochet crossbody that fits a small bottle and phone. - Two-color stripes
Change colors every 2 mesh rounds for a fun look. - Minimalist version
Skip bobbles and keep it all mesh with a sturdy base and rim.
Benefits of This Crochet Project#
- Hands-free carrying for walks, errands, and travel
- Quick to make and great for gifting
- Customizable for any bottle size
- Uses small yardage, perfect stash buster
- Breathable mesh keeps it lightweight
- Durable and washable with the right yarn choice
Internal Linking Suggestions#
- How to Crochet a Bobble Stitch for Beginners
- Easy Crochet Mesh Stitch Tutorial
- Best Cotton Yarn for Crochet Accessories
- How to Make Crochet Straps That Don’t Stretch
- DIY Crochet Bag Patterns for Beginners
FAQ#
What yarn is best for a crochet water bottle holder?
Cotton is the best choice because it’s strong, washable, and doesn’t stretch as much as acrylic.
How do I size this crochet pattern for my bottle?
Match the base diameter to your bottle bottom and keep the body circumference slightly smaller than the bottle circumference so it hugs securely.
Can beginners make this?
Yes. The stitches are basic, and the mesh repeat becomes very easy after a couple of rounds.
How do I keep the strap from stretching?
Use sc or sc BLO, choose cotton yarn, and add a slip stitch reinforcement edge. You can also insert a thin cord inside the strap.
Can I make it for a large insulated tumbler?
Yes. Add extra increase rounds to the base and add more mesh rounds for height. If the tumbler is heavy, add more solid sc rounds for strength.
Is it washable?
Yes if you use washable yarn. Cotton holders can usually be hand washed and laid flat to dry.
Conclusion#
A crochet water bottle holder is one of the most useful crochet pattern projects you can make because it’s cute, practical, and totally customizable. With a sturdy base, breathable mesh, and a strong strap, you’ll have an accessory that makes everyday life easier and looks handmade in the best way.
If you tell me your bottle’s circumference (or the brand/size, like 20 oz, 32 oz, etc.), I can give you a precise base stitch count target and the best strap length for shoulder or crossbody.


