


Introduction#
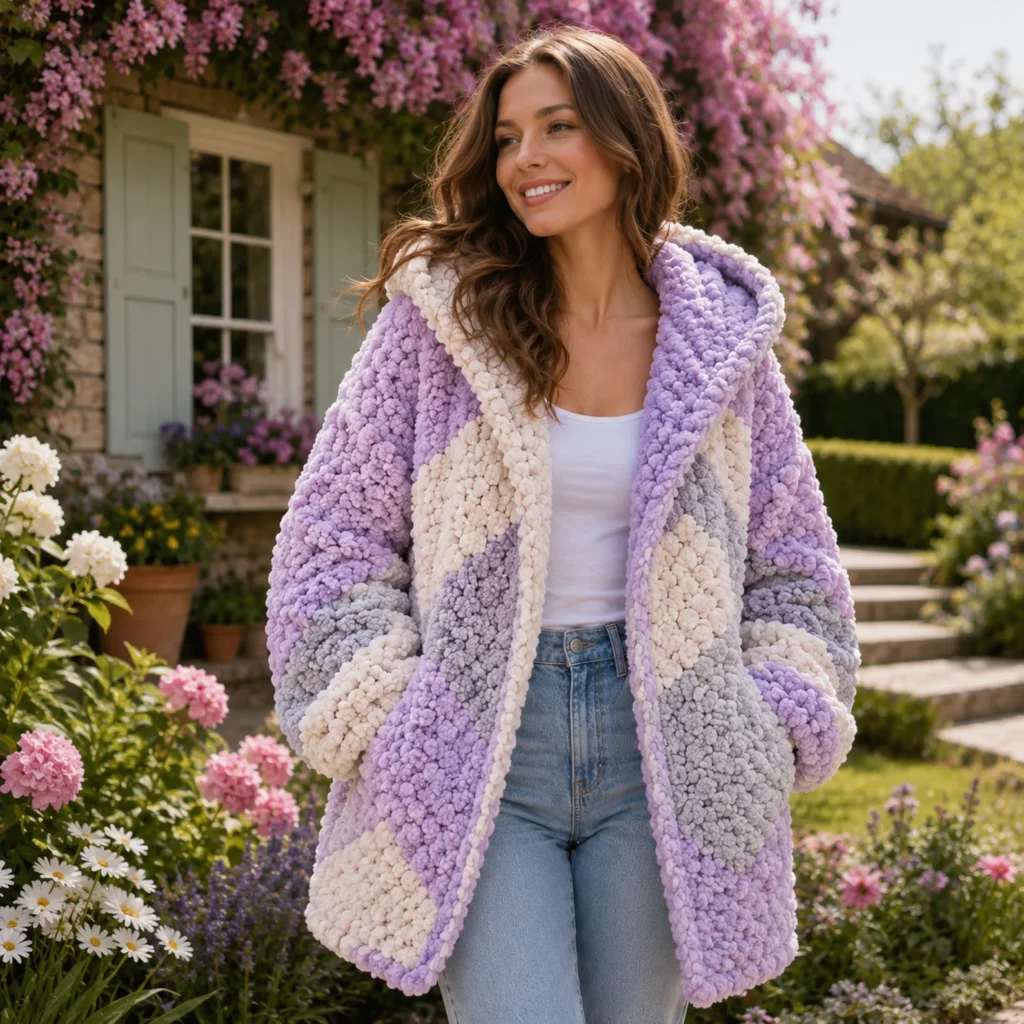
If you’ve ever wished you could wrap yourself in something that feels like a wearable blanket but still looks stylish enough to leave the house in, a hooded teddy coat is exactly that project. It’s plush, oversized, and unbelievably cozy, with a big hood and roomy sleeves that make it feel extra luxe.
Explore more beginner cardigans crochet patterns in our pattern library.
The best part is that this crochet pattern doesn’t rely on complicated shaping. The “designer” look comes from the yarn and the silhouette, not advanced garment math. You’ll build the coat using simple panels, seam them together, and then finish with a hood and optional edging. It’s a beginner-friendly approach that still creates a high-impact result.
This crochet tutorial is written to help you succeed even if plush yarn is new to you. You’ll learn how to count and measure without relying on perfect stitch visibility, how to size for a relaxed fit, and how to assemble the pieces so your coat hangs nicely and feels comfortable.
Detailed Description of the Crochet Pattern#
This project is a fluffy, open-front hooded coat with a soft teddy texture and an intentionally oversized shape. The fabric is thick, warm, and nubby, making it ideal for cool weather layering. Construction is modular and approachable.
Key design elements
- Open-front, no zipper required (optional closures can be added later)
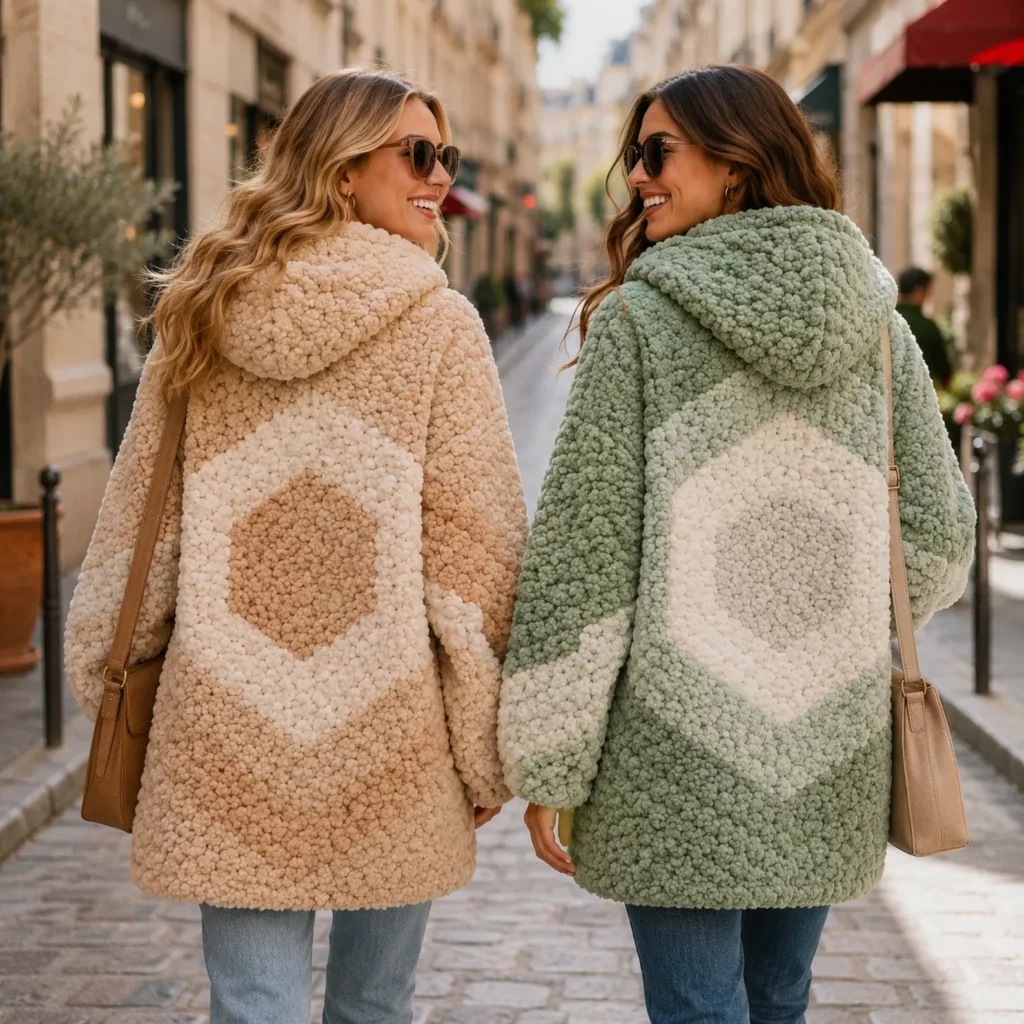
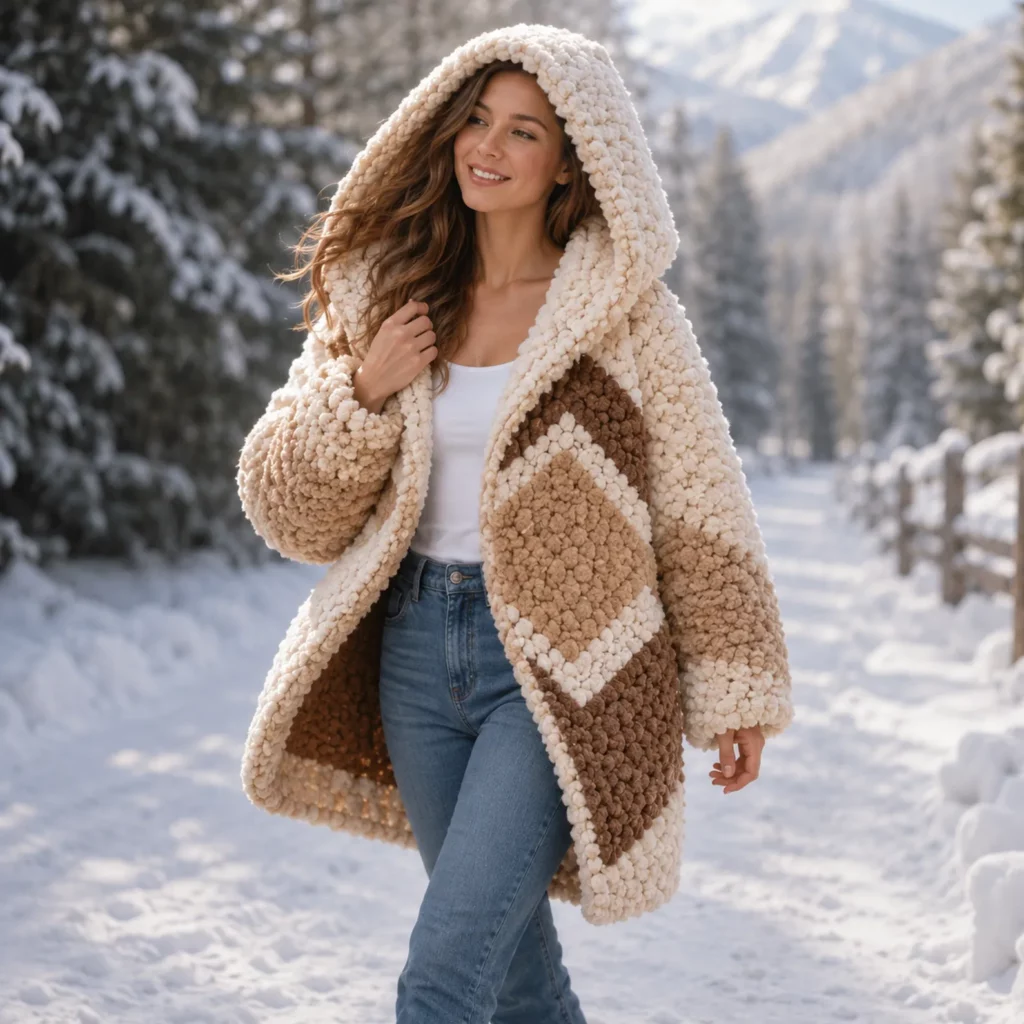
- Oversized hood with a deep, cozy drape
- Drop-shoulder sleeves for a relaxed fit and easy assembly
- Long length (hip to mid-thigh by default), easy to customize
- Optional clean edging along the front and hood opening for structure
How it’s made
- Back panel: large rectangle
- Two front panels: matching rectangles, slightly narrower than the back
- Sleeves: wide rectangles seamed into tubes
- Hood: one rectangle folded and seamed, then attached to the neckline
- Finishing: edging and optional cuffs/hem ribbing
This is a perfect “easy crochet pattern” garment because you can try it on as you go, adjust length without rewriting the design, and rely on measurements instead of strict stitch counts.
Skill Level Explanation#
Skill Level: Beginner-Friendly to Confident Beginner
You’ll do great if you already know
- Chain (ch)
- Single crochet (sc) or half double crochet (hdc)
- Working in rows
- Basic seaming with a yarn needle
- Using a measuring tape
Newer skills you’ll practice
- Made-to-measure garment sizing
- Keeping edges straight for neat seams
- Managing plush yarn (stitch markers and counting techniques)
Plush yarn can look intimidating, but this DIY crochet project is very forgiving because the fabric is thick and the fit is intentionally relaxed.
Materials Needed#
Yarn
To get that teddy look, choose a plush yarn with a soft pile.
Best yarn types for a teddy coat
- Super bulky (Category 6) chenille for fast, fluffy progress
- Jumbo (Category 7) plush for an ultra-thick, statement coat
- Faux-fur style yarn for maximum texture (harder to see stitches, but very warm)
Color ideas
- Soft pastel variegated yarn for a dreamy cloud effect
- Solid cream, oatmeal, or gray for a classic teddy vibe
- Bold solid colors for a modern streetwear feel
Yardage estimate (varies by yarn thickness and coat length)
- XS–S: 900–1400 yards (825–1280 m)
- M–L: 1200–1700 yards (1100–1550 m)
- XL–2XL: 1500–2200 yards (1370–2010 m)
- 3XL–5XL: 2000–3000 yards (1830–2740 m)
Helpful yarn tip
Plush yarn dye lots can vary. If possible, grab one extra skein so you don’t run short during the hood or sleeves.
Hook
Use a hook that creates a warm, stable fabric without becoming stiff.
Typical hook sizes
- Category 6 chenille: 8.0–10.0 mm
- Category 7 jumbo plush: 10.0–12.0 mm
If the fabric feels too holey, go down a hook size. If it feels too stiff, go up a hook size.
Notions
- Stitch markers (very helpful with fuzzy yarn)
- Tapestry needle
- Scissors
- Measuring tape
- Optional buttons, toggles, snaps, or a belt
- Optional smooth scrap yarn for seaming if your plush yarn sheds
Stitches & Techniques Explained#
Common Abbreviations
- ch = chain
- sc = single crochet
- hdc = half double crochet
- dc = double crochet
- sl st = slip stitch
- ( ) = repeat
- = stitch count
Best stitch choice for a teddy coat
Half double crochet (hdc) is a great default because it builds quickly and makes a thick fabric that drapes nicely. If your yarn is extremely chunky or your fabric feels too open, single crochet (sc) will create an even denser, warmer coat.
Suggested stitch options
- Hdc for speed and soft drape
- Sc for maximum warmth and structure
- Hdc in the back loop only for subtle ridges (optional, not necessary with plush yarn)
Plush yarn tips that make everything easier
Plush yarn can hide your loops, so rely on tools and consistency instead of eyesight.
- Mark the first and last stitch of every row
- Count rows with a notebook or click counter
- Feel your stitches with your fingers (you’ll “read” the fabric faster than you think)
- Avoid aggressive frogging, undo slowly to protect the yarn pile
- Keep turning chains consistent so your edges stay straight
Straight edges for seam-friendly panels
- For sc rows: ch 1, turn
- For hdc rows: ch 2, turn (doesn’t count as a stitch unless you prefer it to)
- Always work the last stitch into the final stitch of the row (use a marker to confirm)
Step-by-Step Instructions#
Finished size and fit
This coat is made-to-measure so you can create your perfect oversized fit without complicated grading.
Ease guidelines
- Cozy fit: bust + 6–10 in (15–25 cm)
- Oversized fit: bust + 10–16 in (25–40 cm)
Length options
- Hip length for a casual plush jacket
- Mid-thigh for a classic teddy coat
- Longer for extra warmth and drama
Quick gauge approach
Plush yarn gauge can vary a lot, so keep it simple.
- Chain 12–15
- Work 8–10 rows in your chosen stitch (hdc or sc)
- Measure the center 4 inches (10 cm)
- You mainly need consistency so all panels match
If you dislike swatching, you can still succeed by measuring your panels as you crochet and adjusting row counts as needed.
Measurements you need
- Bust circumference
- Desired coat length (shoulder to hem)
- Upper arm circumference
- Sleeve length (from shoulder seam to wrist)
- Neckline opening width preference for hood attachment
Construction overview
- Crochet back panel
- Crochet two front panels
- Seam shoulders and sides, leaving armholes
- Crochet sleeves and seam into tubes
- Attach sleeves
- Crochet hood, seam, attach to neckline
- Add optional edging and finishing touches
Back panel
The back is a large rectangle worked bottom-up.
Back panel width
- Aim for about 40–55% of your total bust circumference, depending on how oversized you want it
- Example: bust 40 in, oversized target width 52 in
- Back panel about 22–26 in wide
Back panel length
- Measure from shoulder top down to your desired hem
Back panel pattern (hdc version)
- Foundation: chain until your chain measures the desired back width
- Row 1: hdc in the third chain from hook and across, ch 2, turn
- Row 2: hdc across, ch 2, turn
- Repeat Row 2 until the panel reaches your desired length
- Fasten off
Back panel pattern (sc version)
- Foundation: chain until your chain measures the desired back width
- Row 1: sc in the second chain from hook and across, ch 1, turn
- Row 2: sc across, ch 1, turn
- Repeat Row 2 until desired length
- Fasten off
Edge tip
Place stitch markers in the first and last stitch of every row. This is the single best trick for plush yarn success.
Front panels
Make two rectangles the same length as the back, but narrower.
Front panel width
- Each front panel is typically 20–30% of your bust circumference
- Back width + front width + front width = total coat width
Example layout for an oversized coat (bust 40 in, target width 52 in)
- Back: 22 in
- Front panel 1: 15 in
- Front panel 2: 15 in
Front panel pattern
Work exactly like the back panel, matching stitch choice and row count so the lengths are the same. Make two identical panels.
Optional shaping note
Many teddy coats look best with a straight open front. If you want a more shaped neckline later, you can create it with your edging rather than shaping the panels.
Assemble the body
Lay the panels flat with the back in the center and the fronts on either side.
Shoulder seams
- Seam the top of each front panel to the top of the back panel
- Leave a center neck opening for the hood
- A simple guideline is seaming 4–6 inches (10–15 cm) on each shoulder
Side seams and armholes
- Seam from the hem upward
- Stop to leave an armhole opening
Armhole depth guideline (roomy for coats)
- S–M: 9–10 in (23–25 cm)
- L–XL: 10–11 in (25–28 cm)
- 2XL–5XL: 11–12 in (28–30 cm)
Seaming methods
- Whip stitch: easiest and strong
- Mattress stitch: flatter and cleaner looking
- Slip stitch join with hook: sturdy, creates a ridge
Plush yarn seaming tip
If your plush yarn sheds or snaps when pulled, seam with a smooth, strong yarn in a matching color. The seam will be hidden in the fluff.
Sleeves
These are drop-shoulder sleeves made from rectangles that are seamed into tubes.
Sleeve width
- Upper arm circumference + 4–8 inches (10–20 cm) ease
- More ease = puffier, cozier sleeves
Sleeve length
- Measure from shoulder seam to wrist (or your preferred length)
Sleeve pattern
- Foundation: chain until it measures your desired sleeve width
- Work rows in the same stitch as the body (hdc or sc)
- Continue until sleeve reaches desired length
- Fasten off
Seam sleeves into tubes
Fold each sleeve rectangle in half and seam the long edge.
Optional easy taper
If the wrist feels too wide, seam a little deeper near the wrist end or add a cuff later.
Attach sleeves
Align the sleeve seam with the body side seam. Pin or clip around the armhole opening, then seam the sleeve in place evenly.
Fit tip
Try the coat on before you fully seam both sleeves. It’s easy to adjust sleeve placement slightly for your best fit.
Hood
A teddy coat hood should be roomy and soft, not tight.
Hood width
- Measure the neckline opening you left during shoulder seaming
- Make the hood rectangle about the same width, or slightly wider for extra drape
Hood depth (height)
- Typically 14–18 inches (36–46 cm), depending on how oversized you want it
Hood pattern
- Foundation: chain to hood width
- Work rows in the same stitch as the coat
- Continue until hood reaches desired depth
- Fasten off
Seam the hood
Fold the hood rectangle in half and seam along the top edge to form the hood shape.
Attach hood to neckline
Pin the hood opening to the neckline opening, seam evenly all the way around.
Pro placement tip
If you want the hood to sit slightly forward (cozier look), attach it with a tiny bit more hood fabric toward the front edges.
Optional edging and finishing
An edging helps your coat hang well, prevents stretching, and gives a polished border.
Simple single crochet edging
- Attach yarn at the bottom of one front edge
- Work sc evenly up the front opening, around the hood opening, and down the other front edge
- Work 1 sc per row along vertical edges (adjust if it ripples)
- Place 2–3 sc in corners to keep them smooth
Add 1–3 rounds depending on how substantial you want the border.
Optional cuffs and hem ribbing
If you want a more structured finish, add ribbing using sc in the back loop only. This is optional for plush yarn, but it looks very professional and helps sleeves feel intentional.
Common Mistakes and How to Avoid Them#
- Edges look wavy or uneven
- Mark first and last stitch every row and keep turning chains consistent
- Panels don’t match sizes
- Measure width as you crochet, and match row counts for length
- Hood feels floppy
- Add one or two rounds of sc edging around the hood opening
- Sleeves feel tight
- Add more width to sleeve rectangles; coats need roomy sleeves
- Plush yarn is hard to count
- Use stitch markers, count rows, and feel stitches instead of relying on sight
- Seams look bulky
- Use mattress stitch or seam through back loops only, and gently reshape after seaming
Expert Tips for Better Results#
- Make a small test sleeve swatch before committing to the whole coat. Plush yarn varies wildly by brand, and this tells you instantly if your fabric is too stiff or too holey.
- Weave ends by splitting plush yarn tails into two thinner tails and weaving separately. This reduces bulky lumps under the surface.
- If you plan to add buttons or toggles, add a sturdier border (2–3 rounds) so the front edges don’t stretch.
- Light steam shaping (from a distance) can smooth seams without flattening the fluff. Avoid heavy wet blocking on plush yarn.
- For a cleaner silhouette, keep your panels slightly wider at the body and avoid over-lengthening the sleeves. Plush fabric adds visual bulk, and a balanced proportion looks more “boutique.”
Variations and Customization Ideas#
- Add pockets
- Crochet two rectangles in the same stitch and seam them onto the fronts at hip level
- Add a belt
- Crochet a long strap in sc rows until thick, then tie at the waist
- Add toggles or snaps
- Great for keeping the coat closed without a zipper
- Make it cropped
- Stop the body panels at hip length for a plush jacket style
- Make it longer
- Add extra rows for a dramatic winter coat vibe
- Change the hood
- Make a deeper hood for extra cozy, or a smaller hood for a lighter look
- Use a solid neutral
- Cream, taupe, or gray makes the shape the star and looks timeless
Benefits of This Crochet Project#
- Fast progress with chunky yarn
- Simple construction, perfect for a first garment-style crochet pattern
- Very cozy and warm
- High-end look without complicated shaping
- Easy to customize for any size, length, and sleeve style
- A satisfying, wearable DIY crochet project you’ll actually reach for
Internal Linking Suggestions#
- Best Plush Yarn for Crochet Wearables
- Crochet Gauge Guide for Beginners
- How to Crochet Straight Edges in Rows
- Mattress Stitch vs Whip Stitch for Crochet Seaming
- How to Add Pockets to Any Crochet Cardigan
FAQ#
Is this suitable for beginners?
Yes. This is one of the easiest garment-style crochet patterns because it uses rectangles and simple seams. The main learning curve is managing plush yarn, which is solved with stitch markers and row counting.
What yarn works best for a teddy coat look?
Super bulky chenille or jumbo plush yarn creates the soft, nubby teddy texture. A yarn with a firmer core tends to hold shape better for coats.
What stitch should I use for the warmest coat?
Single crochet makes the densest fabric. Half double crochet is a great balance of warmth and speed. If your fabric feels too open, use a smaller hook or switch to sc.
How do I size it without complicated math?
Use the made-to-measure method. Decide how oversized you want it, crochet your panels to those measurements, and adjust length by adding rows.
Will plush yarn stretch over time?
Some plush yarn relaxes slightly with wear. Adding edging, cuffs, or a sturdier border helps the coat keep its shape.
Can I add pockets or closures?
Absolutely. Pockets are easy rectangles. Closures can be toggles, snaps, buttons, or a belt, depending on the look you want.
Conclusion#
A hooded teddy coat is the ultimate cozy crochet pattern because the construction stays simple while the final look feels expensive and dramatic. With plush yarn, roomy sleeves, and a big hood, you get that dreamy “wrap yourself in a cloud” feel in a wearable piece you’ll love for years.
If you share your bust measurement, your desired coat length (hip, mid-thigh, or longer), and whether your yarn is Category 6 or 7, I can give you a super specific panel plan with suggested widths and approximate starting chain lengths so you can start crocheting confidently.


