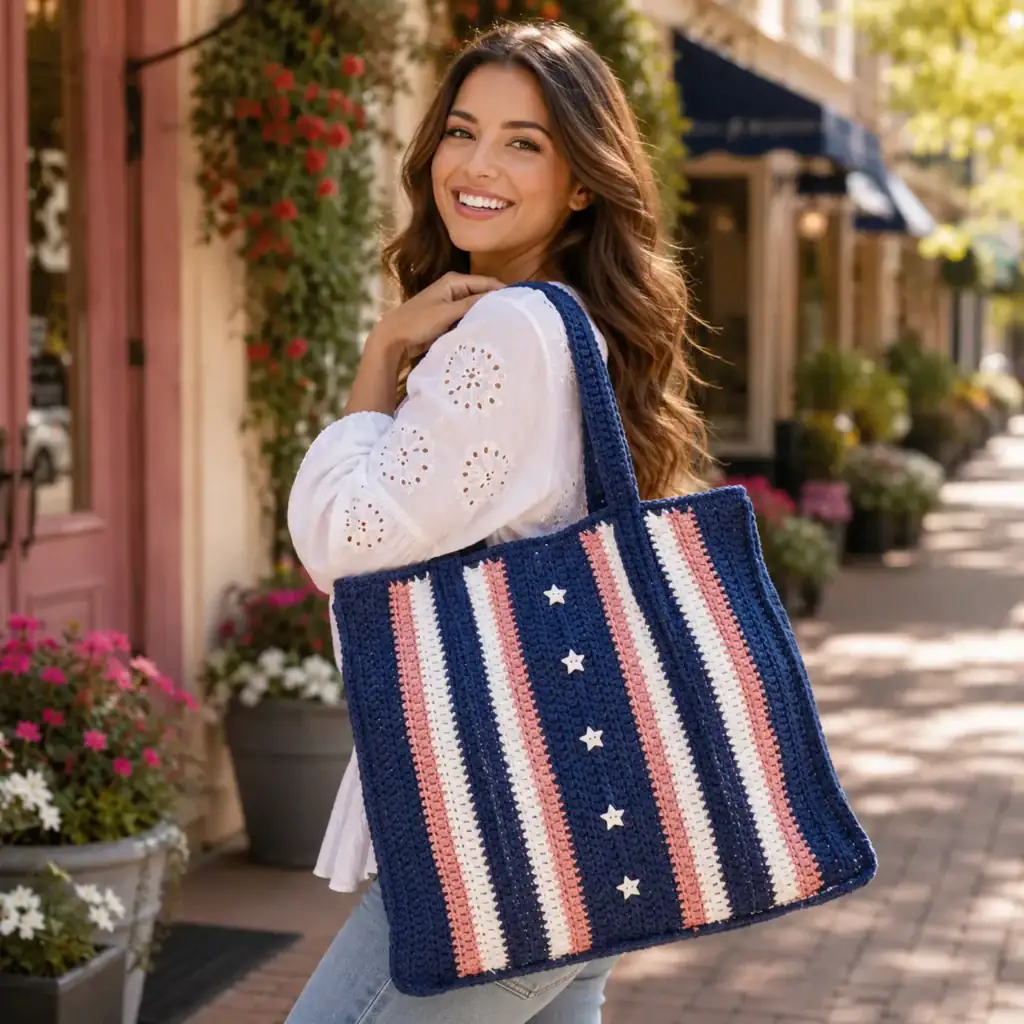
Introduction#
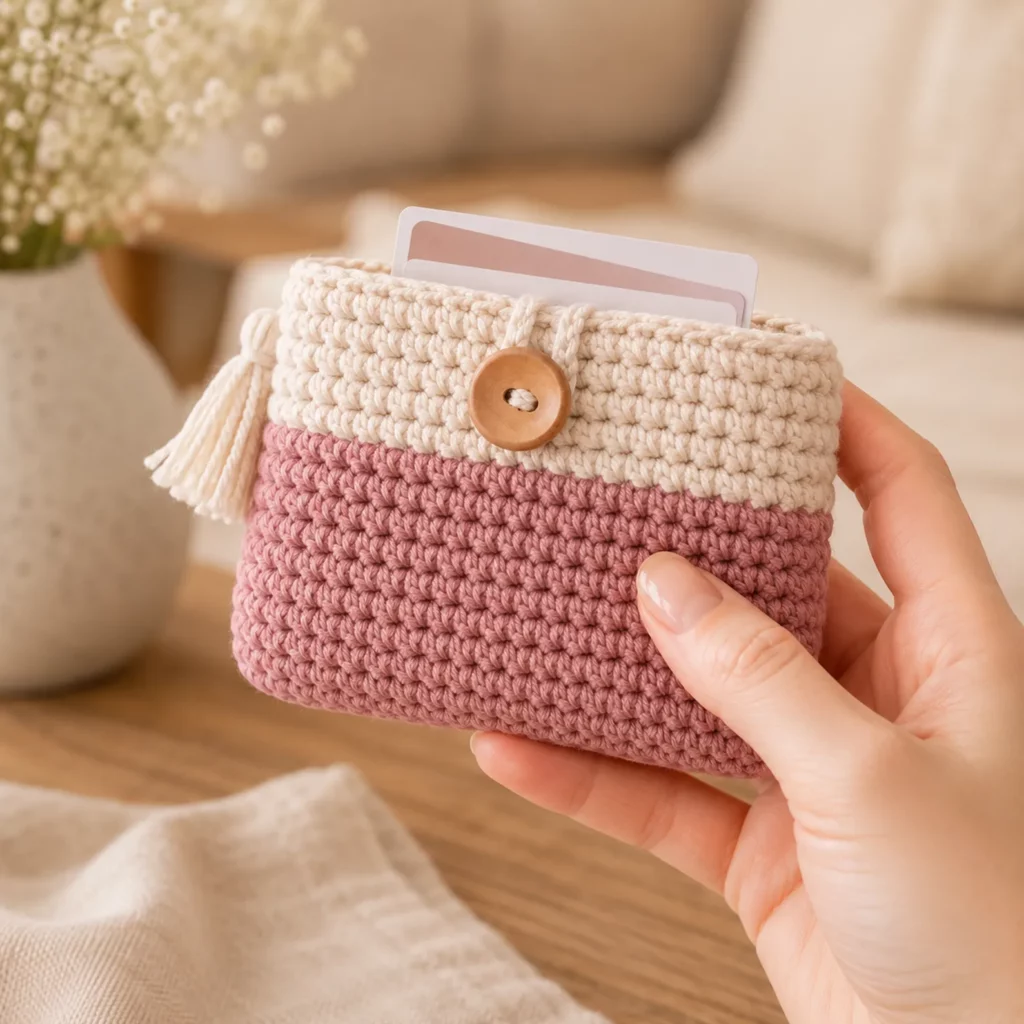
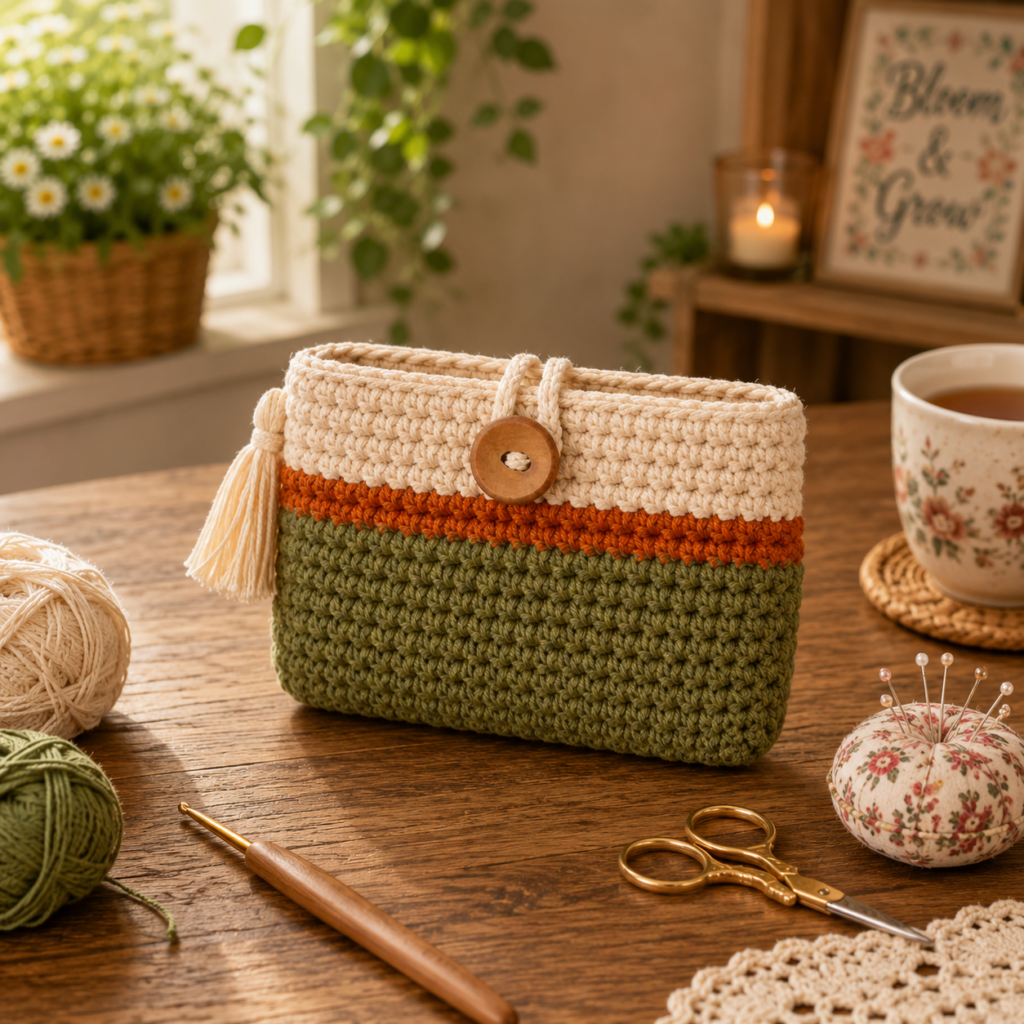
A tiny crochet wallet is one of those projects you’ll use every single day—and it’s also one of the most satisfying makes because it’s small, quick, and looks polished when it’s finished. Whether you want a simple card holder for errands, a gift for a friend, or a neat way to store cash and loyalty cards in your bag, this little pouch-style wallet is practical and adorable.
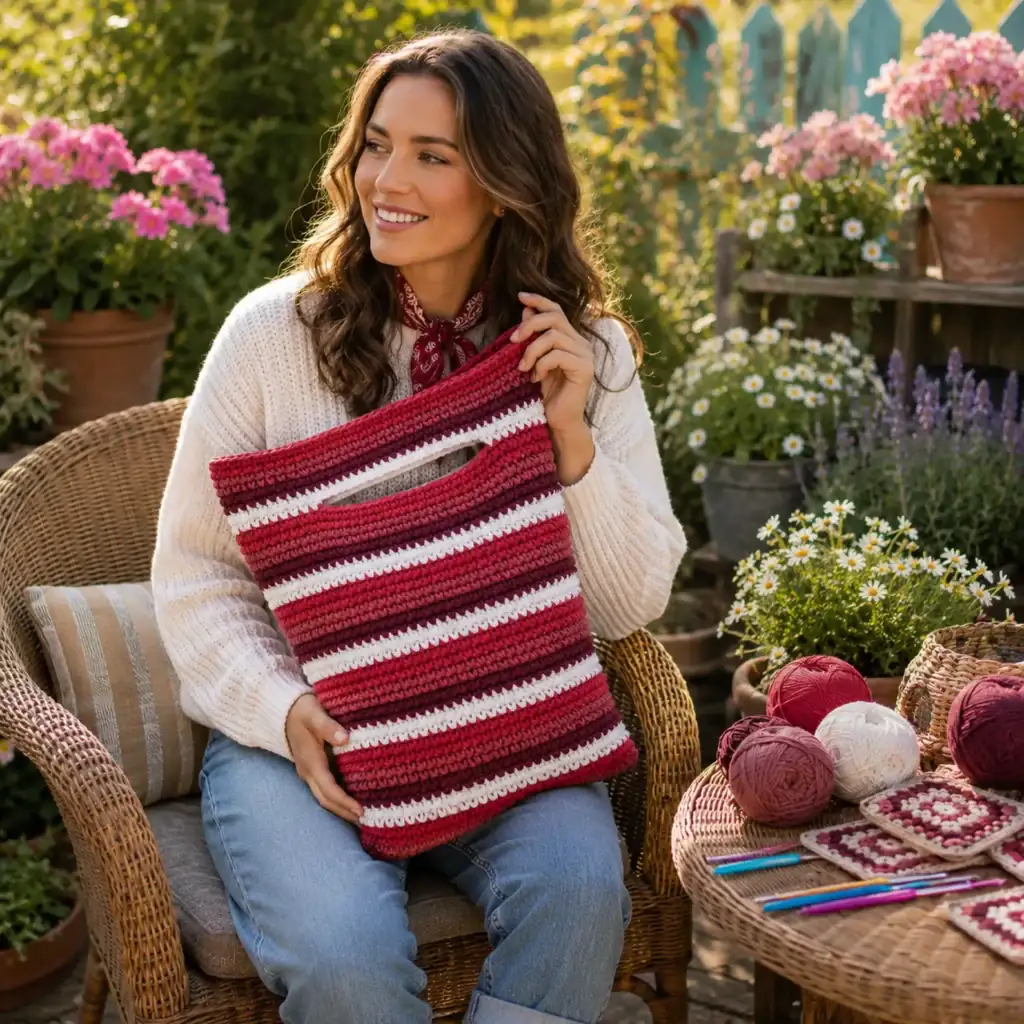
Explore more beginner bags crochet patterns in our pattern library.
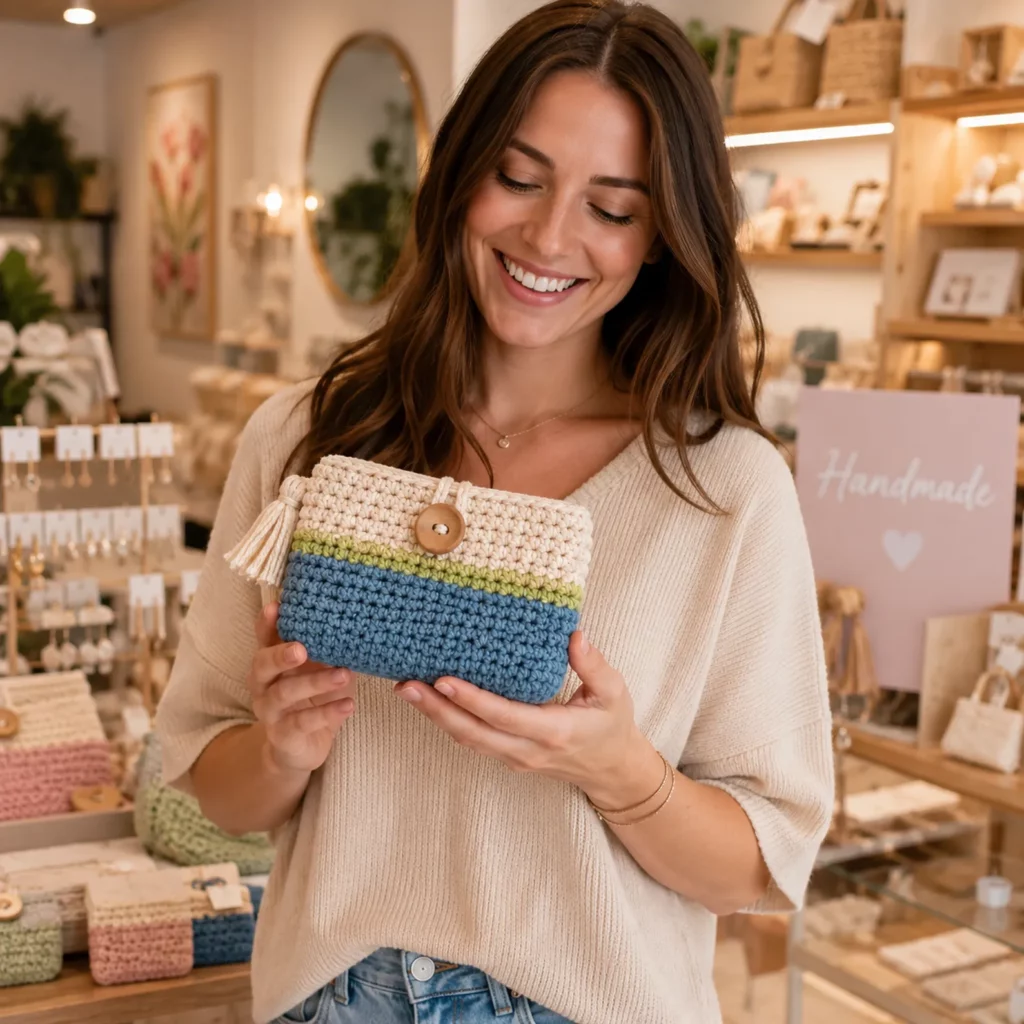
This crochet pattern creates a structured mini wallet with clean color blocking, a sturdy top band, a simple button-and-loop closure, and an optional tassel charm. The shape is compact but roomy enough for cards and folded bills, and the tight stitches make it feel durable (not floppy like a soft pouch).
Below you’ll find a full crochet tutorial style guide—materials, stitches, step-by-step instructions, and customization ideas—so you can make it your own while keeping a professional finish.
Detailed Description of the Crochet Pattern#
This project is a small rectangular wallet worked in rounds from an oval base, creating a seamless pouch with neat sides and a flat bottom. The design uses a three-color layout:
- A deep base color for the bottom half (gives a grounded look and hides wear)
- A narrow accent stripe (adds a modern pop)
- A light top band (clean, minimal, and perfect for the closure)
The closure is a crocheted loop attached to the top band that slips over a wooden button. A small tassel on the side adds a handmade charm and helps the wallet feel gift-ready.
Key design features
- Oval base for a flat bottom (wallet stands on a table)
- Tight stitches for structure and durability
- Simple color changes (no complicated tapestry work)
- Optional lining-friendly shape (easy to add fabric later)
- Button loop closure that’s beginner-friendly
Skill Level Explanation#
This is an easy crochet pattern for beginners.
You’ll be comfortable if you can
- Chain and single crochet
- Work in rounds
- Increase evenly (basic shaping)
- Change colors
- Sew on a button and weave in ends
You’ll learn or practice
- Making an oval base
- Keeping edges straight with a “turning round”
- Creating a neat top band and closure loop
- Simple finishing touches like a tassel
Materials Needed#
Yarn
Choose a yarn that holds shape. Cotton or a cotton-blend is ideal for wallets because it’s sturdy and doesn’t stretch too much.
Recommended yarn weight
- DK or worsted weight yarn (DK gives a slimmer wallet; worsted gives a thicker, sturdier feel)
Color suggestions
- Main color (bottom): olive/green, navy, charcoal, or tan
- Accent stripe: rust/orange, mustard, blush, or black
- Top band: cream/ivory or any light neutral
Yarn tips
- Cotton gives crisp stitches and a structured wallet
- Acrylic works, but choose a firm acrylic (some can stretch)
- If your yarn is very soft, go down a hook size for tighter fabric
Hook
Use a slightly smaller hook than the yarn label suggests to create a dense fabric.
- DK: 3.0–3.5 mm
- Worsted: 3.5–4.5 mm
Notions
- Stitch marker
- Tapestry needle
- Scissors
- Wooden button (about 18–25 mm looks great)
- Optional keyring clasp
- Optional fabric lining + needle/thread
- Optional zipper if you want a zip wallet variation
Stitches & Techniques Explained#
US terms
Abbreviations
- ch chain
- sl st slip stitch
- sc single crochet
- inc increase (2 sc in same stitch)
- BLO back loop only
How the oval base works
You crochet around a starting chain. You’ll increase at both ends each round. This creates a flat oval that becomes the wallet bottom.
Turning round for a crisp edge
Working one round in BLO creates a clean ridge. It helps the sides stand up neatly.
Neat color changes
Change color on the last yarn-over of the stitch before the new color. This keeps stripes clean.
Step-by-Step Instructions#
This free crochet pattern is written to be adjustable. The stitch counts below make a wallet that fits cards comfortably. You can easily size it up or down.
Finished size (approximate)
- Around 4 to 4.75 inches wide
- Around 3 to 3.5 inches tall
This varies with yarn and tension.
Foundation oval
With Main Color
Start
- Ch 23
Round 1
- Sc in 2nd ch from hook and in each ch across (21 sc)
- In last ch: 3 sc
- Work back along the underside of the chain: sc in each ch (20 sc)
- In last ch: 2 sc
Total: 46 sts
Round 2
- Sc in next 21 sts
- Inc, sc, inc (this spreads the increases around the curved end)
- Sc in next 20 sts
- Inc, sc, inc
Total: 54 sts
Round 3
- Sc in next 21 sts
- (sc, inc) three times around the end curve
- Sc in next 20 sts
- (sc, inc) three times around the other end
Total: 60 sts
Sizing note
If you want a wider wallet, start with a longer chain (add 2 chains for a little extra width). If you want it shorter, reduce the starting chain.
Turn the sides upward
Round 4
- Sc in BLO around (60 sts)
This creates a ridge and makes the wallet “stand up.”
Build the pouch body
Continue in Main Color
Rounds 5 to 10
- Sc around (60 sts each round)
Tip
Try your cards after round 9 or 10. If you want the wallet taller, add 1–2 more rounds here.
Accent stripe
Change to Accent Color
Round 11
- Sc around (60)
Round 12
- Sc around (60)
If you want a thinner stripe, do only 1 round in accent color.
Top band
Change to Top Band Color
Rounds 13 to 16
- Sc around (60)
Optional neat edge
For a slightly firmer top edge, work the final round as sl st around, but only if your slip stitches aren’t too tight.
Button loop closure
Find the center of the back of the wallet (opposite where you want the button). Place a marker.
Loop round (worked as a small tab)
- Attach yarn at the top edge center back
- Ch 10 to 14 (depending on button size)
- Sl st back into the same stitch to form a loop
- Sl st into the next 2 stitches on the wallet edge to anchor the loop
Fasten off and weave in securely.
Button placement
- Place button centered on the front of the wallet, about 0.5 inch below the top edge
- Sew button on tightly with matching thread or yarn
Test the closure
If the loop is too tight, add 2 more chains. If it’s too loose, shorten by 2 chains.
Optional side tassel
Tassel looks best in Top Band Color (or matching Main Color).
Quick tassel
- Wrap yarn around 2–3 fingers about 12–16 times
- Slide off, tie tightly at the top
- Cut the bottom loops
- Wrap a small strand around the tassel neck and tie off
- Trim evenly
Attach tassel to a side stitch near the top band.
Common Mistakes and How to Avoid Them#
Wallet is floppy
- Use cotton yarn
- Use a smaller hook for tighter stitches
- Add a fabric lining
- Add one extra round of BLO near the top band for structure
Oval base curls
- Your tension may be too tight or your increases too few
- Make sure you do the correct increases at both ends
- Block the base lightly before finishing
Stripe looks jagged
- Change color on the final yarn-over of the stitch
- Pull the new color snugly
- Weave in ends neatly and avoid bulky knots
Button loop stretches out
- Use a slightly smaller hook for the loop
- Crochet the loop with tight chains
- Stitch the base of the loop down with extra passes for strength
Expert Tips for Better Results#
- Insert a piece of thin plastic canvas between lining and crochet for a super-structured wallet
- Use a smaller hook for the top band so it doesn’t flare
- Weave ends along the inside edge so they’re invisible from outside
- Add a simple lining to protect cards and keep the wallet crisp
- If you want a luxury finish, use a leather tag or a metal button instead of wood
Variations and Customization Ideas#
- Coin purse version: make it taller and add a zipper
- Card-only slim version: reduce the starting chain to make it narrower
- Wristlet: add a crocheted strap on one side
- Keychain pouch: add a small D-ring and a clasp
- Two-button closure: add a second button and a longer loop for a wrap look
- Personalized gift: stitch initials on the top band with surface embroidery
Benefits of This Crochet Project#
- Quick make that feels “high value” and giftable
- Uses small amounts of yarn (great stash buster)
- Practical for everyday use
- Teaches useful skills: oval base, color changes, clean finishing
- Easy to customize for different card counts and styles
Internal Linking Suggestions#
- Easy crochet pattern for a coin purse with zipper
- Crochet tutorial for oval bases (how to crochet around a chain)
- Crochet for beginners guide to neat color changes
- DIY crochet tassel tutorial
- Simple crochet pouch patterns roundup
FAQ#
What yarn is best for a crochet wallet
Cotton or cotton-blend yarn is best because it holds shape and doesn’t stretch too much. A firm acrylic can work too, but choose a tight stitch.
How do I make the crochet pattern bigger
Start with a longer foundation chain for a wider wallet, and add more rounds to make it taller. Keep the oval increase pattern the same.
Can I wash this wallet
Yes, especially if you used cotton or washable acrylic. Hand washing and air drying helps keep the shape crisp. If you add a lining, follow the lining fabric care too.
How do I add a lining
Cut fabric slightly larger than the wallet shape, sew a simple pouch, then hand-stitch it inside along the top edge. This improves structure and durability.
What if my button loop doesn’t fit
Adjust the number of chains. Add chains if it’s tight, remove chains if it’s loose. Always test with the button before weaving in ends.
Can I add a zipper instead of a button
Yes. Make the wallet slightly taller, then sew a zipper along the top edge by hand. A zipper turns it into a coin-and-card pouch.
Conclusion#
This mini wallet crochet pattern is the perfect blend of cute and practical. The clean color blocking makes it look modern, the tight stitches give it structure, and the button loop closure keeps everything secure. Whether you’re making one for yourself or a handmade gift set, it’s a project that looks polished without requiring complicated techniques.
If you want, tell me the yarn weight you use (DK, worsted, or plush) and whether you want it to hold just cards or cards plus coins, and I’ll adjust the stitch counts so it fits perfectly.