


Introduction#
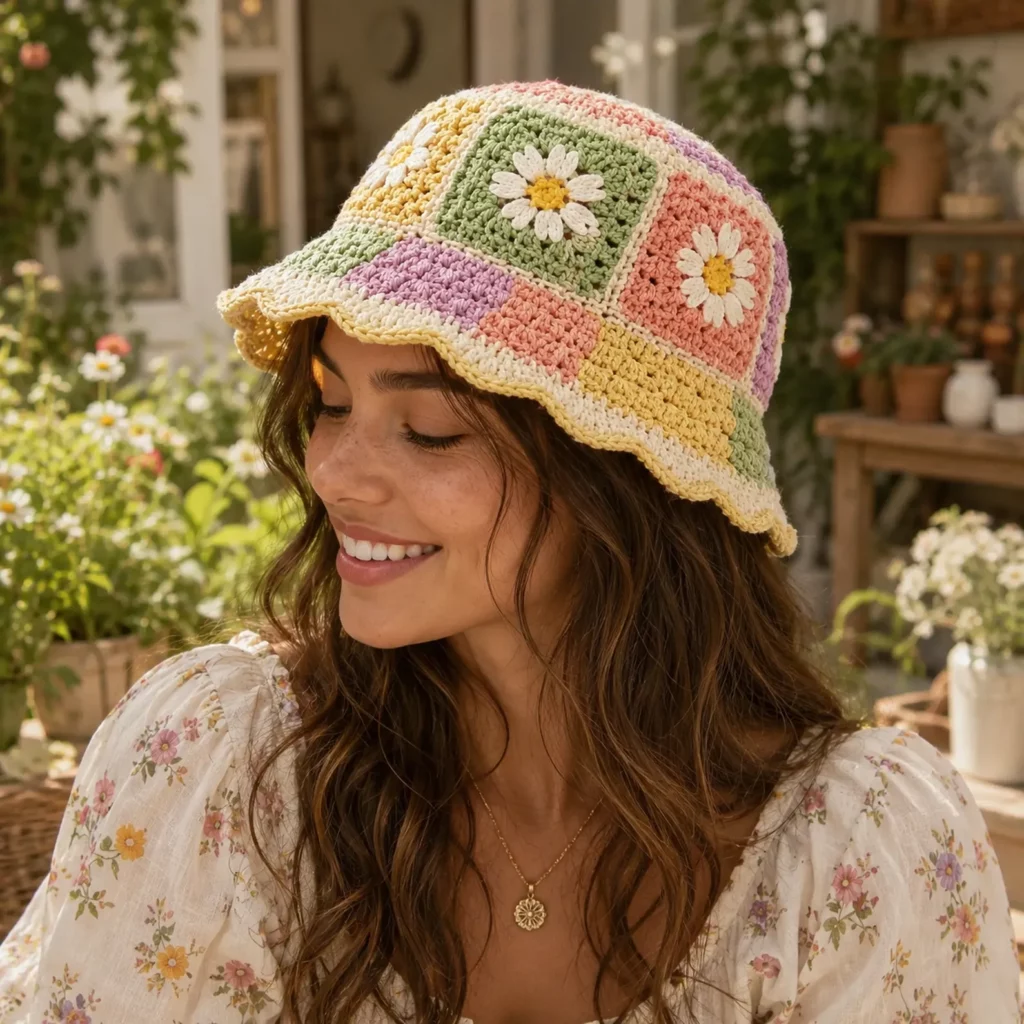
If you love granny squares but want something you can wear immediately (instead of committing to a whole blanket), a patchwork bucket hat is one of the most satisfying crochet projects you can make. It’s cheerful, customizable, and surprisingly practical. The bucket hat shape gives you real sun coverage, while the patchwork panels let you play with colors and textures in a way that feels modern and fun.
Explore more beginner granny squares crochet patterns in our pattern library.
This crochet pattern is built around a simple idea: make a handful of daisy-style squares, join them into a hat band, add a shaped crown on top, then finish with a structured brim and a cute scalloped edge. It looks like a boutique accessory, but the construction is beginner-friendly because it’s modular. You can crochet one square at a time, mix scraps, and adjust size by adding or removing panel rounds.
Below is a detailed crochet tutorial style guide that covers materials, stitch explanations, step-by-step instructions, sizing, joining tips, and finishing details so your hat looks polished and fits comfortably.
Detailed Description of the Crochet Pattern#
This bucket hat has three main sections, each doing a different job for fit and style.
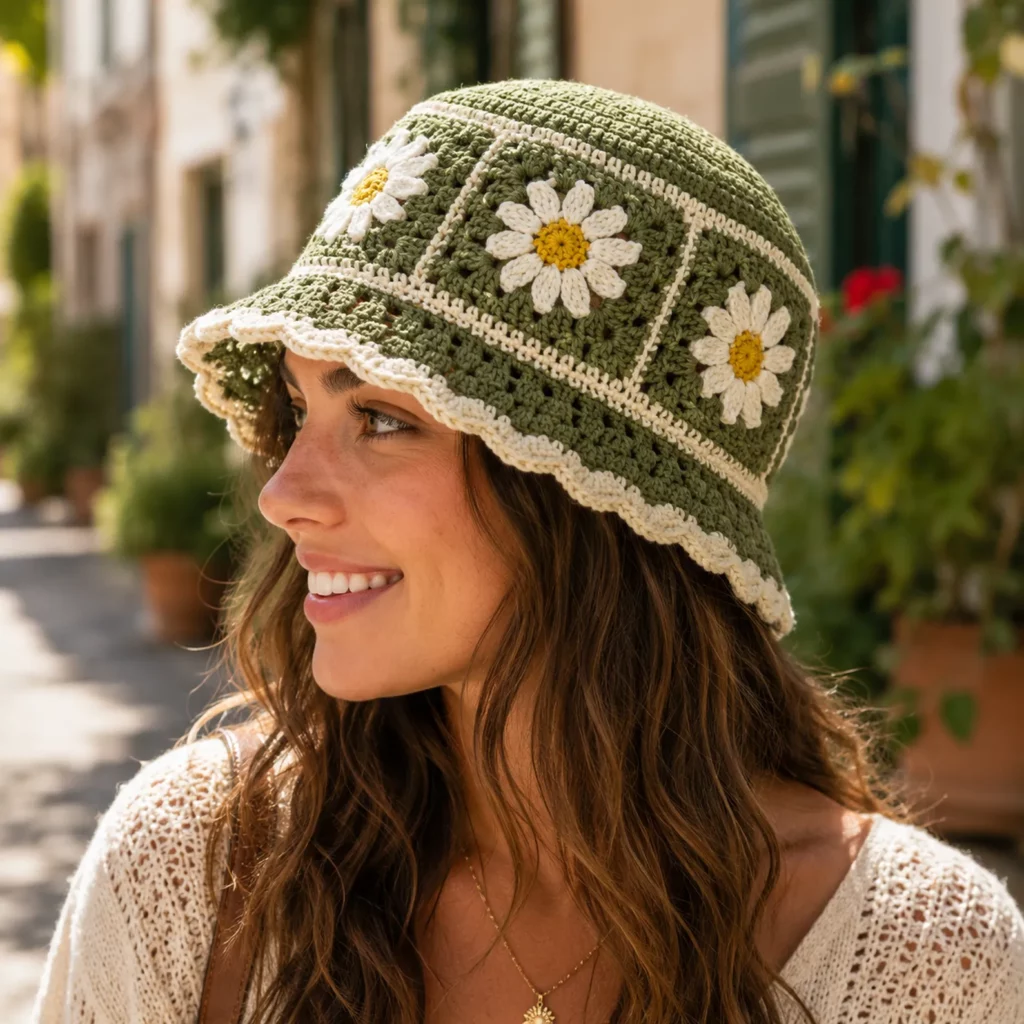
Patchwork side band
- The sides are formed using granny-style squares joined into a ring
- Some squares feature a daisy motif, while others can be solid or textured
- The patchwork makes the hat breathable and gives it a playful, handmade look
Rounded crown
- The top is crocheted as a flat circle that increases evenly
- Once it reaches the right diameter, it’s joined to the patchwork band
- This creates the clean bucket hat shape without complicated shaping
Structured brim with scallops
- The brim is worked in rounds from the bottom edge of the side band
- Increases create the flare so it sits like a bucket hat instead of folding inward
- A scalloped edge gives a sweet finish and helps the brim look intentional and “designed”
Style highlights you can customize
- Pastel patchwork palette or bold brights
- Daisy squares on every panel or just a few as accents
- Wider brim for more sun protection
- A stronger brim for structure or a softer brim for drape
This is the kind of easy crochet pattern that looks detailed, but the steps are repetitive and relaxing once you get going.
Skill Level Explanation#
Skill Level: Confident Beginner to Intermediate Beginner
You’ll do great if you already know
- Chain (ch), slip stitch (sl st)
- Single crochet (sc) and double crochet (dc)
- Working in the round
- Basic granny square construction
- Simple joining or seaming
Newer skills you’ll practice
- Keeping motif squares the same size
- Joining squares neatly so the hat band doesn’t twist
- Matching crown stitch count to band stitch count
- Shaping a brim that lies flat without rippling
- Scalloped edging that looks smooth and even
If you can make one granny square and count your stitches, you can make this crochet pattern.
Materials Needed#
Yarn
Cotton or cotton blends are ideal for hats because they hold shape and feel breathable.
Recommended yarn weights
- DK (Category 3) for a lighter, more delicate hat
- Worsted (Category 4) for a sturdier, more structured bucket hat
Fiber suggestions
- Cotton for crisp stitch definition and summer comfort
- Cotton-acrylic blend for a softer feel with decent structure
- Avoid super stretchy yarns if you want the hat to keep its shape
Color planning
You’ll typically need
- A neutral joining/border color (often cream/white)
- 4–6 pastel shades for patchwork panels
- A flower center color (yellow)
- A petal color (white/cream)
Yardage estimate
Because this is patchwork, yardage depends on square count and brim width. A reliable range is
- DK: 250–450 yards (230–410 m) total
- Worsted: 200–350 yards (180–320 m) total
If you add a wider brim, plan for the higher end.
Practical yarn tip
Make one full square and one brim section sample, then weigh them. Multiply by your planned number of squares and brim rounds to estimate yarn more accurately.
Hook
Choose a hook that makes a firm fabric (not floppy) so the hat holds shape.
- DK: 3.5–4.0 mm
- Worsted: 4.0–5.0 mm
If your stitches look loose or the hat feels stretchy, go down a hook size.
Notions
- Stitch markers
- Tapestry needle
- Scissors
- Measuring tape
- Optional: blocking mat and pins
- Optional: thin elastic thread for a snug inner band
- Optional: fabric stiffener spray for brim structure
Stitches & Techniques Explained#
Common Abbreviations
- ch = chain
- sl st = slip stitch
- sc = single crochet
- hdc = half double crochet
- dc = double crochet
- inc = increase
- sp = space
- ( ) = repeat
- = stitch count
Granny Square Corner Structure
Most squares rely on the same corner formula
- (3 dc, ch 2, 3 dc) in each corner space
Keeping corners consistent is the secret to squares that join neatly.
Daisy Motif Basics
A daisy square typically has
- A small round center
- Petals made with chained loops or tall stitches
- A background round that turns the circle into a square
The petals are decorative, but the background rounds do the structural work.
Joining Squares for Wearables
For hats, you want joins that feel comfortable and don’t twist.
Best joining methods
- Mattress stitch for a flat, almost invisible seam
- Whip stitch through outer loops for a sturdy, simple join
- Slip stitch join for a decorative ridge (looks cute but can feel thicker)
Brim Shaping Rules
A brim ripples when there are too many increases. It curls when there aren’t enough increases. The sweet spot depends on yarn and tension, so the best approach is
- Increase evenly
- Check for ripples every round
- Adjust increase frequency slightly if needed
Scalloped Edge
A scallop is usually created by clustering stitches in one spot, then anchoring with a slip stitch.
Classic scallop repeat
- (skip 1, 5 dc in next, skip 1, sl st in next) repeat
You can adjust scallop size by using 4 dc instead of 5.
Step-by-Step Instructions#
Finished Size
This crochet pattern can fit kids to adults depending on square size and crown diameter.
Common adult head circumference
- 21–23 inches (53–58 cm)
Crown diameter guide
Crown diameter (inches) ≈ head circumference ÷ 3.14
Example: 22-inch head ÷ 3.14 ≈ 7-inch crown diameter
Notes Before You Start
- Make one daisy square and block it before committing to the full hat
- Use the blocked square measurement for planning
- Keep all squares the same stitch count and number of rounds
- Weave in ends as you go because patchwork creates many ends
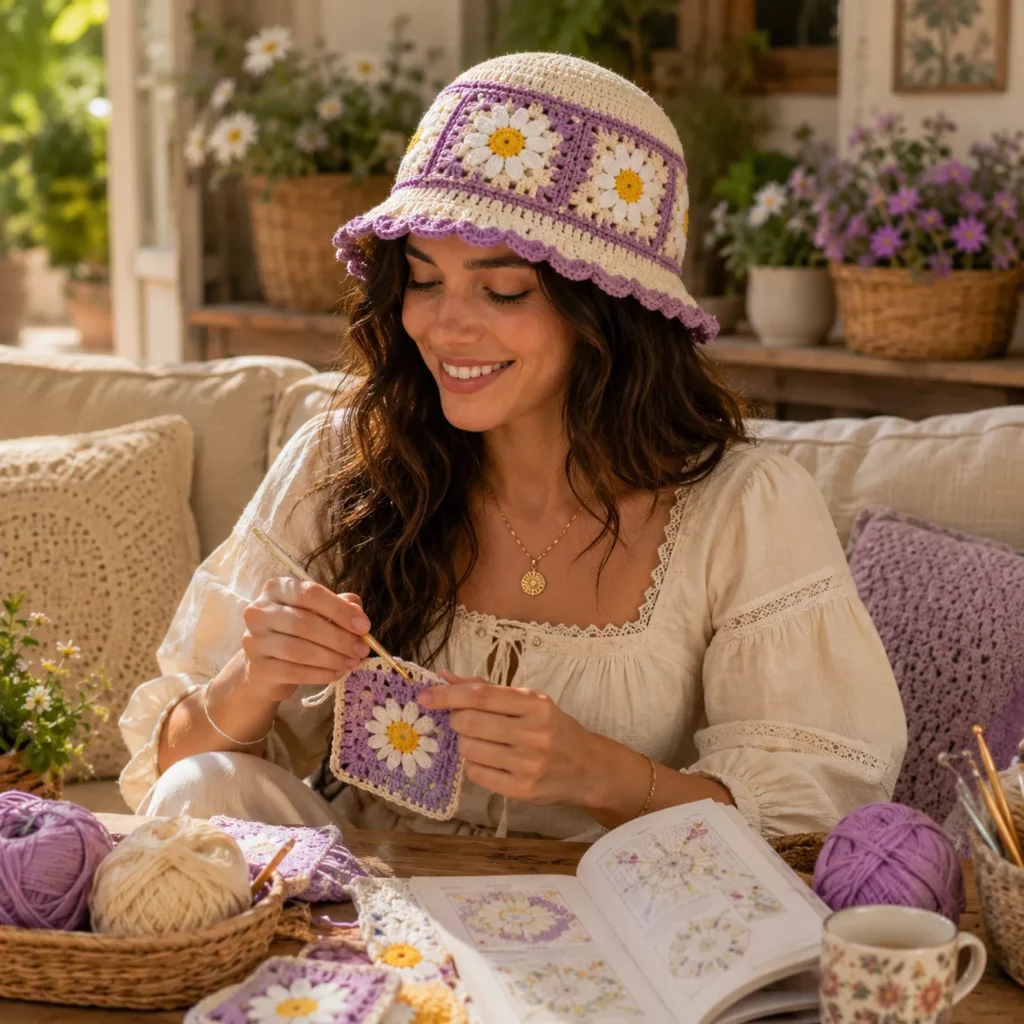
Daisy Granny Square Pattern (Make 6–10)
This square is designed to be easy, flat, and wearable.
Center (yellow)
Round 1: MR, ch 2, 12 dc in ring, join
Round 2: ch 1, 2 sc in each stitch around, join
Fasten off for a clean color change
Petal loops (white/cream)
Join petal color in any stitch
Round 3: (sl st in same st, ch 4, sl st in next st) repeat around
You’ll have 12 loops
Fill petals (white/cream)
Sl st into first loop
Round 4: (sc, hdc, 3 dc, hdc, sc) into loop, sl st into next loop, repeat around
Fasten off
Square it up (pastel background color)
Join background color in any space between petals
Round 5: ch 3, 2 dc in same sp
Work 3 dc clusters in spaces between petals, and form corners by placing (3 dc, ch 2, 3 dc) at four evenly spaced points
Join
Round 6 (optional for larger squares)
Work granny clusters around with corners as usual until square reaches your target size
Fasten off
Sizing tip
Your squares should be large enough that 6–10 squares can wrap around the head circumference you want. Many hats use 6 squares for smaller sizes or 8 squares for adult sizes, depending on square size.
Solid or Textured Squares (Optional, Make 0–4)
If you want variety, swap some daisy squares for solid squares.
Basic solid granny square
Round 1: MR, ch 3, 2 dc, ch 2, (3 dc, ch 2) repeat 3 more times, join
Round 2+: Work granny clusters with corners until it matches daisy square size
Fasten off
Textured square idea
Use lemon peel stitch (sc, dc repeat) in a square format, then edge with sc to match size.
Plan Your Side Band Layout
Choose how many squares go around.
A simple planning method
- Measure your blocked square width
- Multiply by the number of squares you want around
- Aim for head circumference minus about 0.5–1 inch (1–2.5 cm) for a snug fit because the hat relaxes slightly
Example
If a blocked square is 3 inches wide
- 7 squares around = 21 inches
That’s a good snug adult fit
Join Squares Into a Ring
Arrange squares in the order you like, then join into a strip, then join ends to form a ring.
Recommended join for comfort
Mattress stitch or whip stitch through outer loops.
Joining steps
- Place squares right sides together
- Stitch along edges with even tension
- Keep corners aligned so the seams look tidy
- Join the final seam to form a ring
Crochet a Stabilizing Round Around the Top and Bottom of the Band
This step makes it much easier to attach the crown and brim.
Top edge round
- Join your neutral/border color to any seam
- Work sc evenly around the top edge of the ring
- Place 1 sc into each stitch along square tops, and 1–2 sc in seam areas as needed
- The goal is an even count that is divisible by 6 or 8 for crown attachment ease
Bottom edge round
- Repeat sc evenly around the bottom edge
- This becomes the foundation for the brim
Tip for neatness
If your squares have gaps at corners, place an extra sc in those spaces so the edge looks smooth.
Crown (Top Circle)
Work the crown as a flat circle, then attach it to the top edge of the square ring.
Crown in dc (quick and smooth)
Round 1: MR, ch 3, 11 dc in ring, join (12 dc)
Round 2: ch 3, 2 dc in each stitch around, join (24)
Round 3: ch 3, (dc, 2 dc in next) around, join (36)
Round 4: ch 3, (dc in next 2, 2 dc in next) around, join (48)
Round 5: ch 3, (dc in next 3, 2 dc in next) around, join (60)
Round 6: ch 3, (dc in next 4, 2 dc in next) around, join (72)
Continue until crown diameter matches your target size.
Attach crown to band
- Pin crown to the top of the square ring evenly
- If stitch counts differ slightly, distribute small adjustments by skipping or adding a stitch occasionally, spread evenly
- Seam with whip stitch or sc join
Professional finish tip
A sc join (crocheting through both loops of crown and band) creates a strong seam and looks neat.
Brim
Work brim rounds from the bottom edge sc round of the band.
Brim Round 1
- Ch 1, sc around, join
This stabilizes the brim start
Brim Round 2
- Ch 2, hdc around with increases every 6th stitch (2 hdc in same stitch), join
Brim Round 3
- Ch 2, hdc around with increases every 7th stitch, join
Brim Round 4
- Ch 2, hdc around with increases every 8th stitch, join
Continue until brim width is what you want
- Short brim: about 1.5–2 inches (4–5 cm)
- Medium brim: about 2–2.75 inches (5–7 cm)
- Wide brim: about 3–4 inches (7.5–10 cm)
If the brim ripples
Increase less frequently
- Try every 9th or 10th stitch for the next round
If the brim curls upward
Increase a little more frequently
- Try every 6th stitch again for one round
Scalloped Edge
Switch to a border color if you want the scallops to pop.
Classic scallop round
- Sl st to next stitch
- (skip 1, 5 dc in next stitch, skip 1, sl st in next) repeat around
Fasten off and weave ends.
If you want softer scallops
Use 5 hdc instead of 5 dc.
Common Mistakes and How to Avoid Them#
Squares are different sizes
- Count your rounds and corners
- Block the first few squares and measure
- Use the same hook and yarn weight throughout
Hat band twists
- Lay squares in a line and join carefully
- Make sure all squares are oriented the same way
- Use stitch markers on corners so you don’t rotate a square accidentally
Crown doesn’t match band
- Add a stabilizing sc round to the top edge of the band
- Adjust with small skips or extra stitches spread evenly
- Pin before seaming so you can distribute evenly
Brim ripples
- Too many increases
- Reduce increase rate on the next round
- Switch to sc for one round to tighten structure
Brim flops
- Use cotton
- Use a smaller hook for brim rounds
- Add one extra sc round before scallops
- Lightly block the brim flat
Expert Tips for Better Results#
- Block your squares before joining. This is the easiest way to make the hat look polished instead of lumpy.
- Use a single neutral border color to join and edge the hat. It makes patchwork look intentional and “designed.”
- Weave ends as you go. Patchwork hats can create dozens of ends, and finishing becomes overwhelming if you wait.
- For a more structured hat, crochet the brim in sc instead of hdc, or use a smaller hook for brim rounds.
- If you want a snug fit without squeezing, thread a thin elastic through the inner sc round at the band seam line.
Variations and Customization Ideas#
- Make it a pastel daisy theme by using the same petal and center colors across all squares
- Make it a retro bright theme with hot pink, orange, and teal backgrounds
- Add more daisies by replacing all solids with daisy squares
- Create a striped brim by changing colors every brim round
- Add a chin tie by crocheting two cords and attaching them at the band sides
- Make a child version by using fewer squares around and a smaller crown diameter
Benefits of This Crochet Project#
- Modular and portable because you crochet squares one at a time
- Great stash-buster for leftover pastel yarn
- Breathable and comfortable for warm weather
- Easy to customize in size, color, and brim width
- Looks boutique and unique with simple stitches
- A crochet pattern you can repeat for gifts or craft fairs
Internal Linking Suggestions#
- How to Crochet a Granny Square for Beginners
- How to Join Granny Squares Neatly
- Crochet Hat Sizing Guide Using Crown Diameter
- How to Crochet a Scalloped Edge
- Best Cotton Yarn for Summer Crochet Projects
FAQ#
Is this crochet pattern suitable for beginners?
Yes. If you can make a granny square and single crochet in the round, you can make this hat. The construction is simple and modular.
How many squares do I need for a bucket hat?
Most hats use 6 to 10 squares around the band depending on square size and head circumference. Measure your blocked square and plan from there.
What yarn works best for a crochet bucket hat?
Cotton or cotton blends are best for structure and comfort. Acrylic can work but may be stretchier and less crisp.
How do I make the brim stiffer?
Use cotton, go down a hook size for the brim rounds, add an extra sc round, and lightly block the brim flat.
Can I make this hat in child sizes?
Yes. Use fewer squares around and stop the crown increases earlier. Keep brim rounds shorter for a smaller silhouette.
How do I keep the hat from stretching out?
Make the band slightly snug, add a stabilizing sc round, and consider threading elastic through the inner edge.
Conclusion#
A daisy patchwork bucket hat is one of the cutest ways to turn granny squares into a wearable accessory. This crochet pattern gives you a structured crown, a colorful patchwork band, and a scalloped brim that feels playful and finished. Take your time with consistent square sizing, join neatly, and don’t skip the stabilizing rounds—those details are what make the final hat look polished.
If you tell me your head circumference and your blocked square size, I can map out the exact number of squares around, the crown diameter target, and how many brim rounds to crochet for the fit and brim width you want.


