Introduction#
Baby booties are one of the most rewarding crochet projects because they’re small, fast, and unbelievably giftable. But let’s be honest—many booties are either too floppy, too tight, or they fall off the second a baby kicks. The secret to a great pair isn’t fancy stitches. It’s a good sole shape, a snug ankle, and a clean toe build that holds its form.
Explore more beginner baby crochet patterns in our pattern library.
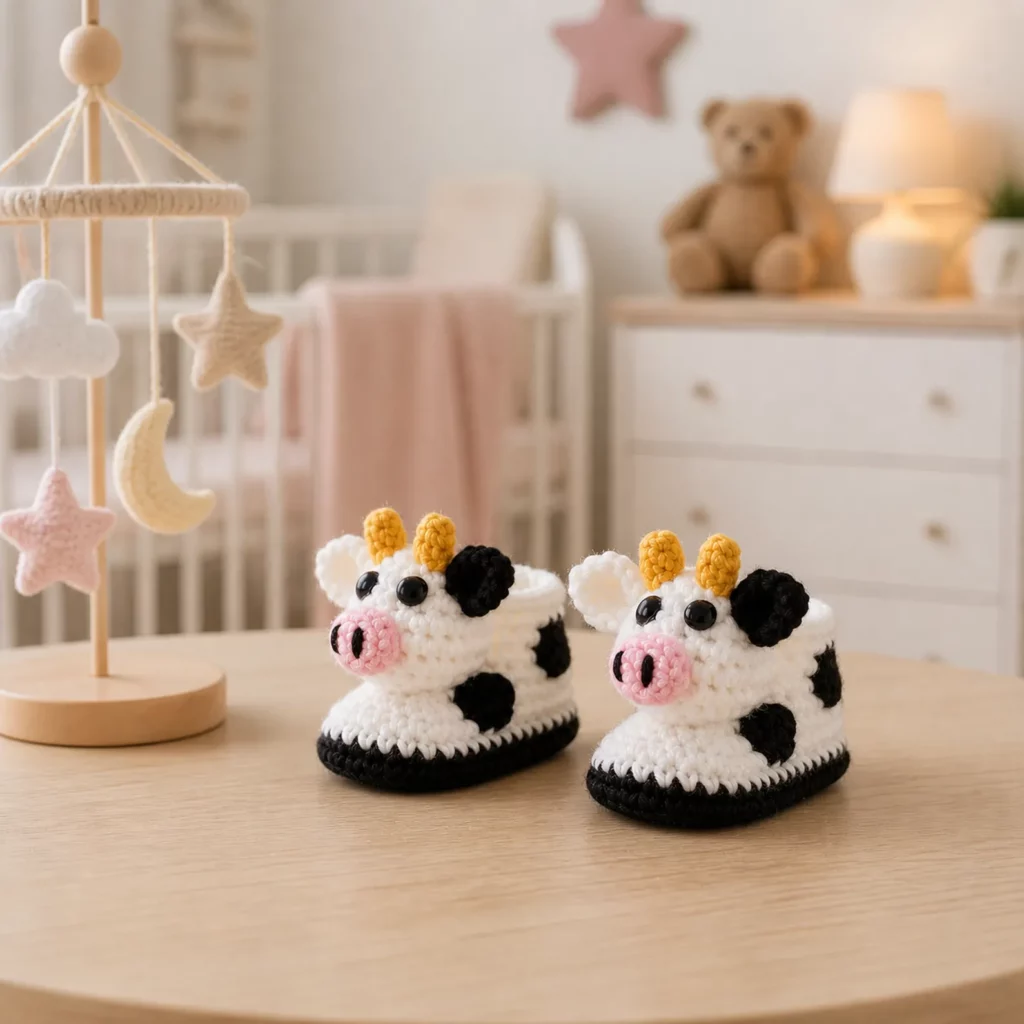
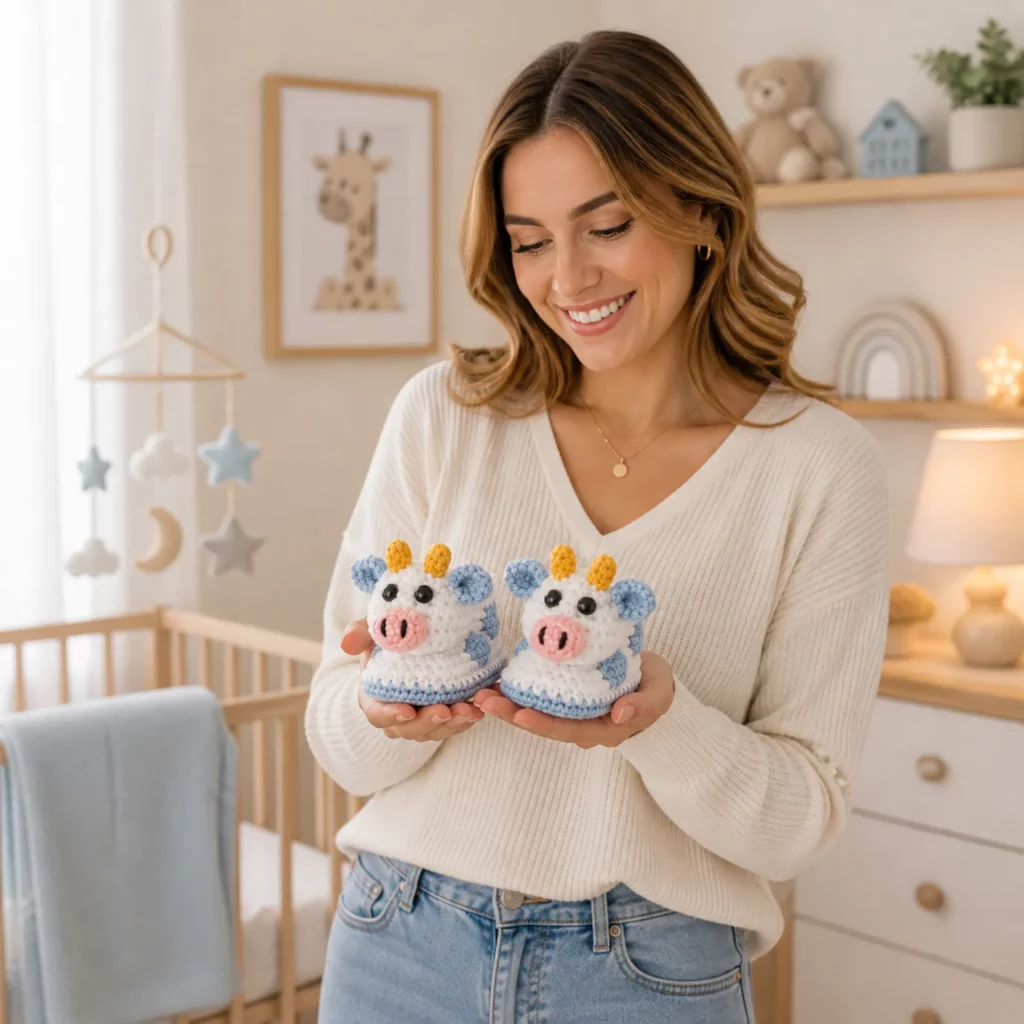
This crochet pattern creates the cutest little cow booties: a white base with black spots, a pink snout, tiny horns, and soft ears. They’re cozy, breathable, and the animal face turns a practical item into a keepsake. Whether you’re making them for a baby shower, first birthday photos, or just because you love tiny things, this is a joyful DIY crochet project that looks impressive without being complicated.
Detailed Description of the Crochet Pattern#
These are cow-themed baby booties (or tiny slippers) made with a traditional bootie construction:
- Oval sole worked in the round for comfort and stability
- Side wall “fold round” (worked in BLO) to create crisp structure
- Toe shaping using decreases to form a rounded “muzzle” front
- Ankle cuff that sits snugly to help the booties stay on
- Cow face details added as small appliqués: snout, spots, ears, horns
What makes these booties special
- The cow “face” is built right into the toe area, so it reads clearly from the front.
- The black spots are simple appliqués—easy to place and customize.
- The snout is a soft oval patch with stitched nostrils (no bulky embroidery required).
- The cuff can be made plain or ribbed depending on your skill level and preferred fit.
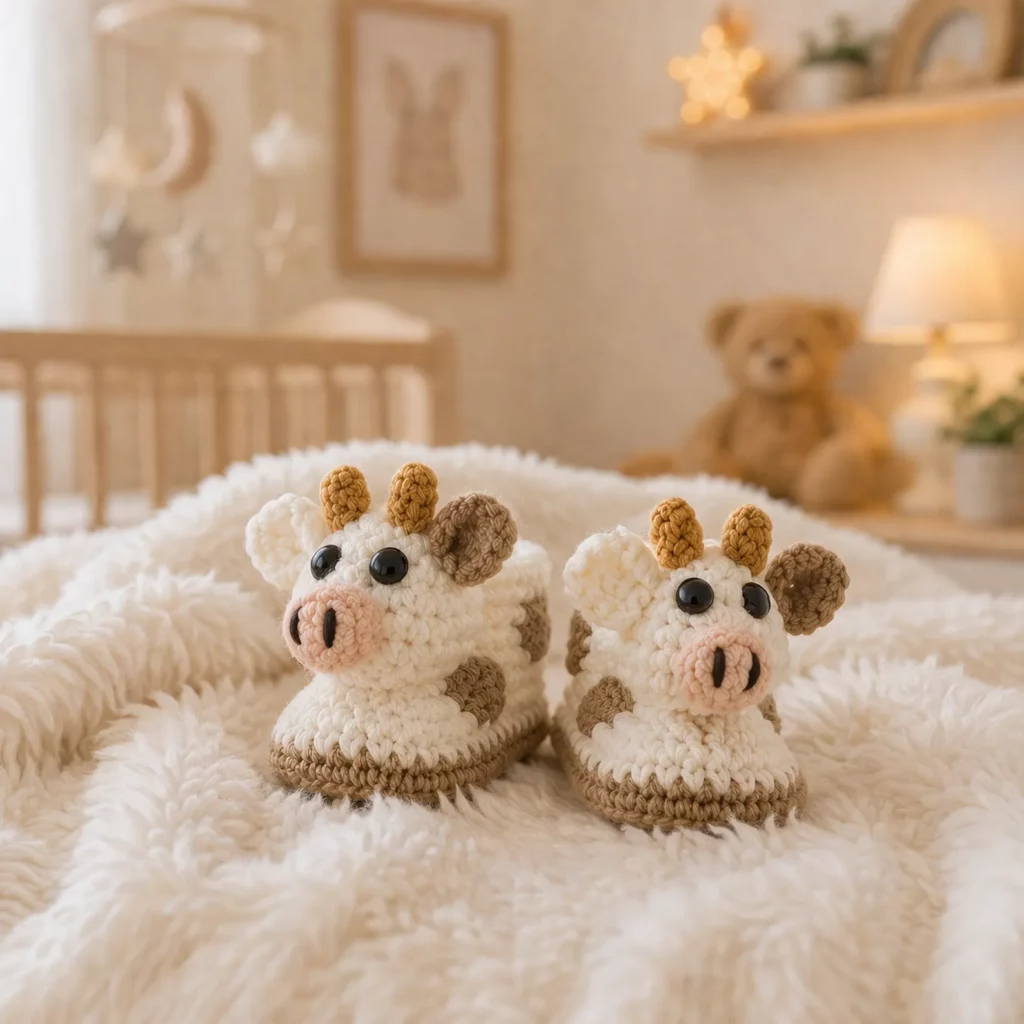
Finished look and fit
These booties are designed for comfort + photo-ready cuteness. They’re slightly taller than basic slippers, with a snug ankle opening that helps them stay on tiny feet.
Skill Level Explanation#
This is an easy-to-intermediate crochet project.
Great for beginners who can:
- crochet single crochet (sc) and half double crochet (hdc)
- work increases and decreases
- crochet around an oval
- sew on small pieces (appliqués)
Intermediate elements (still very manageable):
- shaping the toe area with decreases
- neat placement of facial features and spots
- making two booties that match (the real challenge of baby footwear!)
If you’ve made a hat or a simple pouch, this easy crochet pattern is a fun and realistic next step.
Materials Needed#
Yarn
For baby booties, choose yarn that’s soft, washable, and not scratchy.
Best yarn options:
- Worsted weight (#4) acrylic (soft, affordable, easy-care)
- Cotton-acrylic blend (breathable and sturdy)
- Baby yarn in DK (#3) (if you want a smaller, finer bootie)
Colors needed:
- White/cream (main)
- Black (spots + optional sole edge)
- Pink (snout)
- Mustard/tan (horns)
- Optional: a tiny bit of light pink for cheeks (super cute)
Yardage estimate (pair):
- White: 120–180 yards
- Black: 20–40 yards
- Pink: 10–20 yards
- Horn color: 5–10 yards
Hook
Use a hook that creates a dense fabric (important for slippers/booties):
- Worsted yarn: 3.5–4.0 mm
- DK yarn: 3.0–3.5 mm
Tip: If you see holes where toes might poke through, go down a hook size.
Notions
- Stitch markers (highly recommended)
- Yarn needle
- Scissors
- Measuring tape
Optional (for extra fit + safety)
- Thin elastic thread (to weave into the cuff)
- Non-slip dots (if using as toddler slippers)
- Fabric lining is optional but usually unnecessary for baby booties
Stitches & Techniques Explained#
Abbreviations (US terms)
- ch = chain
- sl st = slip stitch
- sc = single crochet
- hdc = half double crochet
- dc = double crochet
- inc = increase (2 stitches in one stitch)
- dec = decrease (sc2tog or hdc2tog)
- BLO = back loop only
- st(s) = stitch(es)
- rep = repeat
Oval sole basics
An oval sole is worked by crocheting down one side of a chain, increasing at the end, then crocheting back along the other side and increasing again. The increases stay at the toe curve and heel curve, while the long sides stay mostly even.
Fold round (BLO)
Working one round in BLO sc creates a crisp corner where the sole turns upward into the sides. This helps the bootie hold shape and look more professional.
Toe shaping with decreases
Toe shaping usually happens across the front third of the bootie. You work decreases in that area to pull the opening inward and form a rounded toe.
Appliqués for clean color details
Instead of changing colors mid-round (which can look bumpy), the cow details (snout and spots) are made separately and sewn on. This keeps everything neat and easy.
Step-by-Step Instructions#
Pattern notes
- Written in US terms
- Make 2 soles, then build sides and toe shaping
- Sizes are flexible (see sizing section below)
- Use a stitch marker to track rounds
Sizing (baby)
Instead of locking you into one exact size, this pattern uses a simple method:
- Crochet the sole until it matches the foot length you want.
- Then follow the same wall/toe/cuff steps.
Common sole lengths
- Newborn: 3.5–4″
- 0–3 months: 4–4.5″
- 3–6 months: 4.5–5″
- 6–12 months: 5–5.5″
Fit rule: Crochet sole about ¼ inch shorter than foot length (crochet relaxes).
Part 1: Sole (Make 2, White)
Foundation: Ch 11 (adjust for size)
- For larger sizes: ch 12–14
- For smaller sizes: ch 9–10
Rnd 1: Sc in 2nd ch from hook and across to last ch.
In last ch: 3 sc.
Working on underside of chain: sc back across.
In last ch (at start): 2 sc. (Oval formed)
Rnd 2: Inc in first st, sc across to toe curve.
At the 3-sc toe curve: inc in each of the 3 sts.
Sc across underside to heel curve.
At heel curve (the 2-sc end): inc in each of the last 2 sts.
Rnd 3: (sc, inc) at start, sc across to toe curve.
At toe curve: (sc, inc) in each of the 3 curve sts.
Sc across underside; mirror increases at heel curve.
Continue rounds until sole length matches your target size.
Fasten off after you reach the size.
Part 2: Side Wall (White)
Join yarn at heel.
Wall Rnd 1 (Fold Round): BLO sc around.
(This creates the crisp “turn.”)
Wall Rnds 2–4: Sc around (working in both loops now).
At this point, your piece should look like a shallow bowl.
Part 3: Toe Shaping (White)
Place stitch markers:
- Mark the center front stitch.
- Mark a toe section that spans roughly one-third of the front.
Toe Rnd 1:
Sc to first toe marker.
Across toe section: sc, dec repeat until toe section ends.
Sc around the rest of the round.
Toe Rnd 2:
Repeat, adding one more decrease if the opening still feels wide.
Try it against a baby sock or approximate foot size: the toe should feel snug but not tight.
Part 4: Build the Ankle (White)
Ankle Rnds: Sc around for 2–4 rounds (depending on desired height).
For a taller bootie, add more rounds.
Part 5: Cuff (Optional Rib Look)
Option A (simple):
1 more round of sc, then fasten off.
Option B (ribbed cuff, snug fit):
Work one round BLO sc around the opening.
Then work one more round of sc.
Optional elastic trick: Weave thin elastic thread through the cuff stitches to help the booties stay on.
Part 6: Cow Snout (Pink)
Make a small oval patch.
Ch 6
Rnd 1: Starting in 2nd ch: 4 sc, 3 sc in last ch.
Other side: 3 sc, 2 sc in last ch.
Rnd 2: Inc, 3 sc, inc x3, 3 sc, inc x2.
Fasten off leaving a tail.
Nostrils: Embroider two small vertical stitches in black.
Sew snout centered on the toe front.
Part 7: Cow Spots (Black)
Make 4–6 small spots per bootie (or fewer for a minimalist look).
Spot (small, make several):
MR, 6 sc, sl st to close. Fasten off.
For larger spots:
- MR, 8 sc or MR, 10 sc.
Sew spots randomly on sides and back (avoid the sole).
Part 8: Ears (Make 4, White)
Ear (simple):
Ch 6
Row 1: Sc in 2nd ch and across (5)
Row 2: Ch 1, sc across (5)
Fasten off.
Optional: add a tiny black spot on one ear for extra personality.
Sew ears near the top front sides of the bootie.
Part 9: Horns (Make 4, Tan/Mustard)
Horn (tiny cone):
MR, 4 sc (4)
Rnd 2: (sc, inc) twice (6)
Rnd 3: sc around (6)
Fasten off leaving tail.
Lightly stuff (optional), then sew two horns between/near the ears.
Part 10: Eyes (Black)
You can choose:
- Embroidered eyes (best for baby-safe)
- Small sew-on buttons (cute, but use only for older kids and with secure stitching)
For embroidered:
- Make two small vertical stitches above the snout.
Part 11: Optional Sole Edge Contrast (Black)
If you want that crisp black “sole outline,” join black yarn at the base edge and work one round of sl st or sc around the sole edge.
Common Mistakes and How to Avoid Them#
- Booties fall off easily:
Add a ribbed cuff, weave in elastic, or make the ankle slightly narrower with one extra decrease round. - Sole ruffles:
Too many increases along the long sides—keep increases only at toe/heel curves. - Toe is too pointy:
Decrease too aggressively. Reduce the number of decreases in Toe Round 1. - Toe is too wide:
Add one extra toe shaping round or increase decrease frequency in the toe section. - Cow face looks off-center:
Mark the toe center line first, then place snout, then eyes. - Pairs don’t match:
Count rounds for both booties and measure soles before building walls.
Expert Tips for Better Results#
- Make the sole dense: Use a smaller hook than you would for a hat. Durability matters.
- Block lightly if needed: If the sole curls, a gentle steam-block helps it flatten.
- Pin pieces before sewing: Snout, ears, horns—placement is everything for “cute.”
- Reinforce appliqués: Baby items get tugged. Sew spots and snout with multiple passes.
- Use cotton blend for structure: It holds shape better than super-soft acrylic.
- Add grip for toddlers: If these are for walking kids, add non-slip dots or suede patches.
Variations and Customization Ideas#
- Calf colorways:
- Brown + cream (highland cow vibe)
- Tan + white (soft neutral)
- Pink + white (super cute for themed photos)
- Add a tail: A tiny chain tail with a black tuft stitched to the back.
- Add a strap: Crochet a small ankle strap with a button for extra hold.
- Make them slippers: Use thicker yarn and add a sturdier sole edge.
- Change the expression: Add little rosy cheeks, sleepy eyes, or a tiny smile line.
Benefits of This Crochet Project#
- Fast, satisfying make (great for gifting)
- Uses small amounts of yarn (stash-friendly)
- Teaches key skills: oval soles, toe shaping, neat appliqués
- Cute theme makes it photo-ready for baby milestones
- Easy to customize sizes and colors
- Practical and cozy—more than just decor
Internal Linking Suggestions#
You may also like…
- Crochet Tutorial: How to Crochet an Oval Sole (Step-by-Step)
- Best Yarn for Baby Crochet Projects (Soft + Washable Choices)
- DIY Crochet: How to Add Non-Slip Soles to Slippers
- Free Crochet Pattern: Simple Baby Booties for Beginners
- Crochet Tutorial: Neat Appliqué Sewing Tips
- Free Crochet Pattern Roundup: Animal-Themed Baby Gifts
FAQ Section#
What yarn is best for baby booties crochet pattern?
Soft washable yarn is best—baby acrylic, cotton blends, or gentle worsted cotton. Avoid scratchy wool for newborn skin.
Is this an easy crochet pattern for beginners?
Yes. The main skills are single crochet, increases/decreases, and simple sewing. The cow face is made from easy appliqués.
How do I make the booties bigger or smaller?
Adjust the starting chain and increase rounds to change sole length. Then follow the same wall and toe shaping steps.
How do I keep crochet baby booties from falling off?
Make the ankle snug: add a ribbed cuff, weave in elastic thread, or add a small ankle strap with a button.
Can I use safety eyes on baby booties?
For babies, embroidered eyes are safest. Safety eyes can be a choking hazard if pulled loose.
How long does it take to make a pair?
Most makers finish a pair in 2–4 hours, depending on size and how many details you add.
Conclusion#
These cow baby booties are the perfect blend of cozy and cute: a sturdy little sole, a snug ankle, and an adorable cow face that turns a practical item into a keepsake. This free crochet pattern is beginner-friendly, customizable, and ideal for gifts, photos, and everyday warmth.
If you tell me the baby’s age (newborn, 0–3, 3–6, etc.), I can suggest an exact starting chain and a typical round count so your crochet pattern fits perfectly every time.