Introduction#
A crochet dog bandana is one of those projects that feels instantly rewarding. It’s small enough to finish quickly, practical enough to use every day, and cute enough that people will stop you on walks to ask where you got it. Even better, it’s a perfect “low-pressure” wearable: no complicated shaping, no sleeves, and no fitting stress—just simple stitches, a little texture, and an easy closure.
Explore more beginner scarves crochet patterns in our pattern library.
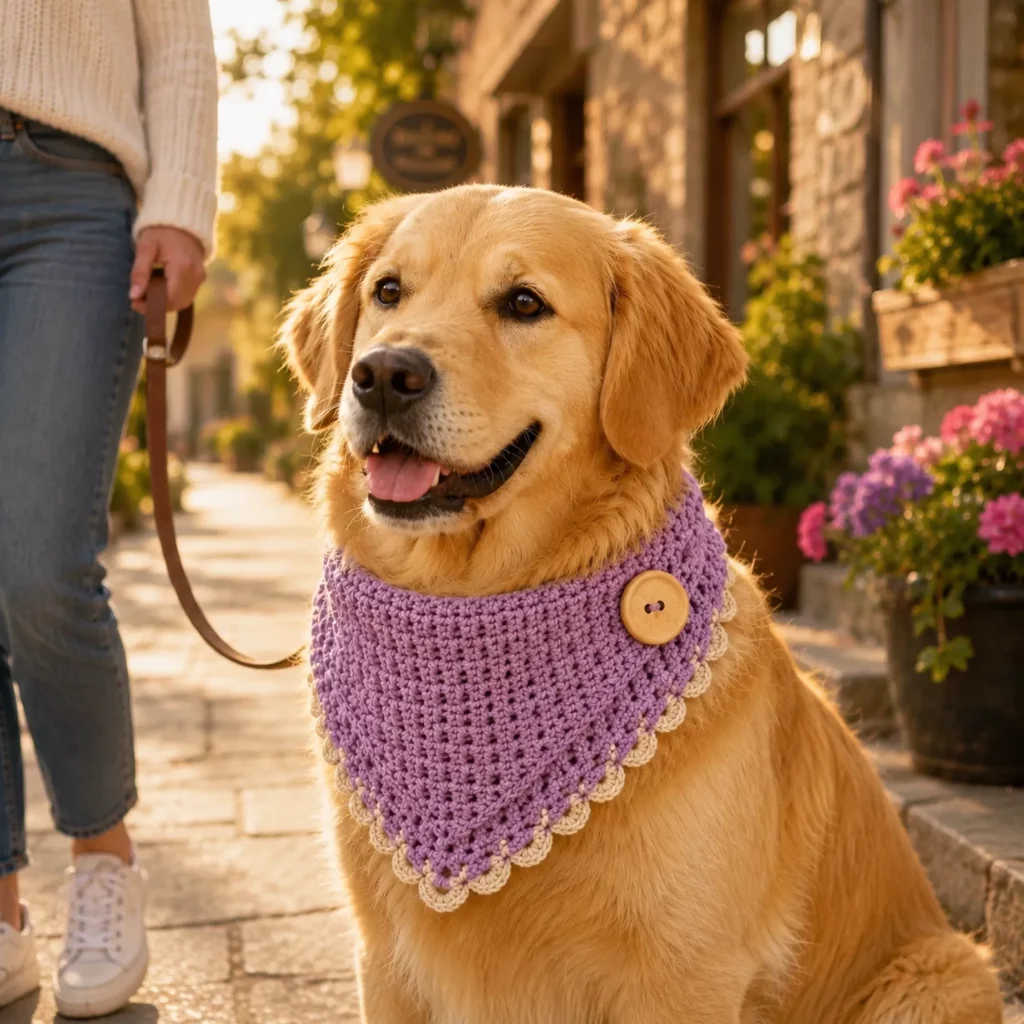
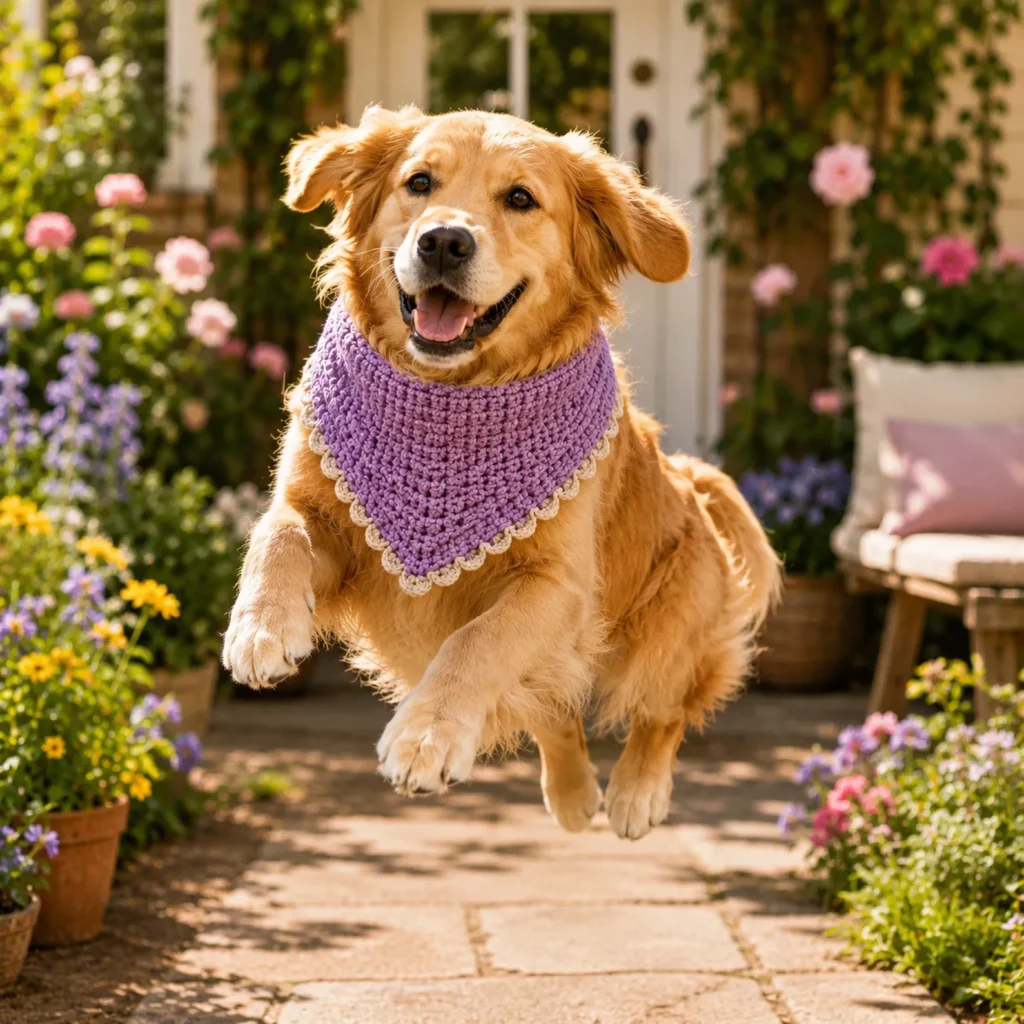
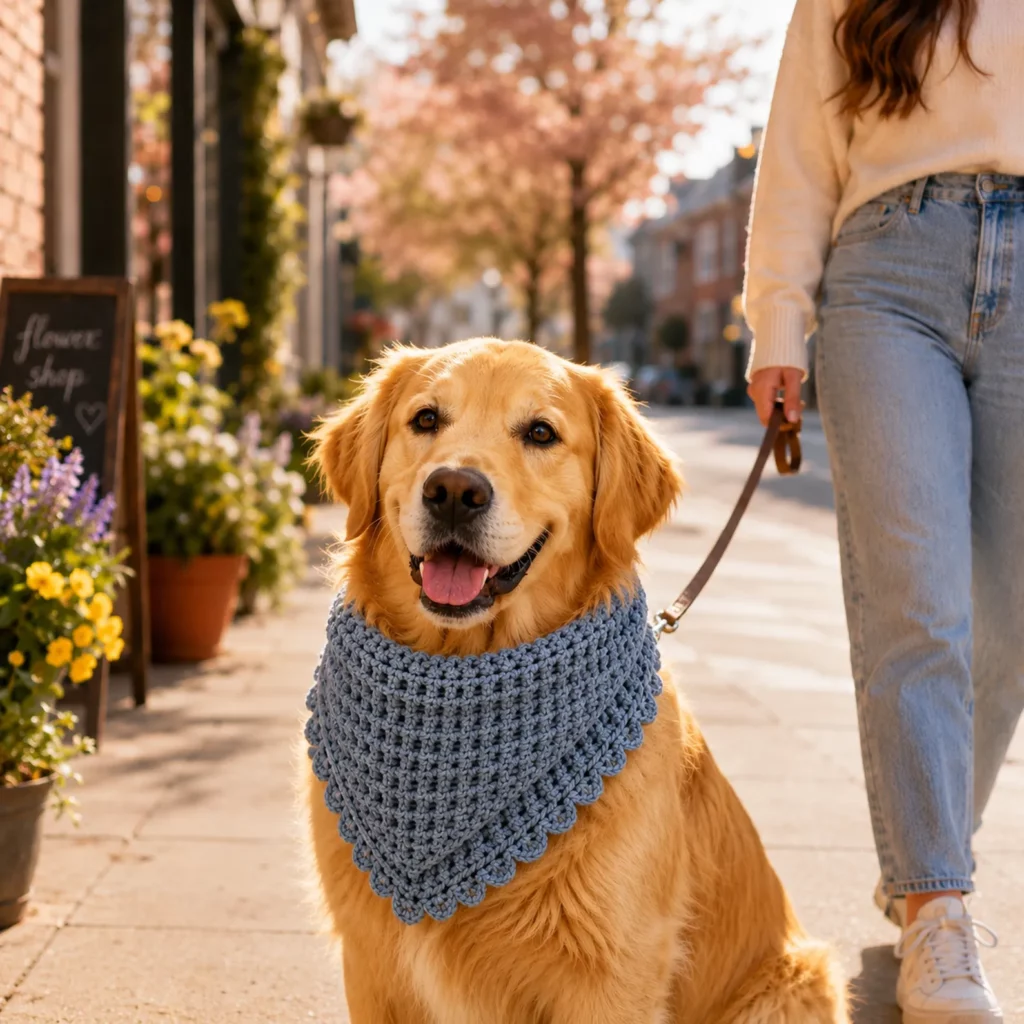
This crochet pattern is designed to create a cozy, slightly structured bandana that sits comfortably on your dog’s chest. It has a clean textured body, a sweet scalloped edge, and a button-up collar section so you can put it on without pulling it over your dog’s head. That makes it great for dogs who don’t love things slipping over their ears, and it also helps you fine-tune the fit with minimal fuss.
In this crochet tutorial, you’ll learn how to measure your dog, choose the right yarn for comfort, crochet the bandana in a way that stays flat, and finish it with a secure button closure that looks polished and professional.
Detailed Description of the Crochet Pattern#
This is a triangular dog bandana with a wide neck band. The triangle portion sits on the chest, and the neck band wraps around the collar line and closes with a button and button loop (or multiple buttonholes for adjustability).
Key design elements
- Textured body stitch that looks neat and slightly “woven”
- Comfortable triangular shape that drapes without bunching
- Scalloped edge trim for a cute, finished look
- Button closure for easy on/off
- Adjustable sizing that works for small, medium, and large dogs
How it’s made
- Start at the top edge (neckline) and crochet rows that gradually increase to form a triangle
- Add a neck band that wraps around the dog’s neck/collar area
- Add a button loop or buttonholes so you can adjust the fit
- Finish with a scalloped edging around the triangle for a boutique look
This is a great DIY crochet project because you can stop at any point to control the size. If you want a smaller bandana, stop earlier. If you want a dramatic big “bib” style, keep going.
Skill Level Explanation#
Skill Level: Beginner-Friendly
You’ll do great if you already know
- Chain (ch)
- Single crochet (sc)
- Half double crochet (hdc)
- Working in rows
- Basic counting
You’ll also practice
- Increasing evenly to create a triangle
- Making a simple button loop or buttonhole
- Adding a scalloped edge
- Measuring for a custom fit
This is an easy crochet pattern that still teaches skills you’ll use in bigger projects.
Materials Needed#
Yarn
Choose a yarn that’s soft, washable, and not scratchy. Dogs move a lot, and you want the bandana to be comfortable against fur and skin.
Best yarn choices
- Cotton or cotton blend for crisp texture and easy washing
- Soft acrylic for budget-friendly, cozy wear
- Bamboo blend for extra softness and drape
Suggested yarn weight
- Worsted (Category 4) is ideal for structure and speed
- DK (Category 3) works for a lighter, more delicate bandana
Yarn tips for pet wear
- Avoid very fuzzy yarns that can trap dirt
- Avoid very stiff yarns that might rub
- If your dog has sensitive skin, choose a soft cotton blend or baby acrylic
Yardage estimate
- XS–S: 40–80 yards (37–73 m)
- M–L: 80–140 yards (73–128 m)
- XL: 140–220 yards (128–201 m)
Hook
- Worsted: 4.0–5.0 mm
- DK: 3.5–4.0 mm
Use a hook that creates a fabric that’s not holey. A slightly tighter fabric looks cleaner and holds shape better.
Notions
- Stitch marker (optional but helpful)
- Tapestry needle
- Scissors
- Measuring tape
- 1 button (or 2–3 buttons for more adjustability)
- Optional: leather/stitched label tag for a finished look
Stitches & Techniques Explained#
Common Abbreviations
- ch = chain
- sc = single crochet
- hdc = half double crochet
- dc = double crochet
- sl st = slip stitch
- inc = increase
- BLO = back loop only
- ( ) = repeat
- = stitch count
Texture Stitch Options
The bandana body looks best with a stitch that has gentle texture and good drape. Here are two great options.
Option A: Hdc BLO (subtle ridges)
- Creates a clean ribbed texture
- Easy for beginners
- Lays flat and looks polished
Option B: Mini bean stitch (more texture)
- Creates a bumpy, cozy texture
- Slightly slower than hdc
- Great for a “sweater” look
This pattern uses Hdc BLO as the main stitch because it’s simple, neat, and fits the style perfectly.
Scalloped Edge
A scallop is created by clustering stitches into one space, then anchoring with a slip stitch. It’s decorative and also helps the edge look intentional and tidy.
Button Loop vs Buttonholes
Button loop
- One loop made at the end of the neck band
- Quick and easy
- Best if you’re using a larger button
Buttonholes
- Small gaps worked into the neck band
- More adjustable if you add more than one
- Great for growing puppies or fluffy coats
Step-by-Step Instructions#
How to Measure Your Dog
You need two measurements for a great fit.
Neck measurement
- Measure around the neck where a collar sits
- Add 1–2 inches (2.5–5 cm) for comfort and overlap
Bandana drop
- Measure from collar line down the chest to where you want the tip to land
- Short and subtle: 3–4 inches (7.5–10 cm)
- Medium: 5–7 inches (12.5–18 cm)
- Dramatic: 8–10 inches (20–25 cm)
Fit note
If your dog is fluffy, you may need a little extra length so the bandana shows.
Bandana Triangle (Top-Down Triangle)
This triangle is worked from the top edge down, increasing evenly.
Foundation
Ch 4
Row 1
Hdc in 2nd ch from hook and in next 2 ch (3 hdc)
Ch 1, turn
Row 2
2 hdc in first st, hdc in next st, 2 hdc in last st (5 hdc)
Ch 1, turn
Row 3
2 hdc in first st, hdc across until last st, 2 hdc in last st (7 hdc)
Ch 1, turn
Repeat Row 3
You are increasing 2 stitches per row (one at each end), creating a triangle.
Texture option
Work all hdc in BLO from Row 2 onward for that clean ribbed look.
When to stop
Stop when the top edge of the triangle (the row you just finished) measures about
- Neck measurement minus the overlap section you want for buttons
A simple guideline is to stop when the triangle top edge is about 60–75% of your dog’s full neck measurement, because the neck band adds the rest.
Example
Dog neck is 16 inches
Triangle top edge target might be 10–12 inches
Then neck band + overlap provides the remaining wrap.
Add the Neck Band
The neck band is worked along the top edge of the triangle and wraps around the neck.
Band setup
Do not fasten off after your last triangle row.
Row Band 1
Ch 1, sc evenly across the top edge of the triangle
At the corner, place 1 extra sc if needed so it stays smooth
Ch 1, turn
Row Band 2
Sc across, ch 1, turn
Row Band 3 (optional for a wider collar)
Sc across, ch 1, turn
A 2–3 row neck band usually looks best: wide enough to feel finished, not bulky.
Add Button Extension and Button Loop
Now you’ll create the overlap flap on one side.
Option A: Button Loop (easiest)
At the end of your last band row
- Ch 10–16 (enough to fit around your button)
- Sl st back into the same edge to form a loop
- Reinforce loop by working sc around it (optional but recommended)
Fasten off with a long tail
Sew button on the opposite side of the neck band so the loop reaches comfortably.
Option B: Buttonholes (adjustable fit)
Instead of one loop, add holes along the neck band by creating small chain gaps.
Buttonhole method
On the last band row
- Sc until you reach the buttonhole placement
- Ch 2, skip 2 stitches
- Continue sc across
Repeat for 2–3 buttonholes spaced 1 inch (2.5 cm) apart
Then sew the button on the opposite side. This gives multiple fit options.
Scalloped Edge Trim
Now you’ll add the scalloped edge around the triangle portion only (not the neck band unless you want a fully scalloped collar look).
Attach yarn to one top corner of the triangle.
Edging Round (setup)
Sc evenly down the side edge, placing about 1 sc per row
At the bottom point, place 3 sc in the tip to turn smoothly
Sc up the other side edge
Join
Scallop Round
Sl st into next stitch
(skip 1, 5 dc in next stitch, skip 1, sl st in next stitch) repeat around the triangle edges
At the tip area, adjust gently so the scallops stay even
Fasten off and weave in ends
Scallop sizing
- Smaller scallops: use 4 dc instead of 5
- Softer scallops: use 5 hdc instead of 5 dc
Finishing
- Weave in all ends securely
- Sew on button
- Add a label tag if desired
- Lightly steam or shape flat (optional)
Common Mistakes and How to Avoid Them#
Bandana tip curls
- Add 3 sc in the bottom point before continuing up the other side
- Keep tension even in edging rounds
Scallops look uneven
- Count your stitches and try to keep the repeat consistent
- If needed, work 1 extra sc in a spot to “reset” spacing
Neck band feels too tight
- Add more rows to the triangle top edge before starting the band
- Add longer button loop or use buttonholes for adjustability
Bandana shifts sideways
- Make sure the neck band is wide enough to sit flat
- Place button so the closure is slightly to the side/back, not centered under the chin
Dog seems bothered by it
- Use softer yarn
- Reduce scallop bulk by using hdc scallops
- Make the bandana shorter so it doesn’t bounce as much
Expert Tips for Better Results#
- For the cleanest look, use Hdc BLO in the triangle and sc for the neck band. The contrast in texture makes the collar look intentional.
- If you want the bandana to sit flatter, block it lightly by pinning it into a triangle shape and misting with water.
- Use a larger wooden button if you want the closure to be a visible design detail.
- Add two buttons and two loops for a stronger closure on bigger dogs.
- For extra durability, sew the button on with strong thread and pass through the yarn fabric multiple times.
Variations and Customization Ideas#
- Add a name tag area by sewing a small rectangle patch to the front
- Use stripes in the triangle for a fun modern look
- Make a holiday version in seasonal colors
- Add a tiny applique (flower, star, paw print) on the front
- Make it reversible by crocheting two triangles and sewing them together with edging (more advanced)
- Add a hidden elastic thread inside the neck band for gentle stretch
Benefits of This Crochet Project#
- Quick, satisfying make that uses little yarn
- Easy to customize for any dog size
- Button closure makes it easy to put on and remove
- Great gift for pet lovers
- Perfect for markets and craft fairs
- Teaches shaping, edging, and finishing skills in a small project
Internal Linking Suggestions#
- Easy Crochet Border Edges You Can Use on Any Project
- How to Crochet Hdc Back Loop Only Texture
- Beginner Guide to Crochet Sizing and Measuring
- Crochet Pet Accessories Collection
- How to Add Buttonholes to Crochet
FAQ#
Is this crochet dog bandana pattern beginner-friendly?
Yes. The stitches are basic and the triangle shaping is simple. The edging and button closure are beginner-friendly and clearly repeatable.
What yarn is best for a dog bandana?
Cotton or soft acrylic are great options. Cotton holds shape and washes well, while acrylic is soft and budget-friendly.
How do I choose the right size for my dog?
Measure the neck where a collar sits and crochet until the top edge plus neck band fits with a little overlap. The buttonholes or loop let you fine-tune the fit.
Can I make this without a button?
Yes. You can replace the button closure with ties by chaining long straps at both ends of the neck band and tying behind the neck.
How do I keep the bandana from stretching out?
Use a slightly smaller hook, add a sc neck band, and avoid very stretchy yarns. Cotton helps a lot.
Is it safe for dogs to wear crochet accessories?
It can be, with supervision. Always ensure the fit isn’t tight, remove it during rough play, and avoid leaving accessories on unattended dogs that like to chew.
Conclusion#
A crochet dog bandana is the perfect blend of cute and practical. This crochet pattern creates a neat textured triangle, finishes it with an adorable scalloped edge, and adds a simple button closure so it’s easy to wear and adjust. Make one in a neutral color for everyday walks, or make a few seasonal versions for photos and holidays.
If you tell me your dog’s neck measurement and how long you want the bandana drop to be, I can give you an exact row target for the triangle and the best button loop length so the fit is perfect.