


Introduction#
If your crochet hooks have a habit of disappearing into couch cushions (or migrating into random project bags), you’re going to love this project. A cute crochet organizer isn’t just “decor”—it’s the kind of practical piece that makes your crafting space feel calmer and more put-together. And when that organizer is also an adorable little turtle wearing a tiny hat? Even better.
Explore more beginner home decor crochet patterns in our pattern library.
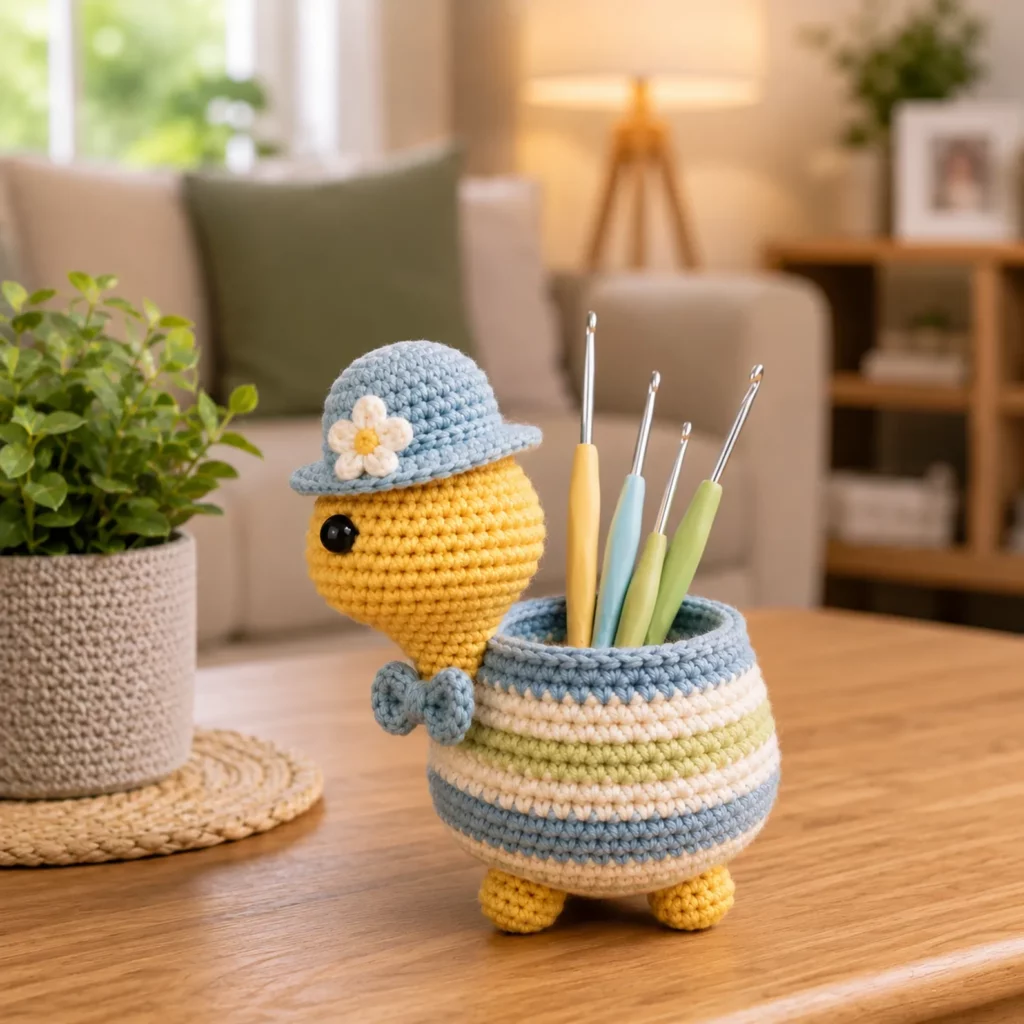
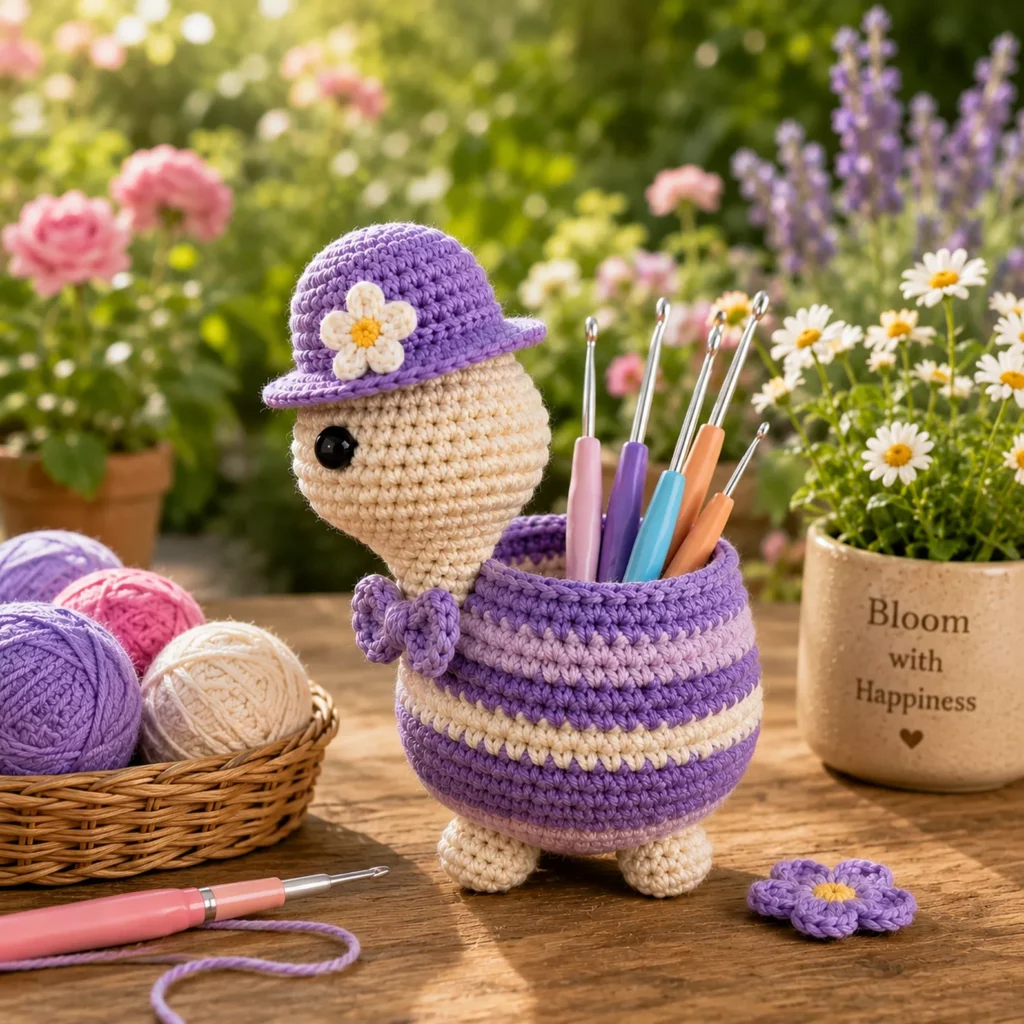
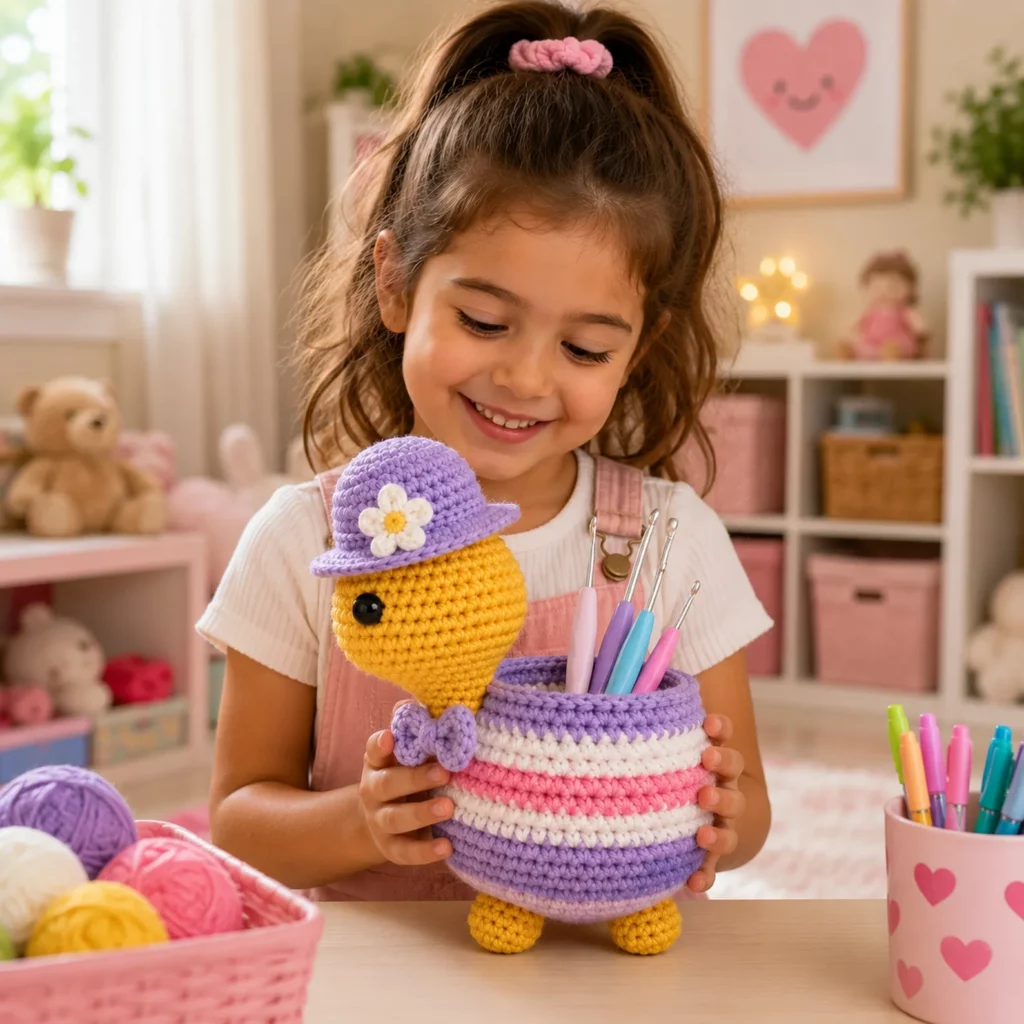
This crochet pattern teaches you how to make a turtle hook holder / desk caddy with a sturdy striped “shell cup” that holds hooks, pens, scissors, or stitch markers. The turtle’s head and tiny feet turn it into a character, while the basket-style body keeps everything functional. It’s a fantastic DIY crochet gift for makers, teachers, or anyone who loves cute desk accessories—and it’s beginner-friendly because it’s built from simple shapes: a cylinder cup, a rounded head, and small accessories.
You’ll finish with a durable organizer that looks boutique-level but uses approachable stitches and easy assembly.
Detailed Description of the Crochet Pattern#
This project is a crochet turtle organizer made from two main components:
- Striped shell cup (the organizer):
A firm cylindrical basket with a flat base and sturdy walls. It’s wide enough to hold several hooks upright and tall enough that they won’t tip out. - Turtle character pieces:
A rounded head/neck that attaches to the side of the cup, plus small feet at the base. Optional accessories (hat + flower, bow/scarf) add charm and personality.
What it’s used for
- Crochet hooks (even chunky handles)
- Knitting needles (shorter ones)
- Pens and pencils
- Small scissors and measuring tape
- Stitch markers, tapestry needles (in a mini inner pouch, optional)
Why it works (the “functional” secret)
- Dense stitches + tight tension create structure.
- A flat base keeps it stable on a desk.
- The cup walls are worked in single crochet so it doesn’t sag.
- Optional lining or base insert can make it nearly rigid.
Skill Level Explanation#
This is an easy-to-intermediate crochet project.
Perfect for confident beginners who can:
- crochet in the round
- increase evenly for a flat base
- single crochet consistently
- sew pieces securely with a yarn needle
Intermediate add-ons (optional):
- color changes for neat stripes
- adding a plastic canvas base insert
- making a small hat and flower appliqué
If you can crochet a basic amigurumi ball and a simple basket, you can absolutely make this easy crochet pattern.
Materials Needed#
Yarn
Choose yarn that creates a sturdy fabric.
Best yarn options:
- Worsted weight cotton (#4) (top pick for structure)
- Cotton-blend (#4) (slightly softer, still sturdy)
- Acrylic worsted (#4) (works, but consider a base insert)
Suggested colors (customize freely):
- Turtle head/feet: mustard yellow, green, tan, or brown
- Shell stripes: 2–4 colors (teal, cream, orange, etc.)
- Hat + flower: accent color(s)
Yardage estimate:
- Total: 250–450 yards depending on cup size and stripes
- You’ll use more if you make a taller cup or add thicker edging.
Hook
For a sturdy organizer, use a hook that makes dense stitches:
- Worsted cotton: 3.5–4.5 mm
Tip: If your basket walls feel floppy, go down a hook size.
Notions
- Stitch marker
- Yarn needle
- Scissors
- Measuring tape
- Polyester fiberfill (for head and feet)
Optional structure upgrades
- Plastic canvas circle (base insert)
- Felt circle (soft base insert)
- Fabric lining (for a polished interior)
Stitches & Techniques Explained#
Abbreviations (US terms)
- MR = magic ring
- ch = chain
- sl st = slip stitch
- sc = single crochet
- inc = increase (2 sc in one stitch)
- dec = decrease (sc2tog or invisible decrease)
- BLO = back loop only
- st(s) = stitch(es)
Why single crochet is ideal here
Single crochet creates a dense, stiff fabric—perfect for baskets and organizers. It also makes color stripes look crisp and tidy.
Fold round (BLO)
A single round in BLO sc creates a sharp turn from base to walls, which helps the organizer stand up like a basket.
Clean stripe changes
To change colors neatly:
- Start the last sc of the old color
- Finish the final yarn-over with the new color
- Continue in the new color
Step-by-Step Instructions#
Pattern notes
- Work in continuous rounds (use a stitch marker).
- Keep tension firm.
- Adjust size by increasing the base diameter and number of wall rounds.
Finished size (example)
- Cup: ~4–5″ diameter, ~3.5–4.5″ tall
- Turtle head: ~3″ tall
This size holds multiple crochet hooks comfortably.
Part 1: Shell Cup Base (Color A)
Rnd 1: MR, 6 sc (6)
Rnd 2: inc around (12)
Rnd 3: (sc, inc) around (18)
Rnd 4: (2 sc, inc) around (24)
Rnd 5: (3 sc, inc) around (30)
Rnd 6: (4 sc, inc) around (36)
Rnd 7: (5 sc, inc) around (42)
Stop when the base circle is the width you want:
- Small cup: 36 sts
- Medium cup: 42 sts
- Large cup: 48 sts (add one more increase round)
Flat base check:
If it ripples, add a plain sc round (no increases). If it cups, add another increase round.
Part 2: Fold Round (Creates Walls)
Next Rnd: BLO sc around (same stitch count)
This is what makes the cup “stand up.”
Part 3: Shell Cup Walls (Striped)
Work sc around, changing colors every 2–3 rounds for stripes.
Example stripe plan (repeat as desired):
- 2 rounds Color A
- 2 rounds Color B
- 2 rounds Color C
- 2 rounds Color A
Continue until the cup is your desired height (usually 10–14 rounds from fold round).
Optional: Reinforced rim
- 1 round sc around
- 1 round sl st around (gives a clean, sturdy top edge)
Fasten off and weave in ends.
Part 4: Turtle Head (Main Color)
The head is a slightly elongated ball.
Rnd 1: MR, 6 sc (6)
Rnd 2: inc around (12)
Rnd 3: (sc, inc) around (18)
Rnd 4: (2 sc, inc) around (24)
Rnd 5: (3 sc, inc) around (30)
Rnd 6–9: sc around (30) for 4 rounds
Rnd 10: (3 sc, dec) around (24)
Stuff firmly.
Rnd 11: (2 sc, dec) around (18)
Rnd 12: (sc, dec) around (12)
Rnd 13: dec around (6)
Fasten off, close, leave tail for sewing.
Eyes (optional):
- Safety eyes or embroidered eyes
- For a “cute” look, place them wider apart and slightly low.
Part 5: Neck (Simple Connector)
Make a short tube to attach head to cup.
Rnd 1: MR, 6 sc (6)
Rnd 2–5: sc around (6)
Lightly stuff.
Fasten off leaving a tail.
Sew neck to the bottom back of the head.
Part 6: Feet (Make 2–4, Main Color)
Small rounded feet help it stand.
Rnd 1: MR, 6 sc (6)
Rnd 2: inc around (12)
Rnd 3: sc around (12)
Rnd 4: (2 sc, dec) around (9)
Stuff lightly, flatten, close with stitches through both layers.
Fasten off leaving tail.
Make:
- 2 feet for front (cute + stable)
- 4 feet if you want the full turtle look
Part 7: Bow/Scarf (Optional, Accent Color)
A cute little bow at the “neck” area adds personality.
Bow strip: Ch 18, sc back across, fasten off.
Wrap center with yarn and stitch to the head/neck base.
Part 8: Mini Hat + Flower (Optional)
Hat (Accent Color)
Rnd 1: MR, 6 sc
Rnd 2: inc around (12)
Rnd 3: (sc, inc) around (18)
Rnd 4: sc around (18)
Rnd 5: sc around (18)
Brim: (inc, sc) around to flare slightly.
Fasten off and sew hat to head.
Flower (small)
- MR, ch 2, 2 dc, ch 2, sl st (petal) repeat 5 times.
Sew to hat.
Part 9: Assembly
- Attach head/neck to cup:
Sew the neck to the side of the cup, near the rim but slightly below it, so the head appears to “peek over” the cup edge. - Attach feet:
Sew feet evenly around the bottom edge of the cup. - Add accessories:
Sew bow/scarf and hat. - Optional base insert:
Cut a felt/plastic canvas circle the size of the base and place inside for extra stability.
Common Mistakes and How to Avoid Them#
- Cup is floppy:
Use cotton, a smaller hook, and tighter tension. Add a base insert. - Base ripples:
Too many increases—add an even round or stop increasing earlier. - Cup leans or tips:
Add weight (pellet pouch) or widen the base by one increase round. - Head droops:
Stuff neck firmly and sew it deeper into the cup wall with multiple passes. - Stripes look uneven:
Change colors on the last yarn-over of the final stitch in the old color. - Weaving ends looks bulky:
Weave ends into same-color stripes to hide them naturally.
Expert Tips for Better Results#
- Cotton yarn makes the best organizers. Less stretch = better structure.
- Add a “hidden stability stitch.” After attaching head, run a few stitches from head to cup rim inside the cup (invisible from outside) to keep it upright.
- Reinforce the rim. One extra sc round makes the top edge look professional.
- Use a lining if storing sharp tools. It prevents snagging and protects yarn fibers.
- Make it gift-ready. Add a small tag and include a matching mini hook cozy.
Variations and Customization Ideas#
- Pencil cup version: Make the cup taller (add 3–5 more rounds).
- Scissor caddy: Add a small side pocket on the cup wall.
- Amigurumi swap: Turn the turtle into a snail, duck, or bear by changing head shape.
- Seasonal hat: Santa hat, pumpkin hat, or spring flower crown.
- Two-tone shell: Alternate stripes or use a spiral color change.
- Keychain mini: Make a tiny turtle head only and attach to a small basket charm.
Benefits of This Crochet Project#
- Keeps hooks and tools organized in a cute way
- Beginner-friendly construction with high “wow” factor
- Great stash-buster (perfect for leftover colors)
- Customizable size and function (desk cup, craft caddy, gift)
- Teaches useful skills: baskets, shaping, clean stripes, assembly
- Makes a wonderful handmade present for crocheters and teachers
Internal Linking Suggestions#
You may also like…
- Crochet Tutorial: How to Crochet a Sturdy Basket Base
- Best Yarn for Crochet Baskets and Organizers (Cotton vs Acrylic)
- DIY Crochet: How to Add a Fabric Lining to Crochet Containers
- Free Crochet Pattern: Crochet Hook Roll Organizer
- Crochet Tutorial: Clean Color Changes in the Round
- Free Crochet Pattern Roundup: Cute Desk Accessories to Crochet
FAQ Section#
What yarn is best for a crochet hook holder pattern?
Cotton yarn is best because it holds shape and stretches less. If you use acrylic, add a base insert or lining for better structure.
Is this an easy crochet pattern for beginners?
Yes. The cup is like a simple basket (sc in the round), and the turtle is basic amigurumi shaping. Sewing is the only “finishing” skill needed.
How do I make the organizer taller or wider?
To make it taller, add more wall rounds. To make it wider, add one more increase round to the base before the fold round.
How do I keep the turtle head from drooping?
Stuff the neck firmly and sew the neck deeper into the cup wall with multiple passes. You can also add a hidden support stitch inside the cup.
Can I wash this organizer?
Yes, if you use washable yarn. For best shape, reshape while damp and air dry. If you add a plastic canvas base, remove it before washing or use a washable base.
Can I turn this into a gift set?
Absolutely—pair it with a small set of hooks, stitch markers, and a matching mini notions pouch.
Conclusion#
This turtle hook holder is the perfect blend of cute and useful: a sturdy striped cup to keep tools organized, plus a cheerful little character that makes your craft space feel happier. This free crochet pattern is beginner-friendly, customizable, and a fantastic way to practice basket structure and amigurumi assembly in one project.
If you tell me what you want to store (hooks only, pens, or mixed tools) and your yarn type (cotton or acrylic), I can suggest the best base stitch count and cup height so your crochet pattern fits your needs perfectly.


