


Introduction#
If you’ve ever wanted a crochet project that feels both playful and polished, a cat granny square pillow cover is the perfect choice. It combines everything we love about a classic crochet pattern, easy squares, simple joining, and endless color options, with the extra charm of sweet cat faces that pop in each panel. The result is a statement cushion that instantly makes a sofa, reading corner, or bedroom feel warmer and more personal.
Explore more beginner granny squares crochet patterns in our pattern library.
This kind of project is also a fantastic confidence builder. You can work one square at a time (great for busy schedules), use up leftover yarn in your stash, and practice clean color changes and neat joining without feeling overwhelmed. And because it’s a pillow cover, you don’t need perfect sizing the way you would with clothing, a little flexibility is totally okay.
In this crochet tutorial, I’ll walk you through how to make a patchwork cat cushion cover using cat motif squares, how to keep your squares consistent, and how to assemble everything into a durable, removable pillow cover.
Detailed Description of the Crochet Pattern#
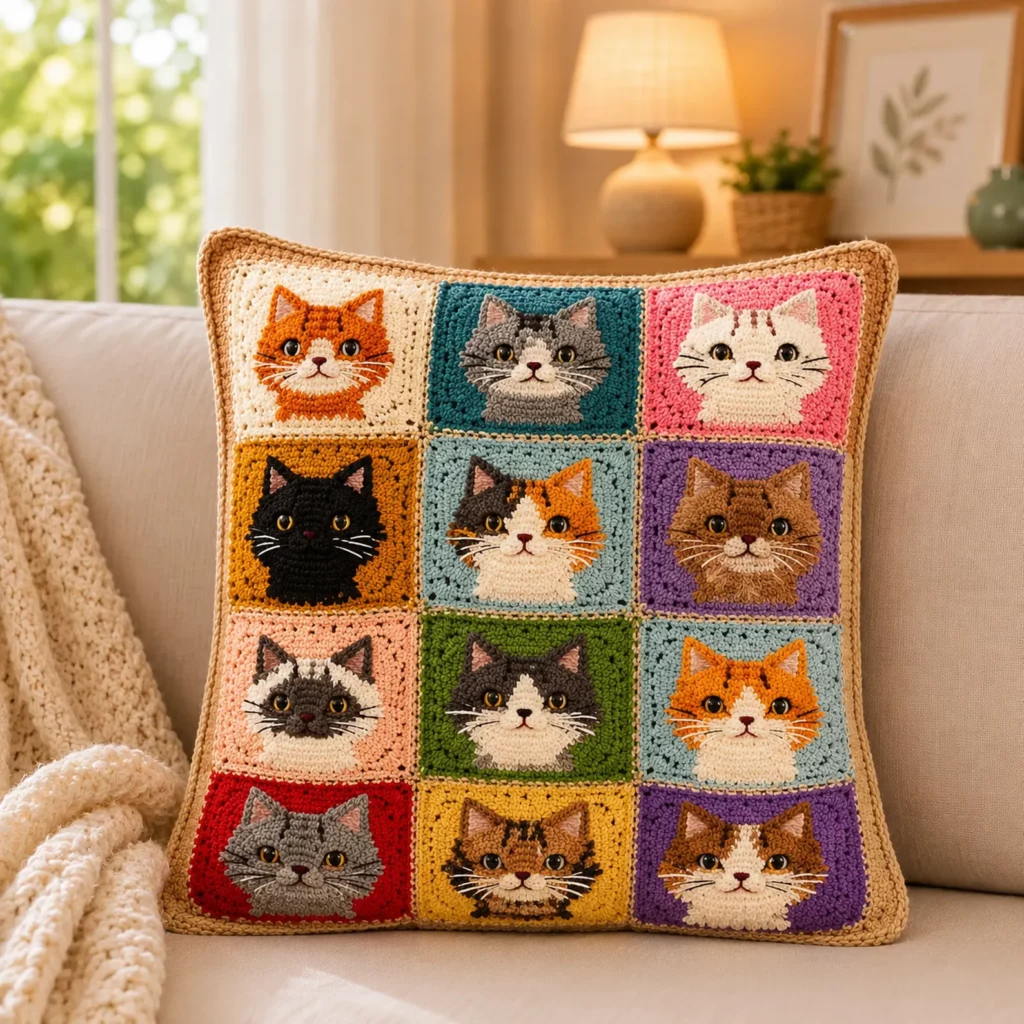
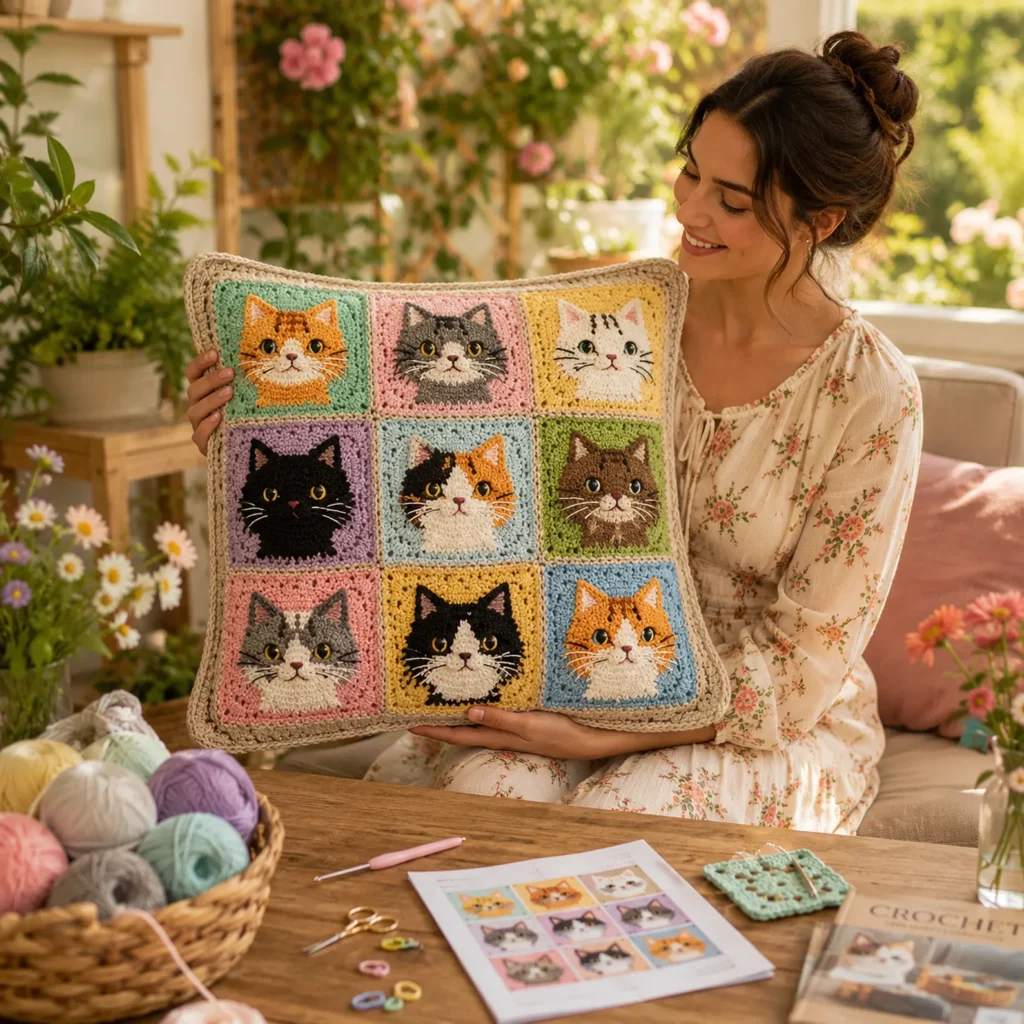
This crochet pattern creates a patchwork-style pillow cover made from multiple cat motif squares. Each square features a cat face in the center, with a colorful background and a neutral border. The squares are joined into a grid (commonly 3 squares wide by 4 squares tall for a larger cushion front, or 3 by 3 for a standard cushion depending on your square size). A simple back panel (either one piece with an envelope overlap or two panels) makes the cover easy to remove and wash.
Key design elements you’ll recreate
Cat faces built with crochet colorwork (tapestry crochet or surface details)
Optional 3D details like raised muzzle, tiny ears, and whiskers
A consistent border around each square to help them join neatly
A structured outer edging to frame the entire pillow
The overall style is cozy, modern-cute, and perfect for home décor. You can keep it soft and neutral or go bold with bright backgrounds for a playful pop.
Skill Level Explanation#
Skill level: Advanced Beginner to Intermediate
Beginner-friendly parts
Granny-style borders and simple stitch repeats
Joining squares with easy methods (whip stitch or slip stitch join)
Basic pillow construction
Skills you’ll practice
Color changes (for cat faces and backgrounds)
Keeping square sizes consistent (blocking helps a lot)
Attaching facial features evenly
Neat finishing and weaving in ends (important with multicolor motifs)
If you’ve made standard granny squares before, you can absolutely do this. If cat faces feel intimidating, don’t worry, you can choose simplified faces (embroidered details) and still get a beautiful result.
Materials Needed#
Yarn
Worsted/Aran weight yarn (Category 4) is the easiest for crisp stitch definition
Cotton yarn gives the cleanest stitches and a polished look
Acrylic yarn is softer and budget-friendly for home décor
Optional: small scraps in extra colors for unique cat markings
Suggested colors
Neutral border color (cream, oatmeal, light beige)
Background colors (pastels or brights, one per square or mixed)
Cat colors (orange tabby, gray, black, calico, white, brown, etc.)
Small accents (pink for nose/ears, black for whiskers)
Hook
4.0 mm to 5.0 mm depending on your yarn and tension
Tip: For neat tapestry colorwork, many crocheters prefer a slightly smaller hook (4.0–4.5 mm) to reduce gaps.
Notions
Pillow insert (choose size based on your finished panel, common: 16×16 in, 18×18 in, 20×20 in)
Tapestry needle
Scissors
Stitch markers
Measuring tape
Optional: safety eyes (if you want a plush/toy-like look) or small buttons
Optional but recommended: blocking board and pins
Closure options
Envelope back (no buttons, easiest)
Buttons (wood buttons look adorable)
Zipper (clean and secure, slightly more advanced)
Stitches & Techniques Explained#
Common abbreviations
ch chain
sl st slip stitch
sc single crochet
hdc half double crochet
dc double crochet
tr treble crochet
inc increase
dec decrease
sp space
rnd round
RS right side
WS wrong side
Helpful techniques used in this crochet pattern
Magic ring or chain-ring start: either works for motif centers
Tapestry crochet: carrying yarn behind stitches to form color blocks
Surface crochet: adding whiskers or outlines on top after the square is done
Standing stitch: a neat way to start a new round without a chain
Blocking: shaping squares to the same size so joining is easy and clean
How to keep your squares the same size
Use the same hook and tension for every square
Count stitches at the end of each round
Add the same number of border rounds to every square
Block your squares before joining
Step-by-Step Instructions#
Pattern notes
This tutorial is written so you can make one standard “cat square” and repeat it for your pillow front. Because cat faces can vary (orange tabby, gray tabby, black cat, calico), you’ll work the same square structure each time, then customize the face colors.
Square size planning
With worsted yarn and a 4.5 mm hook, a finished cat square with a border is often around 5.5–6.5 inches.
12 squares arranged 3 wide x 4 tall makes a front panel around 16.5–19.5 inches wide and 22–26 inches tall, which suits a larger rectangular cushion.
If you want a standard square pillow (16×16 or 18×18), you can do 3×3 (9 squares) or make smaller squares by using thinner yarn.
Below is a flexible method that works no matter what final size you choose.
Free crochet pattern: Cat Motif Square (one square)
Round 1 (center base)
With background color, ch 4, join to form a ring (or use a magic ring)
Ch 3 (counts as dc), work 11 dc into ring, join (12 dc)
Round 2 (build a base circle)
Ch 3, dc in same st, 2 dc in each st around, join (24 dc)
Round 3 (start shaping toward a square)
Ch 3, (dc, ch 1, dc) in same st to form a corner start
Skip 2 sts, (2 dc, ch 1, 2 dc) in next st, repeat around to create 4 corners
Fill sides with dc groups spaced evenly so the circle becomes squarer
Join
If you prefer a classic granny-square transition
Make 4 corners with (2 dc, ch 2, 2 dc) and place dc clusters between corners separated by ch 1.
Round 4 (square round)
Work granny clusters into corner spaces
Corners: (3 dc, ch 2, 3 dc)
Sides: 3 dc in each side space, ch 1 between clusters as needed
Join and fasten off background color
Now you have a solid base square that will hold your cat face nicely.
Cat face panel (worked onto the center area)
You have two beginner-friendly options
Option A: Simplified face with embroidery (easiest)
Crochet a solid square center in the cat color (sc rows or dc rounds)
Add ears as small triangles
Embroider eyes, nose, mouth, whiskers
Option B: Colorwork face (more detailed)
Work the cat face as a separate appliqué and sew it onto the square
This looks clean and avoids complicated tapestry colorwork
I’ll give you the appliqué method because it’s reliable and easy to repeat.
Cat Face Appliqué (make 1 per square)
Face (oval)
With main cat color
Ch 10
Round 1 sc in 2nd ch from hook, sc across (9), 3 sc in last ch
Working along underside of chain: sc 8, 2 sc in last ch, join (22)
Round 2 inc, sc 7, inc x3 around curve, sc 7, inc x2 around curve, join (30)
Round 3 sc around (30)
Fasten off, leave a long tail for sewing
Muzzle (small oval)
With cream/white
Ch 6
Round 1 sc in 2nd ch, sc across (5), 3 sc in last ch
Underside: sc 4, 2 sc in last ch, join (14)
Round 2 sc around (14)
Fasten off, leave tail for sewing
Ears (make 2)
With main cat color
Ch 6
Row 1 sc in 2nd ch and across (5)
Row 2 ch 1, turn, dec, sc 1, dec (3)
Row 3 ch 1, turn, dec, sc 1 (2)
Fasten off, leave tail
Inner ears (optional, make 2)
With pink
Ch 4
Row 1 sc in 2nd ch and across (3)
Row 2 ch 1, turn, dec, sc 1 (2)
Fasten off
Assembly of the cat face
Sew muzzle onto lower half of face oval
Embroider nose (small triangle) in pink or dark yarn
Embroider a tiny “Y” mouth under the nose
Add whiskers with black or dark gray yarn (3 lines per side)
Attach ears to top of face oval, spaced evenly
Optional: add eyebrow markings or stripes with surface crochet (gray/darker shade)
Attach the face to the square
Center the cat face appliqué on the square
Pin first, then sew around edges with a whip stitch using matching yarn
Make sure your face sits straight (check from a distance before sewing)
Finishing border for each square (important for joining)
With your neutral border color (cream/oatmeal)
Round 1 Join yarn in any corner space
Work sc evenly around the square
In corners: 3 sc in corner space
Join
Round 2 (optional for a larger square)
Ch 1, sc around again, 3 sc in corners
Join and fasten off
This border round is what standardizes your squares and makes joining much easier.
Make enough squares for your pillow front
Choose your layout
3×3 grid (9 squares) for a square pillow
3×4 grid (12 squares) for a larger statement cushion front
You can mix cat colors and background colors as you like.
Joining the squares
Simple, clean join (whip stitch)
Lay squares in order, right sides facing up
Whip stitch through outer loops only along the edges
This makes a flatter seam and keeps the front looking neat
Decorative join (slip stitch ridge)
Hold squares with wrong sides together
Slip stitch through both loops along the edge
Creates a raised ridge detail on the front
After joining into a full front panel, weave in all ends securely.
Back panel options
Option 1: Envelope back (easiest)
Make two rectangles that overlap in the center
Each panel width = pillow width, height = about 2/3 of pillow height
Add a simple border to each rectangle
Overlap and sew around edges to the front panel
Option 2: One-piece back with buttons
Crochet a full back rectangle to match front size
Add a button band on one side
Sew buttons onto the other side
Option 3: Zipper back
Crochet two back panels and insert zipper between them
Then sew back to the front
Simple back rectangle pattern (works for any size)
With neutral yarn, make a foundation chain equal to the width of your front panel
Row 1 hdc in 2nd ch, hdc across
Row 2 ch 1, turn, hdc across
Repeat until panel reaches desired height
Add a sc border around for stability
Final assembly
Place front panel and back panel right sides together
Sew around all edges with whip stitch or sc seam
Turn right side out
Insert pillow form
Adjust corners and shape
Optional outer edging
For a polished frame
Join border color around the entire pillow edge
Work one round of sc
Then a round of crab stitch (reverse sc) for a professional finish
Common Mistakes and How to Avoid Them#
Squares don’t match in size
Count stitches each border round
Use the same hook for all squares
Block your squares before joining
Cat faces look crooked
Pin or baste the face before sewing
Use a center line trick: fold the square lightly to find the middle
Step back and check placement before final stitches
Colorwork looks messy
Choose appliqué instead of tapestry if you struggle with color changes
If you do tapestry, keep carried yarn loose so fabric doesn’t pucker
Use a smaller hook to reduce gaps
Pillow cover feels floppy
Use a firm border yarn (cotton helps)
Add a second border round to each square
Add a full sc border around the whole panel before attaching the back
Corners look bulky
Don’t overstuff seams with too many join stitches
Use outer loops only for flatter seams
Weave ends away from corners when possible

Expert Tips for Better Results#
Make your cats look “alive” with tiny changes
Angle whiskers slightly upward for a curious look
Add a tiny highlight stitch to each eye (a small white stitch)
Use different ear placements for personality (closer ears look kitten-like)
Use a consistent palette
Even with many colors, repeating the same neutral border makes the whole pillow feel cohesive and “designed.”
Block before joining
This is the difference between “homemade” and “handmade.”
A quick steam block (if your yarn allows it) makes squares crisp and easy to align.
Reinforce high-use seams
If this pillow will be used daily, sew seams twice or use a slip stitch join plus a second reinforcing pass with a needle.
Choose the right pillow insert
A slightly larger insert (for example, 18×18 insert inside a 17×17 cover) makes the pillow look plush and full.
Variations and Customization Ideas#
Minimalist cat pillow
Use the same background color for all squares
Make cats in shades of cream, gray, and tan
Keep details embroidered and simple
Bold rainbow patchwork
Different bright background for each square
Repeat cat colors (orange, black, gray, white) so the design stays balanced
Seasonal themes
Spring: pastel backgrounds and pink noses
Autumn: mustard, rust, olive, chocolate cats
Winter: icy blues, white cats, silver-gray details
Add texture
Use bobble stitches for the background
Add a fluffy yarn strand for a “fuzzy cat” effect on the face outline
Use surface crochet lines for tabby stripes
Turn it into a tote front
Use 9 squares for a bag panel
Add a fabric lining and sturdy straps
It becomes a standout accessory for everyday outfits
Benefits of This Crochet Project#
A high-impact crochet pattern that’s still modular and relaxing
Perfect stash-buster for leftover yarn
Customizable for any home décor style
Great handmade gift for cat lovers
Teaches joining, edging, and motif planning in one project
Makes your space feel cozy and curated without expensive décor
Internal Linking Suggestions#
How to Crochet a Classic Granny Square for Beginners
Best Joining Methods for Granny Squares (Flat vs Ridge Joins)
How to Block Crochet Squares the Easy Way
Beginner Guide to Crochet Appliqués (Hearts, Flowers, Faces)
Crochet Pillow Cover Tutorials (Envelope Back, Buttons, Zipper)
FAQ Section#
How many squares do I need for a crochet pillow cover like this?
It depends on your square size and pillow insert. Many makers use 9 squares (3×3) for a standard square pillow, or 12 squares (3×4) for a larger front panel.
What stitch is best for a granny square pillow?
A combination works best: granny clusters for speed and structure, and single crochet borders for stability and clean joins.
Can beginners make cat motif squares?
Yes. The easiest method is crocheting a basic square and sewing on a cat face appliqué, then adding embroidered details.
What yarn should I use for a pillow cover?
Cotton yarn holds shape beautifully and shows stitch definition. Acrylic is softer and often more affordable. Either works well.
How do I wash a crochet pillow cover?
If you use washable yarn, hand wash or gentle machine wash inside out in a laundry bag. Air dry flat to maintain shape.
How can I keep my cat faces from curling up?
Use a firm yarn, sew the appliqué down fully around the edges, and block the square before final assembly.
Can I make this into a matching set?
Absolutely. Make a second pillow with different cat colors, or create a matching blanket using the same cat squares.
Conclusion#
A cat granny square pillow cover is the kind of crochet pattern that turns simple stitches into something truly special. The patchwork layout gives you endless freedom with color, while the cat faces add personality and charm that feels instantly cozy. Whether you choose nine squares for a classic cushion or go bigger for a statement pillow, the process stays enjoyable because you can work one square at a time.
If you want, tell me what pillow insert size you’re using (16×16, 18×18, or 20×20) and what yarn weight you chose, and I’ll suggest the best grid layout and the exact target square size so your finished cover fits perfectly.


