Introduction#
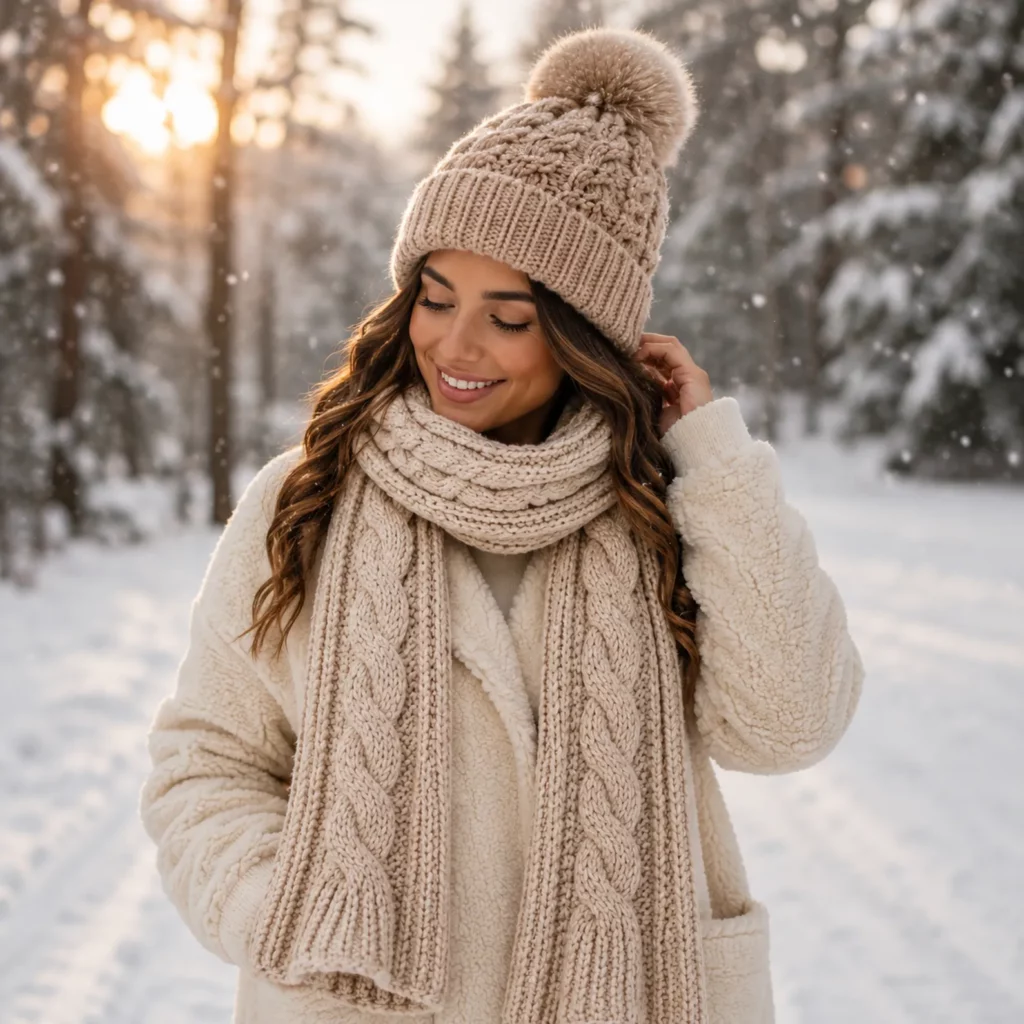
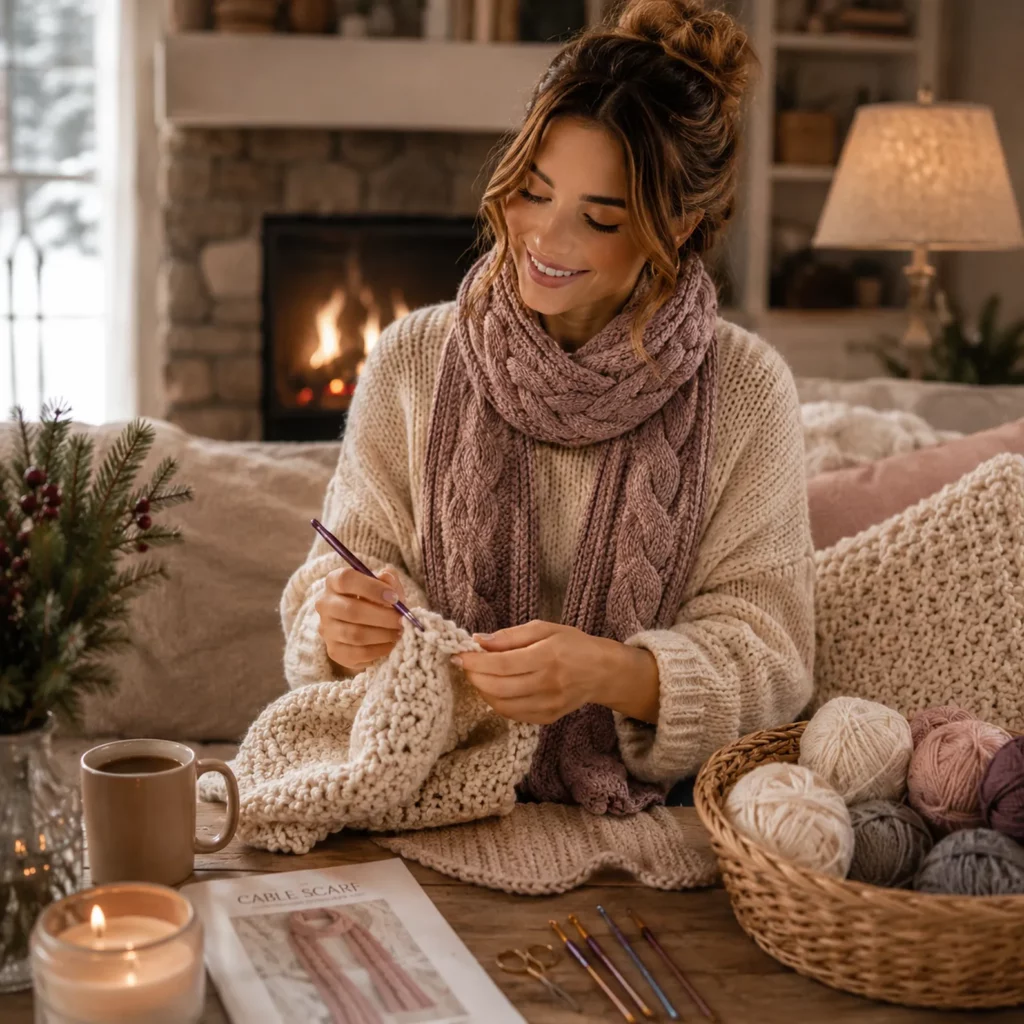
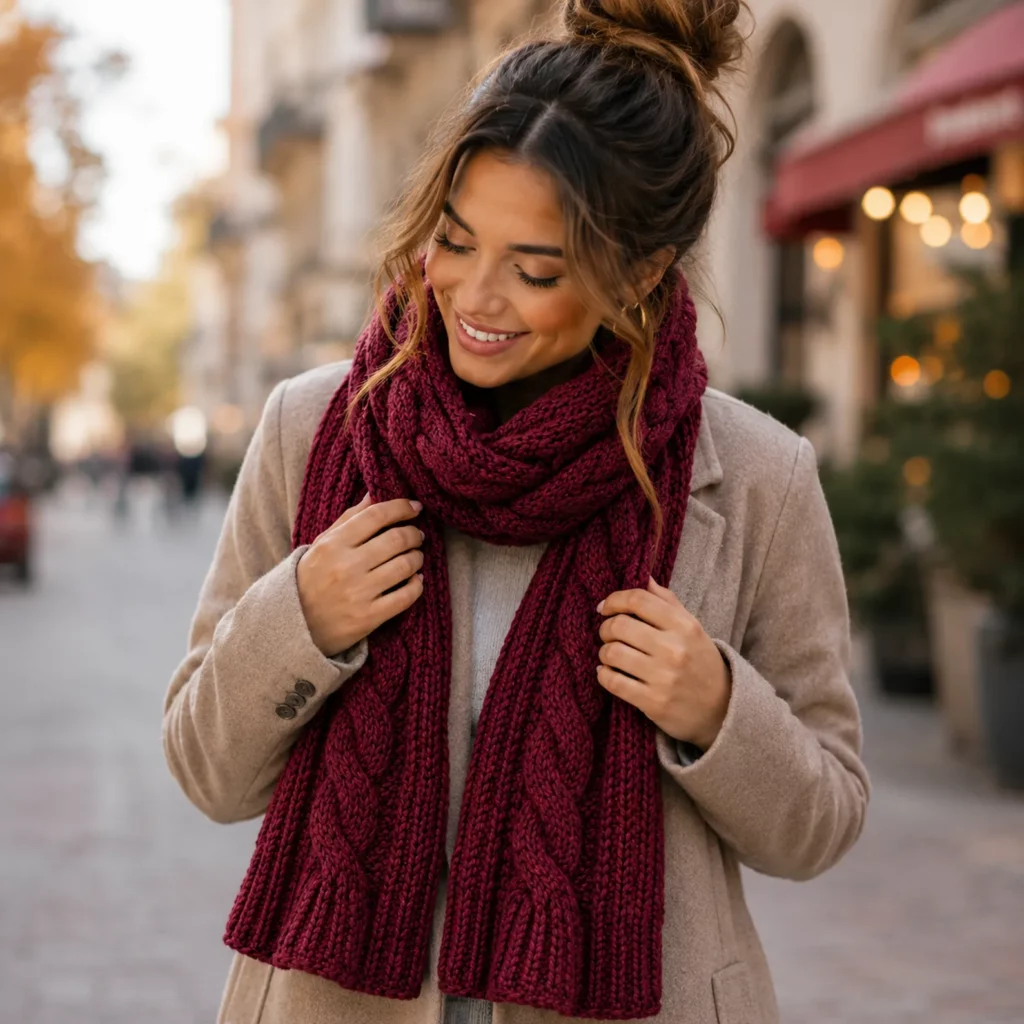
If you love the classic “chunky cable scarf” look but prefer crochet, you’re going to enjoy this project. A braided cable scarf feels timeless: it looks boutique, it’s super warm, and it instantly upgrades even the simplest winter outfit. The best part is that you can absolutely create that rich cable texture with crochet—no knitting needles required—using a small set of stitches (mostly post stitches) that become surprisingly relaxing once you get the rhythm.
Explore more beginner scarves crochet patterns in our pattern library.
This crochet pattern is designed to give you that bold braided cable detail running vertically with a ribbed background that looks structured and expensive. It’s also a practical scarf: long enough to wrap, thick enough to keep the chill out, and flexible enough to style multiple ways. Whether you’re making a gift or treating yourself, this is the kind of crochet project that looks like you spent hours hunting for a designer piece.
You’ll learn how crochet cables work, how to keep your edges straight, and how to customize the width and length without breaking the pattern. By the end, you’ll have a scarf that feels classic, cozy, and completely handmade in the best way.
Detailed Description of the Crochet Pattern#
This crochet pattern creates a long ribbed scarf with two bold braided cable columns. The main fabric is built with post-stitch ribbing (front post and back post double crochet), which creates a stretchy, knit-like texture. The cables are made by working front post treble crochet stitches around posts from earlier rows, then crossing them to form a braid.
Key design elements
Two wide braided cable panels that pop off the surface
Ribbed background texture that frames the cables and keeps the scarf warm
Clean, structured edges that stay neat without curling
Optional ribbed end sections for a finished look
What the finished scarf feels like
Thick and warm, with a soft drape
Stretchy enough to wrap without feeling stiff
Textured but not scratchy when you choose the right yarn
This is a crochet tutorial style pattern: you’ll understand what you’re doing and why, not just follow rows blindly.
Skill Level Explanation#
Skill level: Intermediate Beginner
Beginner-friendly parts
Basic double crochet and turning
Repeating stitch patterns
Skills you’ll practice
Front post double crochet (FPdc) and back post double crochet (BPdc)
Front post treble crochet (FPtr) for the cable strands
Crossing post stitches to create a braided cable effect
Keeping consistent tension so cables look even
If you can crochet a basic scarf and you’re ready to learn one “new” technique (post stitches), this easy crochet pattern is a great next step.
Materials Needed#
Yarn
This scarf looks best in a solid or heathered yarn so the cable texture shows clearly.
Recommended yarn weight
Aran or worsted weight (Category 4) for a classic scarf
Bulky (Category 5) for a faster, chunkier scarf
Yarn amount (approximate)
Worsted/Aran: 400–550 yards (365–500 m) for a long scarf
Bulky: 300–450 yards (275–410 m)
Fiber tips
Wool or wool blend: warmest and best stitch definition
Acrylic: budget-friendly and easy-care
Alpaca blend: very warm and drapey (may soften stitch definition slightly)
Hook
Worsted/Aran: 5.0–5.5 mm
Bulky: 6.0–6.5 mm
Use the hook size that gives you a dense but flexible fabric. If your ribbing looks gappy, go down a hook size.
Notions
Stitch markers (helpful for cable sections)
Tapestry needle
Scissors
Measuring tape
Blocking mat or towel (optional but helpful)
Stitches & Techniques Explained#
Abbreviations
ch = chain
sc = single crochet
dc = double crochet
tr = treble crochet
FPdc = front post double crochet
BPdc = back post double crochet
FPtr = front post treble crochet
sk = skip
sp = space
rep = repeat
st(s) = stitch(es)
Post stitches (the secret to crochet cables)
FPdc: yarn over, insert hook from front to back to front around the post of the stitch below, yarn over, pull up a loop, yarn over, pull through 2 loops twice
BPdc: yarn over, insert hook from back to front to back around the post of the stitch below, yarn over, pull up a loop, yarn over, pull through 2 loops twice
Cable stitches
Cables are made with FPtr worked around posts several stitches away, then crossed. Treble height gives the cable strand room to stretch over the background.
How a cable cross works (simple explanation)
You’ll work FPtr around two posts, skip the next two posts, work two FPtr around the following posts, then go back and work two FPtr around the skipped posts from the front. That creates the braid look.
Tip for neat cables
Keep your cable stitches slightly looser than your ribbing. Tight cable stitches make crossing difficult and can pull the scarf inward.
Step-by-Step Instructions#
Finished scarf size (suggested)
Width: about 7–8 in (18–20 cm)
Length: about 65–75 in (165–190 cm)
This pattern is written in a way you can adjust length easily by repeating rows.
Foundation and Setup
The scarf is worked lengthwise (from one end to the other), so you can stop when it’s as long as you want.
Foundation chain
Ch 37 for a scarf about 7–8 inches wide
If you want to resize, keep this structure in mind
2 edge stitches on each side
Ribbed background sections
Two cable panels (each cable panel uses 8 stitches: 4 for the left strand zone, 4 for the right strand zone)
Row 1 (setup row)
Dc in 3rd ch from hook and in each ch across
Turn
Row 2 (start ribbing base)
Ch 2 (counts as dc)
Work dc across
Turn
This row makes sure you have clear posts to work around in Row 3.
Establish the Ribbed Background
Row 3 (ribbing begins)
Ch 2
FPdc in next st, BPdc in next st, repeat FPdc, BPdc across
End with dc in last stitch
Turn
Rows 4–6
Repeat Row 3
You now have a stretchy ribbed base that looks like knit ribbing.
Place the Cables
You’ll keep ribbing across the scarf, but in the cable zones you will work special cable rows every few rows.
Cable panel layout (for Ch 37 version)
Edge stitches: 2 stitches at each side worked as regular dc (or ribbing if you prefer)
Cable 1 zone: 8 stitches
Center rib zone: 13 stitches
Cable 2 zone: 8 stitches
This layout keeps the scarf balanced.
Practical way to track it
Place stitch markers around the 8-stitch cable zones after Row 6.
Mark the start and end of each cable zone so you always know where to cable.
Cable Row Pattern
Cable Row A (cross cables)
Ch 2
Work ribbing (FPdc/BPdc) until you reach the first cable zone
In the first cable zone (8 stitches), do this cable cross over 4 posts
Work FPtr around the posts of stitches 1 and 2 of the cable zone
Skip the next 2 posts
Work FPtr around the posts of stitches 5 and 6 of the cable zone
Now go back and work FPtr around the skipped posts (stitches 3 and 4)
Then work ribbing for the remaining 2 stitches of the cable zone (or FPtr around posts 7 and 8 if you want a wider cable look)
Continue ribbing across the center zone
Repeat the same cable cross in the second cable zone
Finish the row in ribbing to the end
Turn
Cable Row B (rest row)
Ch 2
Work ribbing across the entire row (FPdc/BPdc)
Turn
Cable repeat schedule
Do Cable Row A, then 3 rest rows (Cable Row B repeated), then Cable Row A again.
This spacing makes the braid look tall and elegant.
Suggested repeat
Rows 7: Cable Row A
Rows 8–10: Cable Row B
Row 11: Cable Row A
Rows 12–14: Cable Row B
Keep repeating until you reach your desired length.
Finishing the Ends
When scarf is your desired length, finish with a tidy ribbed edge.
Last 4 rows
Work ribbing rows (FPdc/BPdc across) without cables. This mirrors the beginning and makes the ends look clean.
Optional end cuff (thicker finish like a knit scarf)
Instead of 4 rows, do 8–10 ribbing rows at each end.
Edge Clean-Up Round (optional but makes it look premium)
Work one round of sc evenly around the scarf edges
Place 3 sc in each corner to keep it flat
On the long sides, try 1 sc per row end, adjusting slightly so it doesn’t pucker
Slip stitch to join and fasten off
Weave in ends neatly, especially around cable posts.
Common Mistakes and How to Avoid Them#
Cables pull the scarf inward
This happens when cable stitches are too tight. Make your FPtr slightly looser and keep the ribbing firm but not stiff.
Edges look wavy
Too many edge stitches in the border round causes rippling. If the edge ruffles, remove stitches (skip every 6th or 7th edge spot). If it pulls tight, add a few extra sc evenly.
Cable crosses look messy
Make sure you’re always crossing in the same direction. Consistency is what creates that clean braid look.
Ribbing doesn’t look “ribbed”
If you accidentally work into the stitch tops instead of around posts, the rib effect disappears. Double check that FPdc and BPdc wrap the post.
Hard to find stitches in bulky yarn
Use stitch markers at the start of each cable zone and count carefully. Bulky yarn hides stitch definition, so markers are your best friend.
Expert Tips for Better Results#
Use a solid or lightly heathered yarn so cables pop
Block lightly when finished to relax the ribbing and open the cable texture
For extra drape, choose a wool blend and a slightly larger hook, but keep stitches dense
If you want a narrower scarf, keep the cable panels and reduce the center rib zone
If you want a wider scarf, add more ribbing stitches between the cables and the edges
Variations and Customization Ideas#
Infinity scarf version
Make the scarf slightly shorter (about 55–60 inches), then sew the ends together with a mattress stitch for a seamless loop.
One-cable minimalist scarf
Use one cable panel centered, with ribbing on both sides.
Two-tone scarf
Use one color for ribbing and a slightly darker or lighter shade for cables for a subtle contrast.
Add fringe
Add twisted fringe to each end for a classic winter look. Keep fringe short so it doesn’t compete with the cables.
Add a hidden pocket end
Crochet one end longer and fold it up, sewing the sides to create a pocket for hands.
Benefits of This Crochet Project#
Looks high-end and classic, perfect for gifting
Warm, thick, and functional for cold weather
Teaches crochet cable skills you can reuse on hats and sweaters
Great for practicing post stitches and tension control
Works in many yarn types and colors
Internal Linking Suggestions#
Beginner Tutorial: How to Crochet Front Post and Back Post Stitches
Free Crochet Hat Patterns That Use Cables
How to Block Crochet Scarves for Better Drape
Best Yarn for Winter Crochet Accessories
DIY Crochet Gift Ideas for the Holidays
FAQ Section#
Is this crochet cable scarf pattern beginner-friendly?
Yes, especially for confident beginners. The scarf uses basic stitches plus post stitches, and the cable cross becomes easy once you repeat it a few times.
What yarn is best for crochet cables?
Worsted or aran weight wool blends show cables beautifully. Acrylic works too, but very fuzzy yarn can hide the braid detail.
How long should a crochet scarf be?
A classic wrap scarf is usually 65–75 inches long. If you like a simple drape, 60–65 inches works well.
How do I make the scarf wider?
Add more ribbing stitches in the center section and keep both cable panels the same. That way the design stays balanced.
Why are my cables tight and hard to cross?
Your FPtr stitches are likely too tight. Relax your tension for cable stitches only, or go up one hook size for the entire scarf.
Do I have to add the border round?
No, but it gives a cleaner, more finished look and helps edges stay neat over time.
Conclusion#
A crochet cable scarf is one of the most satisfying “wearable texture” projects because it looks designer-level while still using simple crochet techniques. With ribbing for warmth and braided cable panels for style, this crochet pattern gives you a scarf you’ll reach for all winter long.
If you tell me what yarn weight you’re using (worsted or bulky) and your hook size, I can adjust the starting chain and the cable-zone stitch counts so your scarf comes out exactly the width you want.