Introduction#
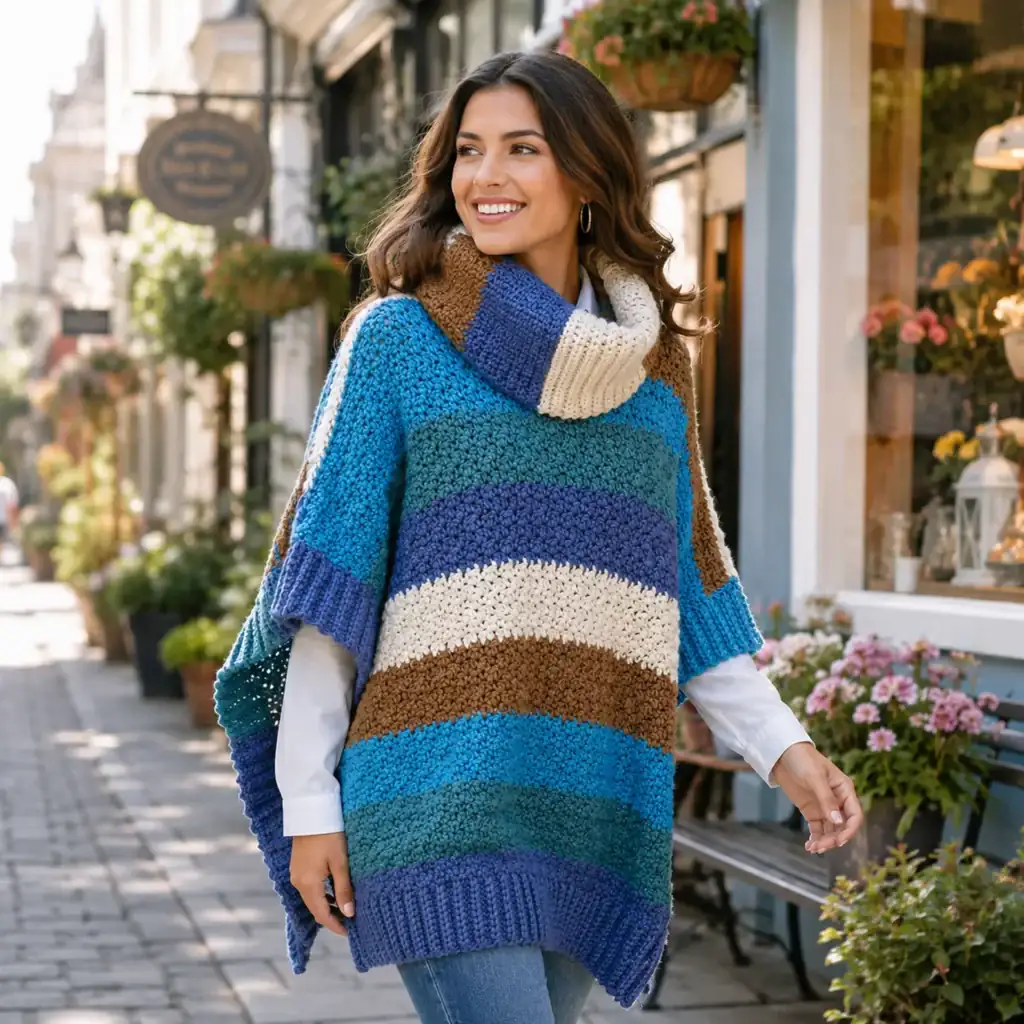
A patchwork cardigan is one of those crochet projects that looks like it took forever—in the best way. Big cozy sleeves, color-block panels, and that eye-catching checkerboard detail give the whole piece a boutique, “handmade but polished” vibe. And the good news is: you don’t need complicated shaping to pull it off.
Explore more beginner cardigans crochet patterns in our pattern library.
This crochet pattern will walk you through a relaxed, oversized patchwork cardigan made from simple rectangles, easy sleeves, and a ribbed front band. The checkerboard sections are created with beginner-friendly color changes (no tricky tapestry techniques required), and the rest of the panels are solid and soothing to crochet—perfect for watching TV or winding down at night.
If you’ve been wanting a wearable DIY crochet project that feels modern, cozy, and totally customizable, this free crochet pattern is a great place to start.
Detailed Description of the Crochet Pattern#
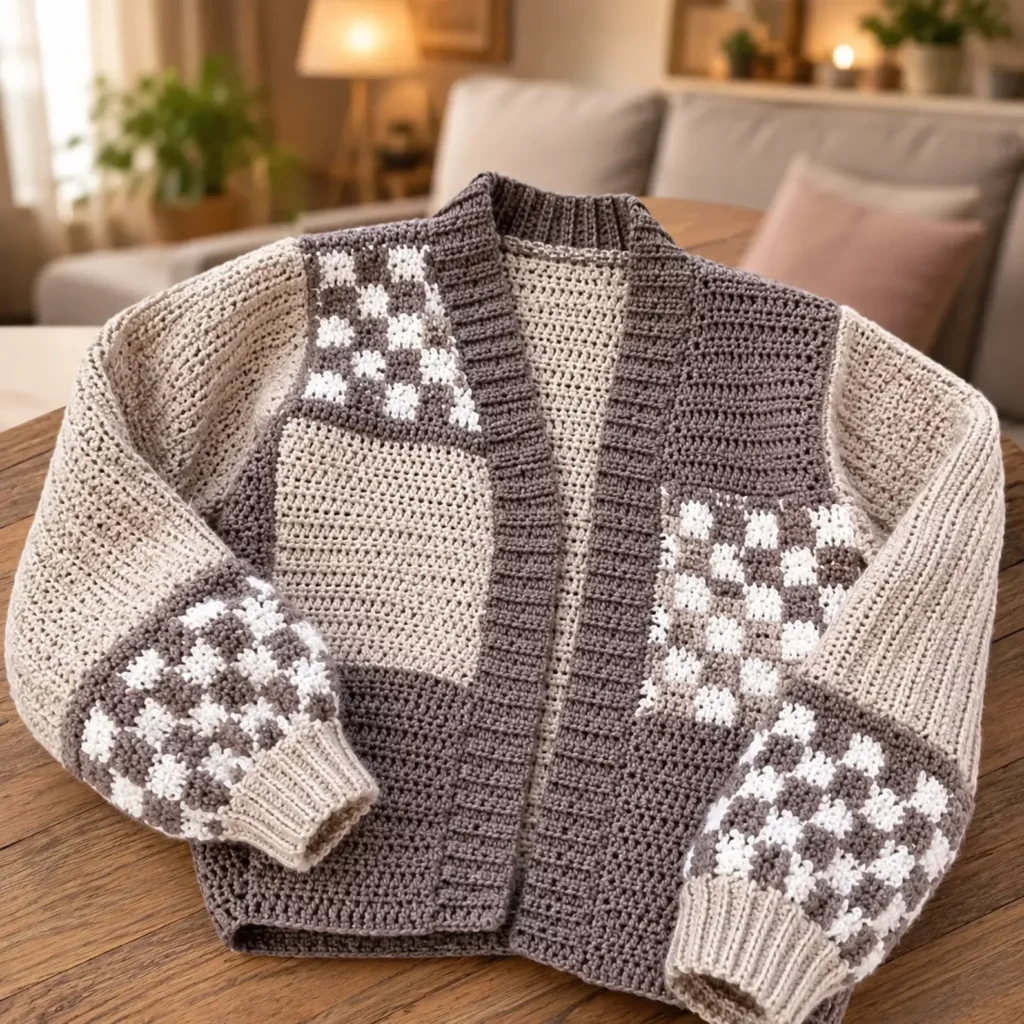
This cardigan is a cozy, open-front style with:
- Oversized fit (slouchy and comfortable)
- Drop shoulders (no complicated armhole shaping)
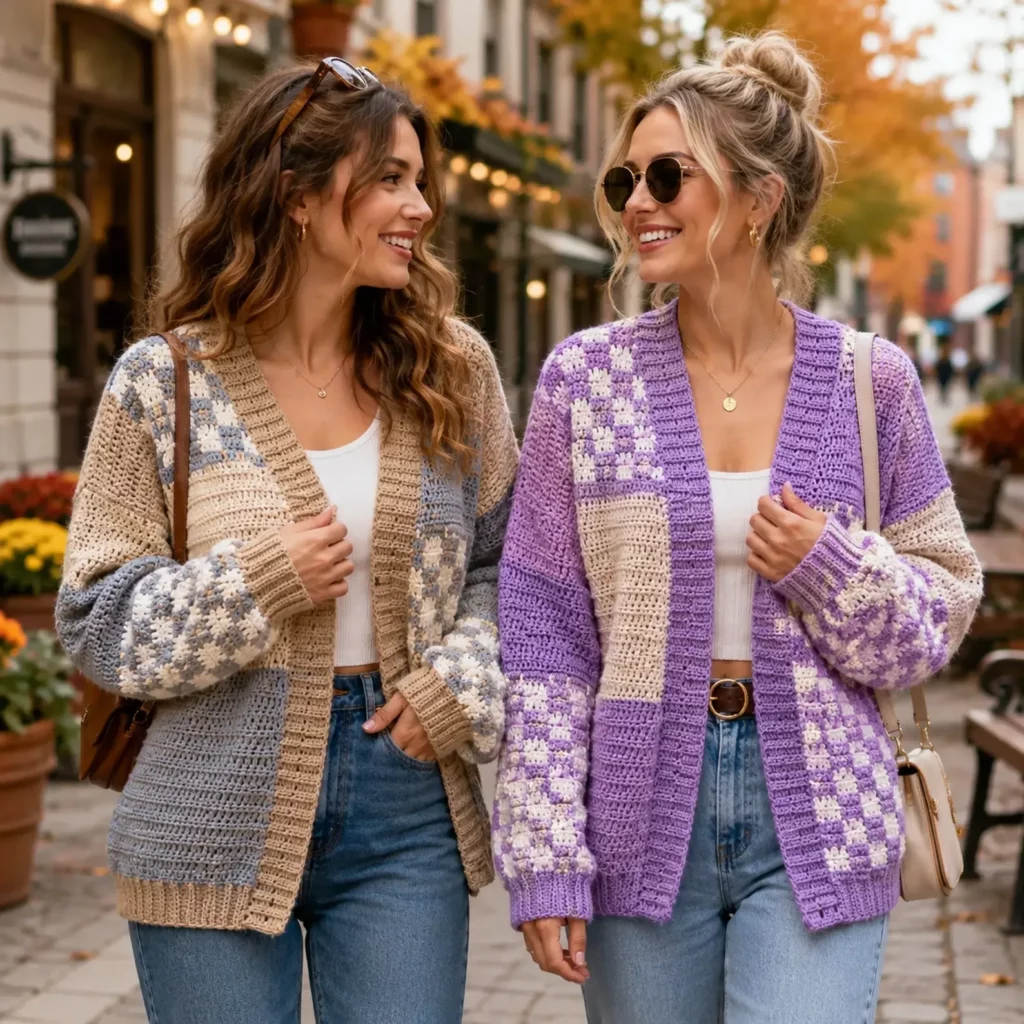
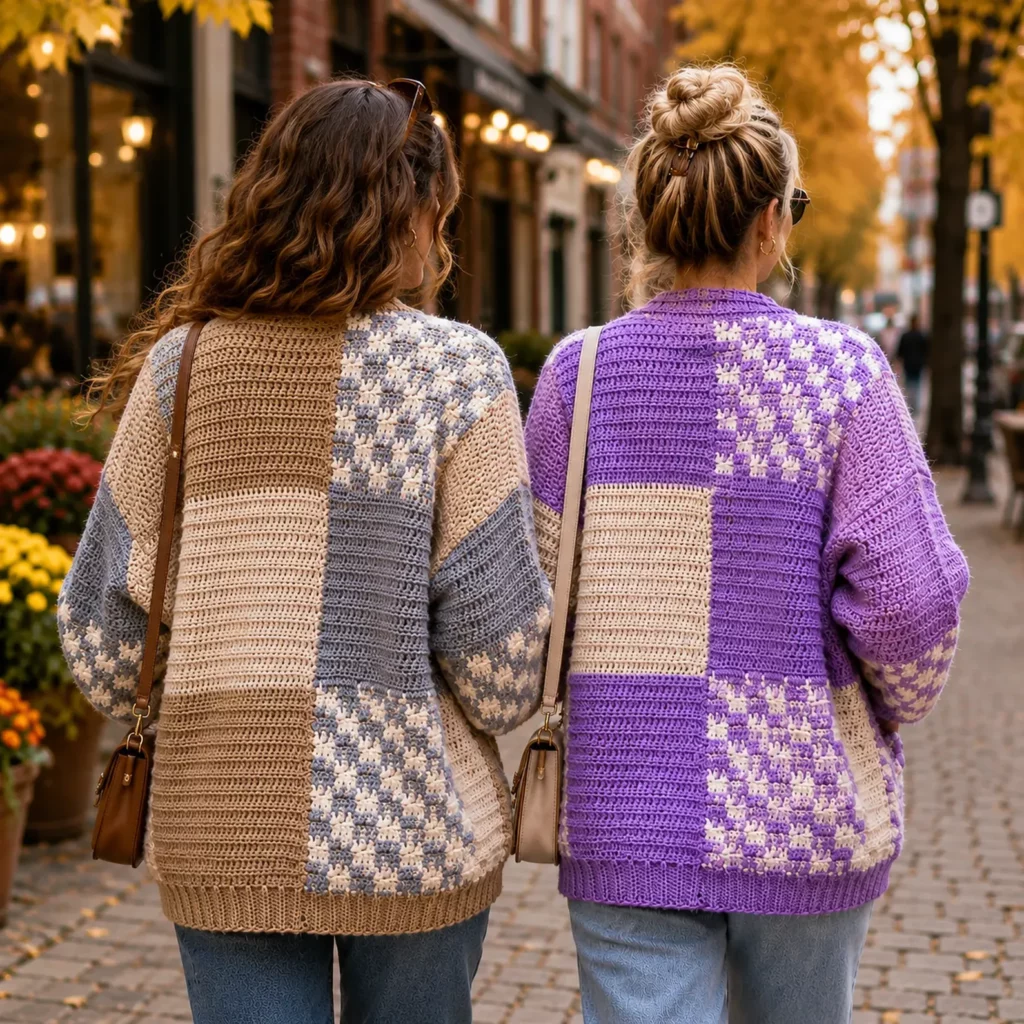
- Patchwork color blocking (large panel sections in coordinating neutrals)
- Checkerboard accent panels (a bold detail that looks “designer”)
- Wide ribbed front band (frames the cardigan and adds structure)
- Ribbed cuffs (optional but recommended to keep sleeves snug)
How it’s constructed
This cardigan is built in a very approachable way:
- Crochet the back panel (rectangle)
- Crochet two front panels (rectangles)
- Crochet two sleeves (wide rectangles seamed into tubes)
- Sew shoulder seams, attach sleeves, sew side seams
- Add a front band and optional cuffs/hem ribbing
The checkerboard sections can be placed on sleeves, upper fronts, or the back—depending on the look you want. The vibe is “mix-and-match,” which makes it perfect for using yarn you already have.
Skill Level Explanation#
This is an easy-to-intermediate crochet project.
Great for confident beginners who can:
- crochet in rows
- count stitches and keep edges straight
- do basic color changes
- seam panels neatly (whip stitch or mattress stitch)
- work simple ribbing
Intermediate elements (still very manageable):
- checkerboard colorwork (simple, block-by-block changes)
- keeping tension consistent across color changes
- sizing and adjusting length
If you’ve made scarves, blankets, or a simple sweater, this easy crochet pattern cardigan will feel like an exciting (but doable) upgrade.
Materials Needed#
Yarn
You’ll get the best result with yarn that has good stitch definition and drape.
Recommended yarn options:
- Worsted weight (#4) acrylic (soft, affordable, easy-care)
- Worsted cotton blend (beautiful structure and stitch clarity)
- Wool blend worsted (extra cozy, great for fall/winter)
Color palette idea (like the look shown):
- Color A: medium brown
- Color B: tan/beige
- Color C: cream/ivory
Checkerboard looks best with two high-contrast shades (ex: brown + cream), while the patchwork panels can use softer neutrals.
Yardage estimate (oversized cardigan):
- S/M: 1,200–1,500 yards
- L/XL: 1,500–1,900 yards
- 2XL/3XL: 1,900–2,300 yards
(Exact yardage depends on length, sleeve volume, and how many color blocks you include.)
Hook
- Worsted yarn: 5.0–6.0 mm (choose based on drape)
Tip: If you want a denser, warmer cardigan, go down a hook size. If you want more drape, go up.
Notions
- Stitch markers (helpful for sleeve placement)
- Yarn needle
- Scissors
- Measuring tape
Optional finishing extras
- 4–6 buttons (if you want a button-front instead of open-front)
- Blocking mats/steam iron for shaping
- A fabric label for a boutique finish
Stitches & Techniques Explained#
Abbreviations (US terms)
- ch = chain
- sl st = slip stitch
- sc = single crochet
- hdc = half double crochet
- dc = double crochet
- BLO = back loop only
- rep = repeat
- st(s) = stitch(es)
Main body stitch (simple + modern)
For a clean, modern cardigan fabric, a simple stitch with a subtle texture works best. Two great choices:
- Half double crochet (hdc) for a smooth, slightly structured fabric
- Double crochet (dc) for a drapier fabric that works up faster
In this tutorial, I’ll use hdc because it creates a cozy, sturdy fabric that holds shape nicely.
Ribbing technique (BLO rib)
Ribbing is made with sc BLO (single crochet in back loop only). It’s easy, stretchy, and gives a clean knit-like look for cuffs and front bands.
Checkerboard technique (beginner-friendly)
This checkerboard is made by crocheting small blocks of color and changing colors at the edge of each block.
Key tip:
- Change colors on the last yarn-over of the final stitch in the old color.
- Keep yarn attached and carry it neatly across the back of the work for short distances, or cut and rejoin for the cleanest look.
A simple block size to start with:
- 4 stitches wide x 4 rows tall per square (adjustable)
Step-by-Step Instructions#
Pattern notes
- Written in US terms
- Construction: back panel + 2 front panels + 2 sleeves + ribbing
- Fit: oversized/drop shoulder
- Sizes: easy to customize using measurements
- Always measure your own gauge by making a small swatch
Suggested measurements (custom fit method)
Instead of locking you into one exact stitch count, this cardigan is easiest to size by measuring:
- Back panel width: about 22–26″ (depending on desired looseness)
- Back panel length: 22–28″ (cropped to long)
- Each front panel width: about half the back panel width
- Sleeve width: 16–22″ (wide and cozy)
- Sleeve length: 16–20″ from shoulder to cuff (adjustable)
If you prefer standard sizing:
- S/M: back width ~22″, sleeve width ~18″
- L/XL: back width ~26″, sleeve width ~20″
- 2XL/3XL: back width ~30″, sleeve width ~22″
Part 1: Back Panel (Color Block)
Foundation: Ch to desired back width (example: ch 61 for ~22–24″ depending on gauge).
Row 1: Hdc in 2nd ch from hook and across. Turn.
Row 2: Ch 1, hdc across. Turn.
Repeat Row 2 until back panel reaches desired length.
Patchwork color blocking (optional layout idea):
- Work 8–12 rows in Color A
- 8–12 rows in Color B
- 8–12 rows in Color A again
Or use larger blocks by changing color every 4–6 inches.
Fasten off and weave in ends.
Part 2: Front Panels (Make 2)
Each front panel is a rectangle, slightly narrower than the back.
Foundation: Ch to desired width (about half of back panel + 1–2″).
Example: If back is 60 sts, each front could be 28–30 sts.
Work hdc rows until the front panel matches the back panel length.
Optional checkerboard placement:
If you want the checkerboard at the upper front (like a statement shoulder panel), do this:
- Crochet the lower portion in solid color (ex: tan)
- Then switch to the checkerboard section for the top 6–10 inches
Fasten off.
Make a second front panel and mirror the color layout if you want symmetry.
Part 3: Checkerboard Panel Instructions
You can crochet checkerboard directly into the front panel or sleeves.
Block size: 4 stitches x 4 rows (easy and bold)
How to crochet it:
- Decide two colors: Color X (dark) + Color Y (light)
- Row A: 4 sts X, 4 sts Y, repeat across
- Next row: same color placement for 4 rows total
- Then swap: 4 sts Y, 4 sts X, repeat across for 4 rows
Repeat these 8-row cycles for the desired checkerboard height.
Pro tip:
Place a stitch marker every 4 stitches for the first row or two—it makes the block rhythm effortless.
Part 4: Sleeves (Make 2)
Sleeves are wide rectangles seamed into tubes (drop-shoulder style).
Foundation: Ch to desired sleeve width (example: 45–55 sts depending on gauge and how oversized you want it).
Rows: Hdc rows until sleeve length is reached.
Patchwork sleeve layout idea:
- Lower sleeve: solid color (tan)
- Mid sleeve: checkerboard section (brown/cream)
- Upper sleeve: solid color (brown)
Once sleeve rectangle is finished:
- Fold lengthwise and seam the long edge to form a tube.
Repeat for second sleeve.
Part 5: Assemble the Cardigan Body
- Lay back panel flat.
- Place front panels on top, aligning shoulders and outer edges.
- Seam the shoulders (leave neck opening wide).
Now attach sleeves:
- Find sleeve center at the top edge.
- Match sleeve center to shoulder seam.
- Sew sleeve to armhole opening (you’re attaching it “flat” before closing sides).
Finally:
- Fold cardigan and sew side seams from underarm down to hem.
- Sew sleeve seams (if not already done as tubes).
Try on and adjust sleeve length if needed before finishing edges.
Part 6: Front Band Ribbing
This gives the cardigan structure and a polished finish.
Join yarn at bottom front edge.
Ribbing strip (worked in rows):
- Ch 10–16 depending on how wide you want the band
- Row 1: sc in 2nd ch and across, sl st to cardigan edge, turn
- Row 2: sc BLO across, turn
- Row 3: sc BLO across, sl st to next cardigan edge stitch, turn
Repeat along the entire front edge and around the neckline until you reach the starting point.
Fasten off and seam the ribbing ends together neatly.
Part 7: Optional Cuffs + Hem Ribbing
Cuffs:
Pick up stitches around sleeve opening and add sc BLO ribbing (same method as band).
Hem ribbing:
Add a ribbed hem the same way if you want a snug bottom edge (great for preventing stretch).
Part 8: Optional Button Band
If you want it to close:
- Add buttonholes on one front band by chaining and skipping stitches at even spacing.
- Sew buttons on the opposite band.
Common Mistakes and How to Avoid Them#
- Checkerboard looks messy:
Keep block sizes consistent and change color on the last yarn-over of the previous stitch. - Tension changes between colors:
Don’t pull the carried yarn too tight. Let it float loosely behind the work. - Cardigan feels stiff:
Use a larger hook or switch from hdc to dc for more drape. - Sleeves are too long or short:
Try on after attaching sleeves (before cuffs) and adjust length easily by adding/removing rows. - Front band waves or flares:
You may have too many slip-stitch joins. Space them evenly and avoid stretching the cardigan edge while attaching ribbing. - Seams look bulky:
Mattress stitch gives the cleanest seam; whip stitch is faster but more visible.
Expert Tips for Better Results#
- Choose a consistent neutral palette: Patchwork looks more “high-end” when colors are coordinated.
- Block panels before assembly: Even light blocking makes seams align better and improves drape.
- Use stitch markers for checkerboard blocks: Mark every 4 stitches to stay perfectly aligned.
- Reinforce shoulder seams: Add a second seam pass—cardigans hang from shoulders.
- Weave ends as you go: Checkerboard produces more ends if you cut colors; handle them early.
- Add a hidden “stability line”: A row of slip stitches along neckline edge can prevent stretching.
Variations and Customization Ideas#
- Make it cropped: Stop back panel at 18–20″ and add a chunky hem rib.
- Make it longline: Extend panels to 30–34″ for a cozy duster.
- Add pockets: Crochet two rectangles and sew onto front panels (keep them in a solid color).
- Switch checkerboard to the back: Make one big checkerboard panel for a statement cardigan.
- Try different block sizes: 3×3 blocks for smaller checks, 6×6 for bold oversized checks.
- Add a hood: Crochet a rectangle, fold, seam, attach to neckline.
Benefits of This Crochet Project#
- A wearable statement piece that looks boutique and modern
- Easy construction (rectangles + seams) with high visual impact
- Great skill builder: seaming, ribbing, and colorwork
- Customizable fit and length for any wardrobe
- Perfect for using coordinated leftovers or stash neutrals
- Cozy enough for cold months, stylish enough for year-round layering
Internal Linking Suggestions#
You may also like…
- Crochet Tutorial: How to Change Colors Neatly in Crochet
- Crochet Tutorial: Mattress Stitch for Invisible Seams
- Best Yarn for Crochet Cardigans (Drape vs Structure)
- Free Crochet Pattern: Beginner-Friendly Oversized Crochet Cardigan
- Crochet Tutorial: Ribbing with Single Crochet BLO
- Free Crochet Pattern Roundup: Cozy Crochet Wearables
FAQ Section#
Is this an easy crochet pattern for beginners?
Yes. The cardigan is built from rectangles with simple seams. The checkerboard adds interest, but it’s made from basic color changes and repeatable blocks.
What yarn is best for a patchwork crochet cardigan?
Worsted acrylic or cotton blends are great for beginners and give clean stitch definition. Wool blends are extra cozy but may require gentler care.
How do I resize the cardigan?
Adjust the width of the back panel and front panels to match your desired bust/oversized fit, then adjust length by adding rows. Sleeves can be made wider or longer by changing the rectangle size.
How do I keep checkerboard edges neat?
Use consistent block sizes (like 4 stitches x 4 rows), change colors on the last yarn-over of the previous stitch, and don’t pull carried yarn too tight.
Do I have to do the checkerboard?
Not at all. You can make the cardigan fully color-blocked or single-color. The checkerboard is just a statement detail.
How do I stop the front band from stretching?
Use sc BLO ribbing and attach it evenly without stretching the body edge. Blocking also helps the band lay flat.
Conclusion#
This patchwork cardigan is the perfect blend of cozy and modern: oversized fit, clean color blocks, and a bold checkerboard accent that makes it look designer-level without complicated shaping. This free crochet pattern keeps the construction approachable, while the finishing details (ribbed band, cuffs, neat seams) give it that polished, wearable look.
If you tell me your preferred size (S/M, L/XL, 2XL/3XL) and whether you want it cropped or longline, I can convert the measurements into a simple stitch-count plan so your crochet pattern fits exactly the way you want.