


Introduction#
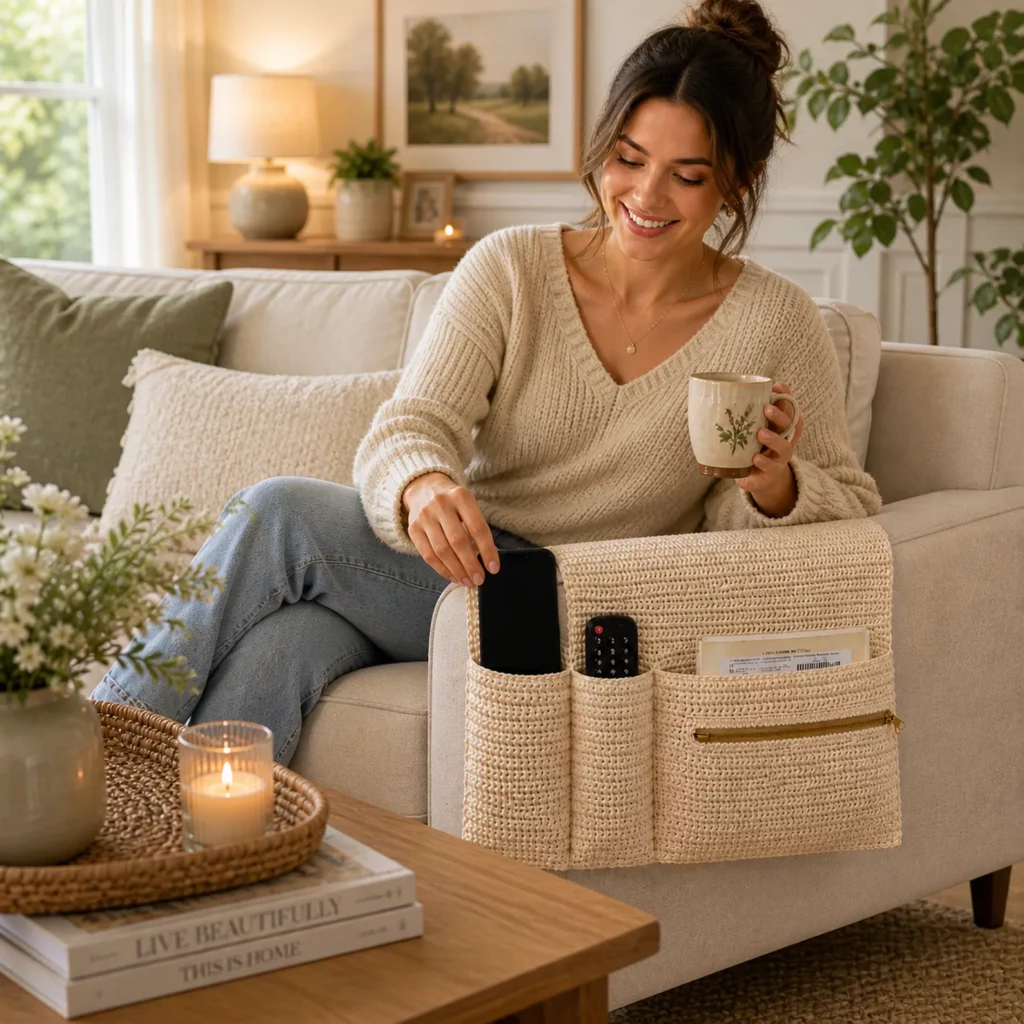
If your living room has a “remote mystery” problem—or you’re constantly moving your phone, glasses, pens, and notepad from one cushion to another—a couch armrest organizer is one of the most satisfying DIY crochet projects you can make. It’s practical enough to use every day, but still pretty enough to look like intentional home décor instead of clutter control.
Explore more beginner home decor crochet patterns in our pattern library.
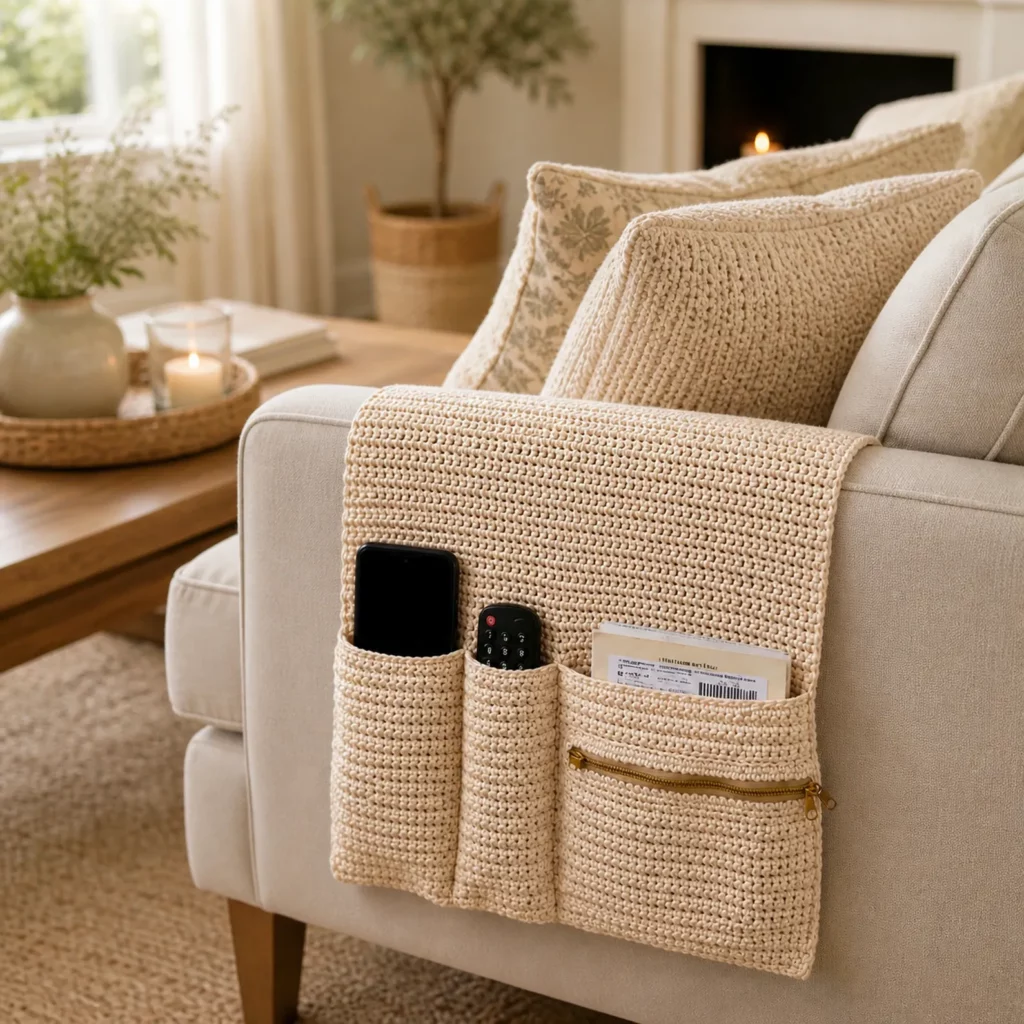
This crochet pattern walks you through making a couch armrest organizer (also called a sofa caddy) that drapes over the arm of your chair or recliner. The design features multiple pockets in different sizes—including a larger pocket that can hold mail, a small book, or a tablet—and an optional zipper pouch panel for items you don’t want to lose (earbuds, spare keys, lip balm, coins, or a tiny crochet notions kit).
The best part: this is a made-to-measure crochet pattern. That means you don’t have to guess whether it will fit your furniture. You’ll measure your armrest, crochet a sturdy wrap panel, then add pockets exactly where you want them.
If you’re looking for a free crochet pattern that’s beginner-friendly, useful, and AdSense-quality helpful (not thin content), this is it.
Detailed Description of the Crochet Pattern#
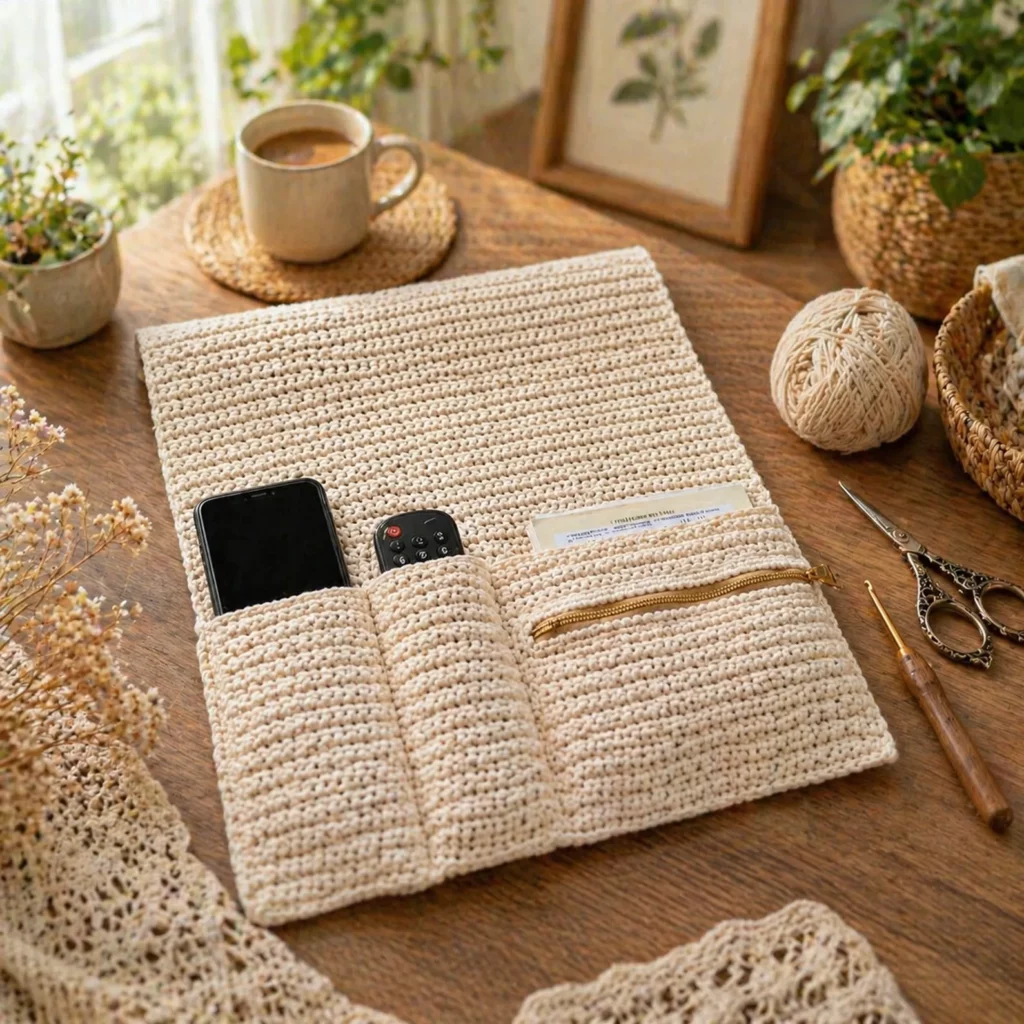
This armrest organizer is built in layers for strength:
- Main wrap panel: a long rectangle that drapes over the armrest—dense stitches for durability and grip.
- Pocket panel: a second rectangle (or multiple smaller rectangles) sewn onto the front side to create compartments.
- Zipper pocket (optional): a zippered pouch section attached on top of (or as part of) the pocket panel.
- Reinforced top edges: pocket tops are reinforced with extra stitching so they won’t stretch out over time.
- Optional anti-slip features: ties, elastic, or a grippy strip added to the underside to stop sliding.
The look is clean and modern: simple horizontal texture lines, neat pocket shapes, and a functional layout that fits real household items.
Skill Level Explanation#
This is an easy-to-intermediate crochet pattern.
You should be comfortable with:
- Working in rows (rectangles)
- Single crochet or half double crochet
- Basic seaming with a yarn needle
- Measuring as you crochet (made-to-measure)
The only “intermediate” part is the zipper pocket. If you’re not ready for that, you can absolutely make this organizer without a zipper and still have a fantastic finished project.
Materials Needed#
Yarn
For a couch organizer, you want yarn that’s sturdy, washable, and not too stretchy.
Best yarn choices:
- Worsted weight cotton (#4) (excellent structure, grip, and durability)
- Cotton blend (cotton/linen or cotton/acrylic for a bit more softness)
- Acrylic works, but cotton usually grips upholstery better and won’t pill as quickly.
Yardage estimate (varies by size):
- Main panel: 300–600 yards
- Pocket panels: 150–350 yards
- Total: often 450–950 yards, depending on width, length, and pocket count
Hook
- Worsted cotton: 4.5–5.5 mm
Choose a hook that makes a firm fabric. If you can easily see gaps, go down a size.
Notions
- Stitch markers (optional)
- Measuring tape
- Yarn needle
- Scissors
- Zipper (optional): 7–10 inch zipper works well for most organizer widths
- Sewing needle + thread (or fabric glue) if attaching zipper more securely
- Optional: button/elastic/ties for anti-slip
- Optional: thin felt strip or non-slip rug pad strip (for underside grip)
Stitches & Techniques Explained#
Abbreviations (US terms)
- ch = chain
- sc = single crochet
- hdc = half double crochet
- sl st = slip stitch
- BLO = back loop only
- RS/WS = right side/wrong side
Why BLO stitches work great here
Working BLO (back loop only) creates subtle ridges—these ridges:
- add texture
- improve grip on upholstery
- make the panel feel thicker without extra bulk
Two strong stitch options
Option A: sc BLO (very sturdy)
Great for structure, less stretch.
Option B: hdc BLO (faster, still sturdy)
Slightly more drape, still durable.
Clean pocket edges
Pocket openings stretch easily if you don’t reinforce them. The fix:
- Add a round (or row) of sc along pocket top edges
- Or crochet the pocket top in slip stitch for a firmer edge
Step-by-Step Instructions#
This is a made-to-measure crochet tutorial. You’ll measure your furniture first, then crochet to fit.
Measure your armrest
You need three measurements:
- Top width (A): across the top of the armrest
- Drop (B): how far down you want it to hang on each side
- Total length (C): B + A + B (plus optional extra drape)
Typical ranges:
- A: 6–10 inches
- B: 10–16 inches
- C: 26–40 inches
Also decide:
- Which side will hold the pockets (usually the outside-facing side)
Crochet the main wrap panel
This is the foundation of the whole crochet pattern.
Foundation chain:
Chain until your chain measures the organizer width (front-to-back across the arm). A common width is 10–14 inches.
Row 1: sc in 2nd ch from hook and sc across. Turn.
Row 2: ch 1, sc BLO across. Turn.
Repeat Row 2 until the panel reaches your measured total length (C).
Tip for neat edges:
- Always turn the same direction
- Count your stitches every few rows
- If edges start to lean, you may be accidentally adding/losing stitches
Fasten off and weave in ends.
Decide pocket placement
Lay the wrap panel over your armrest and mark where pockets should sit. Most people like pockets on the outside panel, about 4–6 inches above the bottom edge (so items don’t fall out).
Common layout:
- One tall pocket for phone
- One narrow pocket for remote
- One wide pocket for mail/book/tablet
- Optional zipper pocket across the bottom or middle
Crochet the base pocket panel
This panel forms the backing for multiple pockets.
Pocket panel width: same as your wrap width, or slightly narrower (about 0.5 inch less) for cleaner edges.
Pocket panel height: typically 8–12 inches depending on how deep you want pockets.
Foundation chain: chain to pocket panel width.
Rows: work sc (or sc BLO) until desired height.
Do not fasten off yet if you want to build pockets directly; otherwise fasten off and weave ends.
Create pocket dividers
Now you’ll turn the panel into multiple pockets.
Option: Sew-on divider method (simplest)
- Place pocket panel on the wrap panel. Pin it in place.
- Sew the bottom edge and side edges to attach the pocket panel (leave the top open).
- Decide your pocket widths (for example: 3.5″ phone, 2.5″ remote, remaining width wide pocket).
- Sew vertical seams straight down to create compartments.
Reinforce the top of each divider seam with extra stitches (this is where stress happens).
Option: Add separate pocket pieces (more structured)
Instead of one big pocket panel, crochet separate pockets (phone pocket, remote pocket, wide pocket) and sew them on one by one. This can look extra polished and makes sizing easier.
Add the zipper pocket
You have two beginner-friendly ways to add a zipper pocket.
Method: Crochet zipper pouch panel and sew zipper on
- Crochet a rectangle for the zipper pocket front (same width as zipper length + a little).
- Crochet a matching rectangle for the zipper pocket back.
- Sew the zipper between the two pieces along the top edge (zipper tape sandwiched between crochet fabric).
- Then sew the sides and bottom of the pouch closed.
- Attach the finished zipper pouch onto the wrap panel or onto the pocket panel.
This method creates a true pouch with depth.
Method: Flat zipper pocket (easiest, looks tidy)
This is great for mail, receipts, and slim items.
- Crochet one rectangle slightly larger than your zipper.
- Sew zipper onto the rectangle near the top edge.
- Place the rectangle against the wrap panel and sew sides and bottom, forming a flat zip compartment.
Tip: Use a sewing needle and thread for zipper attachment—it’s more secure and less bulky than yarn stitches.
Reinforce pocket tops
Pocket openings will stretch unless reinforced.
Do one of these:
- Work a row of sc across each pocket opening (tight tension)
- Add a slip stitch edge (very firm)
- Sew a simple line of running stitch with sewing thread along the inside top edge
Add finishing border
A border makes the organizer look professional and helps edges stay flat.
Join yarn at a corner and work:
- 1 round of sc evenly around the entire wrap panel
- Work (sc, ch 1, sc) in corners if needed for clean corners
Optional: Add a second round of sc for extra firmness.
Optional anti-slip features
If your organizer slides, try one of these:
- Tie straps: crochet two ties (ch 50, sl st back down) and attach to underside so you can tie around the arm.
- Elastic loop: sew a strip of elastic to the underside.
- Grip strip: stitch or glue a thin strip of non-slip rug pad to the underside.
Common Mistakes and How to Avoid Them#
The organizer slides off the armrest
- Use BLO texture on the main panel
- Make the inside drop slightly longer than the outside drop
- Add ties or a grippy underside strip
Pockets stretch out and sag
- Reinforce pocket tops with sc or slip stitch edging
- Use cotton yarn
- Don’t make pockets too deep for heavy items
Panel edges curl
- Your tension may be too tight. Go up a hook size for the border or add a second border round.
- Block lightly if needed.
Zipper looks wavy
- Zippers need a stable edge. Use sewing thread, not yarn, and don’t pull too tight.
- Pin zipper tape before sewing.
Dividers rip over time
- Sew divider seams with reinforced stitching at the top 1–2 inches
- Consider adding a small bar tack (a tight cluster of stitches) at each divider top
Expert Tips for Better Results#
- Use cotton yarn for a “home décor” look and better durability.
- Add a hidden stiffener (thin felt) behind the zipper pocket area to keep it flat.
- For super neat pockets, sew with sewing thread instead of yarn—thread makes flatter seams and less bulk.
- If you want the organizer to fit multiple furniture pieces, make it slightly wider and use a tie to cinch it.
- Make a matching set: coasters or a small crochet basket using the same yarn looks amazing as a gift bundle.
Variations and Customization Ideas#
- Add a charging cable slot by leaving a small gap in a pocket seam.
- Make a tablet pocket by creating one wide compartment with no dividers.
- Add a pen loop: crochet a short chain loop and stitch it to the pocket front.
- Add a glasses sleeve: a narrow pocket with a flap.
- Add decorative trim: daisies, granny squares, or a simple scallop border along pocket tops.
- Make a recliner version: longer drop and extra pockets for snacks or a small water bottle (use stronger yarn and tighter stitches).
Benefits of This Crochet Project#
- Reduces clutter and keeps essentials within reach
- Practical, washable, and durable
- Beginner-friendly construction (mostly rectangles)
- Custom-fit to any sofa, chair, or recliner
- Great for gifting (housewarming, parents, students, grandparents)
- Makes high-value, search-friendly crochet blog content
Internal Linking Suggestions#
You may also like:
- Beginner Crochet Basket Pattern for Home Organization
- How to Crochet Ribbing and Textured Panels
- How to Sew Crochet Seams Neatly
- Easy Granny Square Projects for Home Décor
- Crochet Coaster Patterns
- Crochet Organizer Patterns for Beginners
FAQ Section#
What yarn is best for a crochet couch organizer?
Cotton yarn is best because it’s sturdy, washable, and grips upholstery better than acrylic.
How do I keep my couch caddy from sliding?
Use BLO texture, make the inside panel longer, and add ties or a non-slip strip underneath.
Can I make this crochet pattern without a zipper?
Yes. The zipper pocket is optional. You can replace it with another open pocket or skip it entirely.
How deep should the pockets be?
For remotes and phones, 6–8 inches is usually ideal. For books or tablets, increase height but reinforce the top edge.
How do I resize it for my armrest?
Measure top width and drop. Crochet the main panel to that length, then size pocket panels to match the wrap width.
Is this beginner-friendly?
Yes. The main panel and pockets are rectangles. The zipper is the only advanced element, and it’s optional.
Conclusion#
A couch armrest organizer is one of the most useful crochet projects you can make—because it actually changes how your space functions. Once it’s on your armrest, you stop losing remotes, your phone has a “home,” and your living room instantly feels tidier.
If you tell me your armrest measurements (top width and drop), I can give you an exact starting chain and an easy pocket layout plan tailored to your furniture—so your organizer fits perfectly on the first try.


