Introduction#
A granny square cardigan is one of those crochet projects that looks bold and “designer,” but the construction is wonderfully logical once you see how it’s put together. You’re basically building a cozy jacket out of repeating squares, then finishing it with clean borders, sleeves, and an easy front opening. It’s the kind of make that feels relaxing (because granny stitches are rhythmic), yet exciting (because every color change looks like progress).
Explore more beginner granny squares crochet patterns in our pattern library.
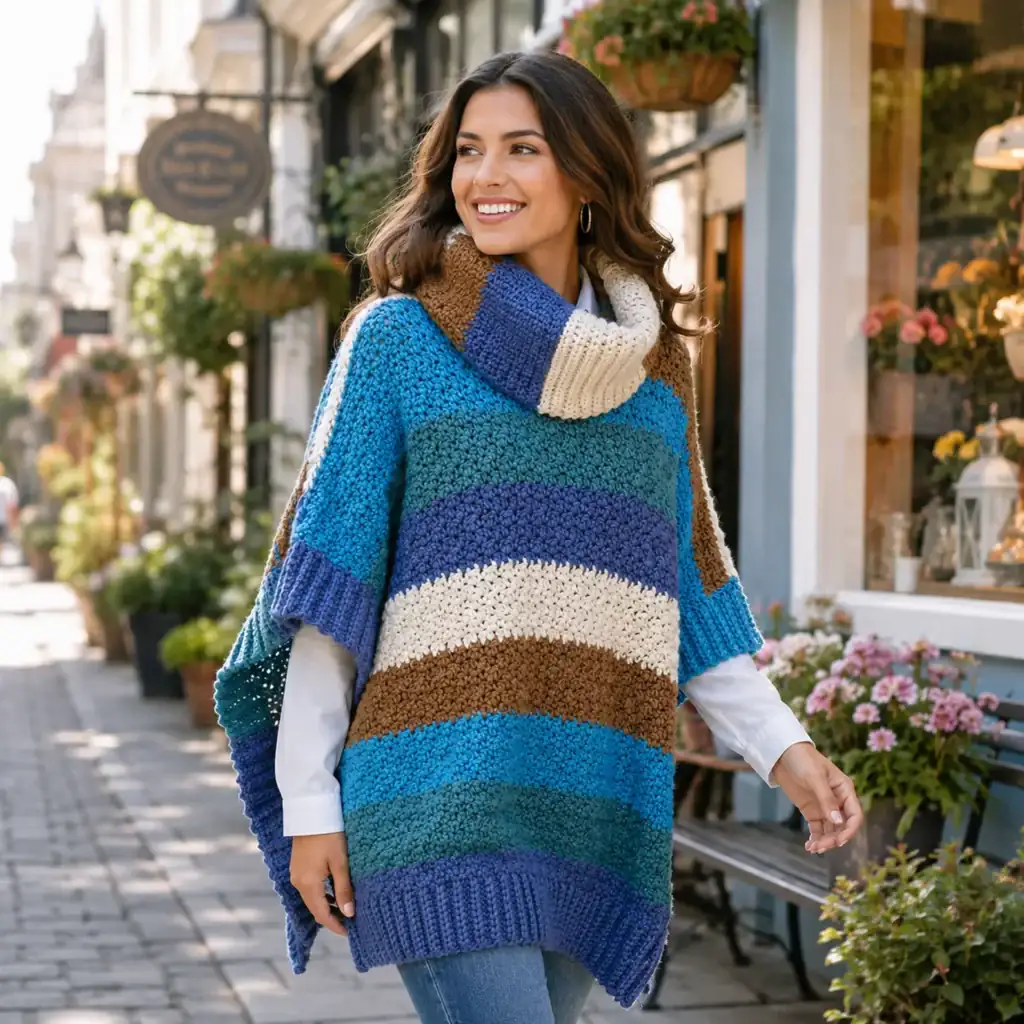
This crochet pattern is for a color-blocked, striped granny square cardigan with a roomy fit, long sleeves, and a neat open-front edging. It’s bright, modern, and perfect for using up yarn in your stash—especially if you love mixing high-contrast colors with a grounding shade.
You’ll get a full crochet tutorial style guide below: materials, stitch explanations, sizing options, step-by-step instructions, and finishing tips so your cardigan looks polished and wearable—not “homemade” in the bad way.
Detailed Description of the Crochet Pattern#
This cardigan is a granny square construction cardigan with a structured-but-cozy silhouette. The standout details include:
- Classic granny stitch texture (clusters of double crochet with chain spaces)
- Bold stripes and blocks created by changing colors every few rounds
- An open front with a clean border/edging that stabilizes the shape
- Long sleeves that echo the body’s stripe pattern
- A longer length (hip to mid-thigh depending on size and yarn)
- Comfortable, slightly oversized fit that layers easily over tees and sweaters
Instead of complicated shaping, this design uses simple geometry: squares + rectangles, strategic joining, then tidy finishing.
Skill Level Explanation#
This is an easy-to-intermediate crochet pattern.
It’s beginner-friendly if you can:
- crochet a granny square (or learn it—this tutorial explains it clearly)
- maintain consistent tension
- seam/join pieces neatly
- measure as you go for sleeve length and cardigan fit
It feels “intermediate” mostly because garments require a bit of assembly and fitting. The stitches themselves are simple and repetitive.
Materials Needed#
Yarn
A granny square cardigan can be made in many yarn weights, but for a cozy, structured look, these options work best:
Recommended yarn weight:
- Worsted (#4) for a wearable, not-too-heavy cardigan
- Bulky (#5) for a chunky, warm, fast project
Fiber suggestions:
- Acrylic or acrylic/wool blend for warmth and easy care
- Wool for drape and premium feel
- Cotton for a lighter cardigan (best for spring/fall)
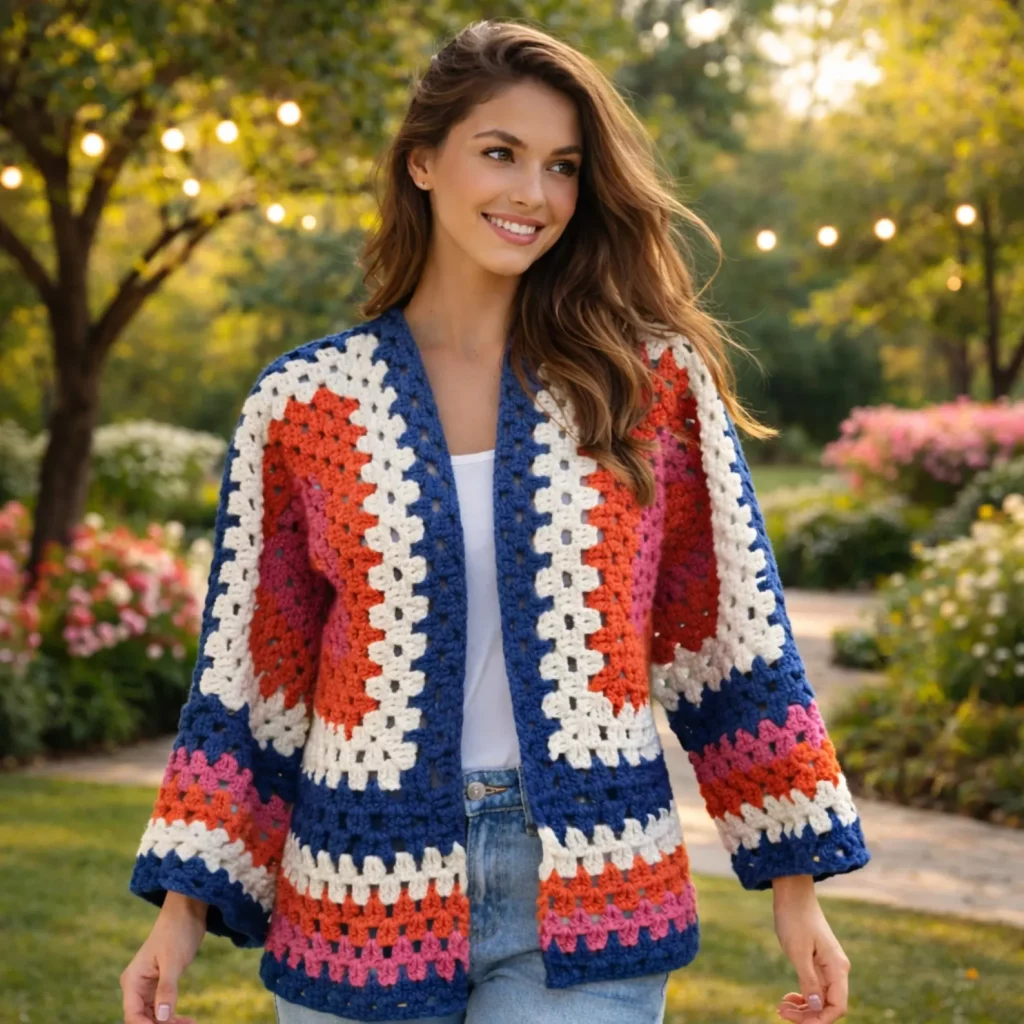
Color palette (example):
- Deep blue as the main “frame” color
- White/cream as contrast
- Bright orange/coral and magenta/pink for bold panels
Yardage estimate (very approximate):
- XS–S: 1200–1600 yards
- M–L: 1600–2200 yards
- XL–2XL: 2200–2800 yards
- 3XL–5XL: 2800–3600 yards
Granny projects vary a lot based on length, sleeve width, and how thick your yarn is, so it’s always smart to have extra of your main color.
Hook
- Worsted: 5.0–6.0 mm (choose drape you like)
- Bulky: 6.5–8.0 mm
Notions
- Stitch markers
- Measuring tape
- Yarn needle (for weaving and seaming)
- Scissors
- Optional: buttons (if you want to add a closure)
- Optional: blocking mats/pins (highly recommended)
Stitches & Techniques Explained#
Abbreviations (US terms)
- ch = chain
- sl st = slip stitch
- sc = single crochet
- dc = double crochet
- sp = space
- sk = skip
- rep = repeat
- RS/WS = right side/wrong side
Granny Stitch Basics
A standard granny square uses 3-dc clusters separated by chain spaces.
- Granny cluster: 3 dc in the same space
- Corner: (3 dc, ch 2, 3 dc) in the same corner space
- Between corners you typically work: (3 dc) in each chain space
Joining Options
Choose one joining method for a clean finish:
- Slip stitch join: neat and slightly raised
- Whip stitch seam: flat and sturdy
- Join-as-you-go (JAYG): faster, less seaming at the end
For a garment, whip stitch or slip stitch seaming is very reliable.
Step-by-Step Instructions#
This is a made-to-measure-friendly approach, with guidance for common sizes. The structure is:
- Make granny squares for body panels
- Join squares into back and front panels
- Seam shoulders and sides
- Create sleeves (squares or striped granny panels)
- Attach sleeves
- Add cuffs, hem, and front edging
Sizing Notes
This cardigan is designed with positive ease (roomy). For a fitted look, reduce square size or overall length.
Target finished bust (approximate):
- XS–S: 36–40 in
- M–L: 42–46 in
- XL–2XL: 48–54 in
- 3XL–5XL: 56–66 in
The easiest way to “size” is by adjusting:
- the size of each granny square (more rounds = bigger square)
- the number of squares across the back/front
- the length of sleeves and cardigan hem
Make the Granny Squares
You’ll make the same style square, changing colors every round or every few rounds to create stripes.
Granny Square (classic)
Round 1:
MR, ch 3 (counts as dc), 2 dc in ring, ch 2, (3 dc, ch 2) three more times, join to top of ch 3.
You should have 4 corners.
Round 2:
Sl st to corner space. In corner: (ch 3, 2 dc, ch 2, 3 dc).
In next corner: (3 dc, ch 2, 3 dc). Repeat for all corners. Join.
Round 3+:
Work corners as (3 dc, ch 2, 3 dc).
Work (3 dc) in each side space between corners. Join each round.
How big should each square be?
- For worsted yarn: many cardigans look great with squares 7–10 inches wide.
- Make one square, block it, then measure. Add rounds until you like the size.
Color planning tip:
To get a bold stripe look, use a consistent sequence like:
- Main color (frame)
- White
- Bright color A
- White
- Main color
- Bright color B
- Main color
Repeat the same sequence on each square for a cohesive cardigan.
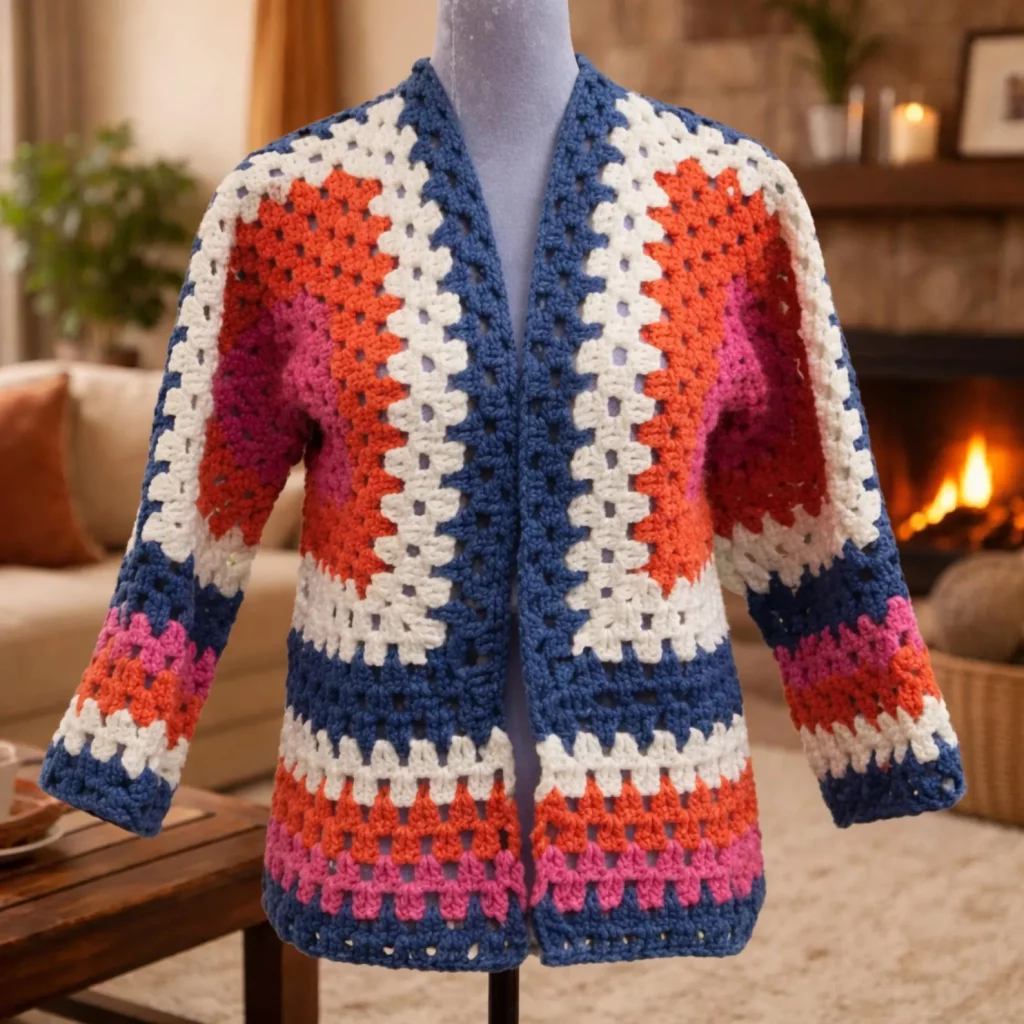
Layout and Panels
A classic layout that works beautifully:
- Back panel: 2 squares wide × 2 squares tall (4 squares total)
- Each front panel: 1 square wide × 2 squares tall (2 squares per side, 4 total)
That’s 8 squares total for the torso.
For larger sizes, you can do:
- Back panel: 3 squares wide × 2 squares tall
- Front panels: 1–2 squares wide × 2 squares tall
Assemble the torso:
- Join squares for the back panel.
- Join squares for each front panel.
- Seam shoulders: attach front panels to the back at the top edge, leaving a neck opening.
- Seam sides: stitch from underarm down to hem, leaving armholes.
Sleeves
There are two easy sleeve approaches. Choose what you like:
Option: Granny square sleeves
Make 2–4 squares per sleeve and join into a tube, then add length with rounds or stripe rows.
Simple build:
- Join 2 squares vertically for each sleeve (short sleeve length).
- Add more squares if you want longer sleeves before adding cuffs.
Option: Striped granny sleeve panels
Make a granny square “base,” then crochet rounds around the armhole opening to create a tapered sleeve.
This gives a smoother sleeve and uses fewer seams.
Recommended for a clean look:
- Attach sleeve to armhole first, then crochet rounds downward.
Attach Sleeves
With cardigan body inside out:
- Match sleeve seam to side seam.
- Pin sleeve evenly around the armhole.
- Seam with whip stitch or slip stitch.
Turn right side out and check fit before adding cuffs.
Add Cuffs (Main Color)
Cuffs help sleeves sit nicely and look finished.
Simple cuff:
Join yarn at sleeve edge. Work 2–6 rounds of sc evenly around.
For a firmer cuff, work BLO sc for a ribbed look.
Add Hem and Front Edging (Main Color)
This border is what makes the cardigan look polished and intentional.
Hem:
Join yarn at bottom edge. Work 2–6 rounds of sc around the entire hem.
Front edging:
Join at lower front corner, work sc evenly up the front opening, around the neck, and back down the other front edge. Repeat for 2–4 rounds.
Tip for neat corners:
At bottom corners, work (sc, ch 1, sc) in the corner space to keep it square.
Optional: Pockets
Pockets look adorable on granny cardigans.
Make 2 small granny squares or crochet 2 rectangles in sc. Sew onto the front panels at hip level.
Blocking
Blocking makes granny squares look professional.
- Steam block or wet block squares before joining if possible.
- If you can’t, block the finished cardigan at the end.
This helps edges straighten and seams settle.
Common Mistakes and How to Avoid Them#
- Cardigan grows too much after blocking: Acrylic can relax. Block your first square before committing to the full size.
- Wavy edges on squares: Too many stitches in side spaces or tension changes. Keep corners consistent and don’t add extra chains unless needed.
- Front edges flare open: Add a few decreases on the edging rounds, especially near the neckline, or use a smaller hook for the border.
- Sleeves feel bulky at the underarm: Reduce the number of squares at the top, or use the “attach then crochet down” sleeve method.
- Color changes look messy: Change colors on the last yarn-over of the joining slip stitch or final dc of the round, and weave ends neatly.
Expert Tips for Better Results#
- Use a main “frame” color consistently to unify wild color choices.
- Weave ends as you go—granny garments can have a lot of ends.
- Seam with matching yarn color (often the main frame color) for cleaner lines.
- For a boutique look, add one extra edging round in a contrasting color.
- If you want less bulk, use DK yarn and keep squares smaller.
Variations and Customization Ideas#
- Longline duster: Add more square rows to the torso length.
- Cropped cardigan: Use one square tall for the front/back, then add a short ribbed hem.
- Balloon sleeves: Increase sleeve circumference by adding extra rounds before cuffs.
- Neutral modern: Use cream, beige, gray, and one accent color.
- Scrap-buster rainbow: Make every square unique, but keep the last round the same color to “frame” them.
- Add buttons: Sew 1–3 buttons on one front edge and add simple chain loops on the other.
Benefits of This Crochet Project#
- A wearable crochet pattern that looks high-value and handmade in the best way
- Perfect stash buster for leftover yarn
- Relaxing repeat (granny stitch is easy to memorize)
- Customizable sizing without complicated grading
- Great gift project if you know someone’s style colors
- A satisfying statement piece you’ll actually wear
Internal Linking Suggestions#
If you’re building a crochet blog, link to these related posts:
- “How to Crochet a Granny Square for Beginners”
- “Best Granny Square Joining Methods (With Photos)”
- “How to Block Granny Squares”
- “Crochet Cardigan Sizing Tips and Measuring Guide”
- “How to Weave in Ends Neatly in Granny Stitch”
- “Easy Crochet Edgings for Cardigans and Blankets”
FAQ Section#
Is a granny square cardigan a good crochet pattern for beginners?
Yes. The stitches are simple; it’s mostly repetition and assembly. It’s a great first garment because you can measure as you go.
How many granny squares do I need?
It depends on your square size and your target fit. A common layout is 8 squares for the torso (4 back + 4 front) plus sleeves built from squares or rounds.
What yarn is best for a cardigan like this?
Worsted acrylic or wool blends are great for warmth and structure. DK makes a lighter drape. Cotton works for spring but can feel heavier.
How do I make the cardigan longer?
Add more rounds to each square or add an extra row of squares to the bottom. You can also extend length with additional border rounds.
How do I stop the front edges from stretching out?
Use single crochet edging, consider a smaller hook for the border, and block gently. You can also add a slip stitch reinforcement row.
Can I make this cardigan with leftover yarn?
Absolutely. Keep one consistent frame color and let the inner rounds vary—this keeps the look cohesive.
Conclusion#
A bold granny square cardigan is the perfect blend of cozy and creative: simple stitches, big visual impact, and endless ways to customize. Once you’ve made one, you’ll realize you can remix the exact same base into totally different looks just by swapping colors, adjusting square size, or changing the sleeve style.
If you tell me your bust measurement and the yarn weight you’re using, I can suggest a square size and a square layout that will land you a perfect, comfy fit without guesswork.