


Introduction#
When you want a crochet project that feels like a warm hug, a chunky hooded cardigan is hard to beat. It’s the kind of layer you throw on for school drop-offs, brisk walks, cabin weekends, and every “I’m cold but I still want to look cute” moment. And the best part is that you can crochet it in a way that looks beautifully textured and expensive, without needing complicated shaping.
Explore more beginner cardigans crochet patterns in our pattern library.
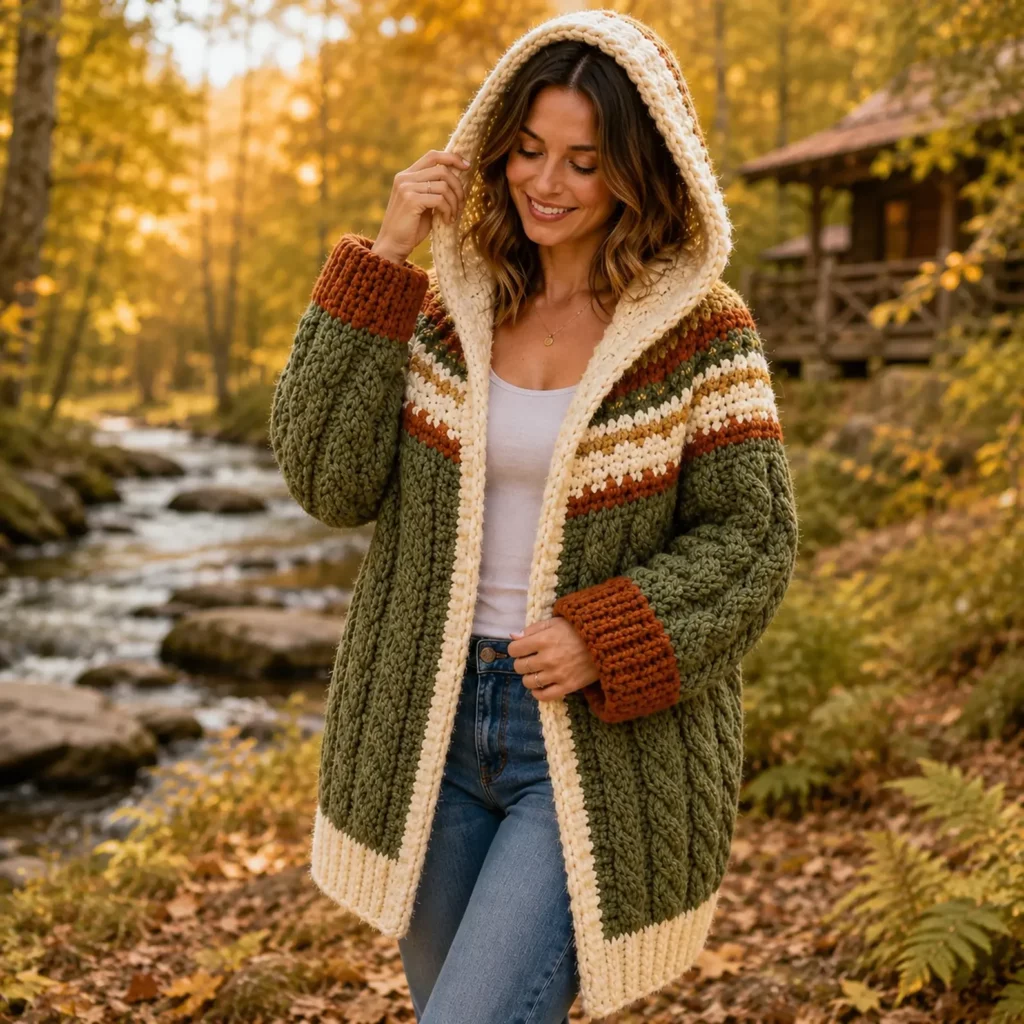
This crochet pattern is designed to create a thick, cozy, hooded cardigan coat with a bold cable-like texture, roomy sleeves, and a striped yoke section that adds a modern, outdoorsy vibe. The fabric is chunky and structured, the ribbing keeps the edges neat, and the hood gives it that extra-cozy finish.
Below you’ll find a full crochet tutorial style guide that explains the stitches, how the “cables” are created with crochet techniques, how to size it for your body, and how to assemble it cleanly. It’s a wearable DIY crochet project you can truly live in.
Detailed Description of the Crochet Pattern#
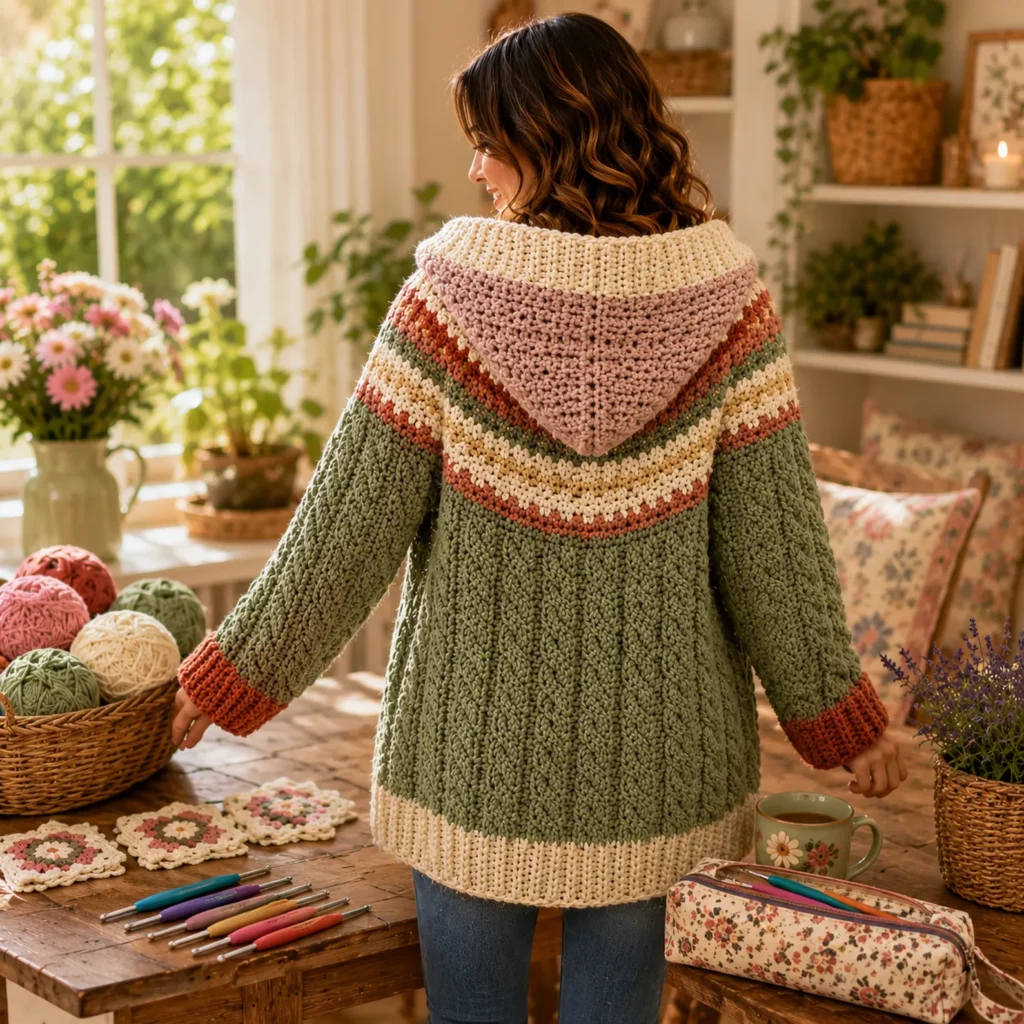
This cardigan is a longline, open-front style with a substantial hood. It has a relaxed fit through the body and sleeves, making it ideal for layering over tees, sweaters, or even light jackets. The standout feature is the vertical cable texture, created with raised stitches that mimic knit cables. These textured columns run along the body and sleeves, giving a classic, timeless look.
Design details you’ll be making
- Chunky, coat-like cardigan length with comfortable positive ease
- Faux cable texture made with raised stitches for bold dimension
- Striped yoke section across upper body and hood area for a rustic, modern feel
- Deep hood with a cozy, thick edge
- Wide ribbed cuffs and a ribbed hem to help the cardigan sit nicely
- Front opening finished with a sturdy edging so it doesn’t stretch out
This is a “statement cardigan” crochet pattern, but the construction itself can stay simple: you build panels, seam, then add finishing details like ribbing and the hood.
Skill Level Explanation#
This is an advanced beginner to intermediate crochet pattern.
You’ll feel comfortable if you know
- Basic stitches like single crochet and double crochet
- Working in rows and keeping edges straight
- Counting stitches and rows consistently
- Basic seaming with a yarn needle
You’ll learn or practice
- Post stitches or raised stitches to create cable texture
- Working ribbing that looks neat and stretchy
- Shaping and attaching a hood
- Creating clean color changes for stripes
- Finishing edges so a garment keeps its shape
If you’ve made a basic cardigan before, this is a great upgrade project. If you’re newer to garments, you can still do it—just take it step-by-step and swatch the textured stitch first.
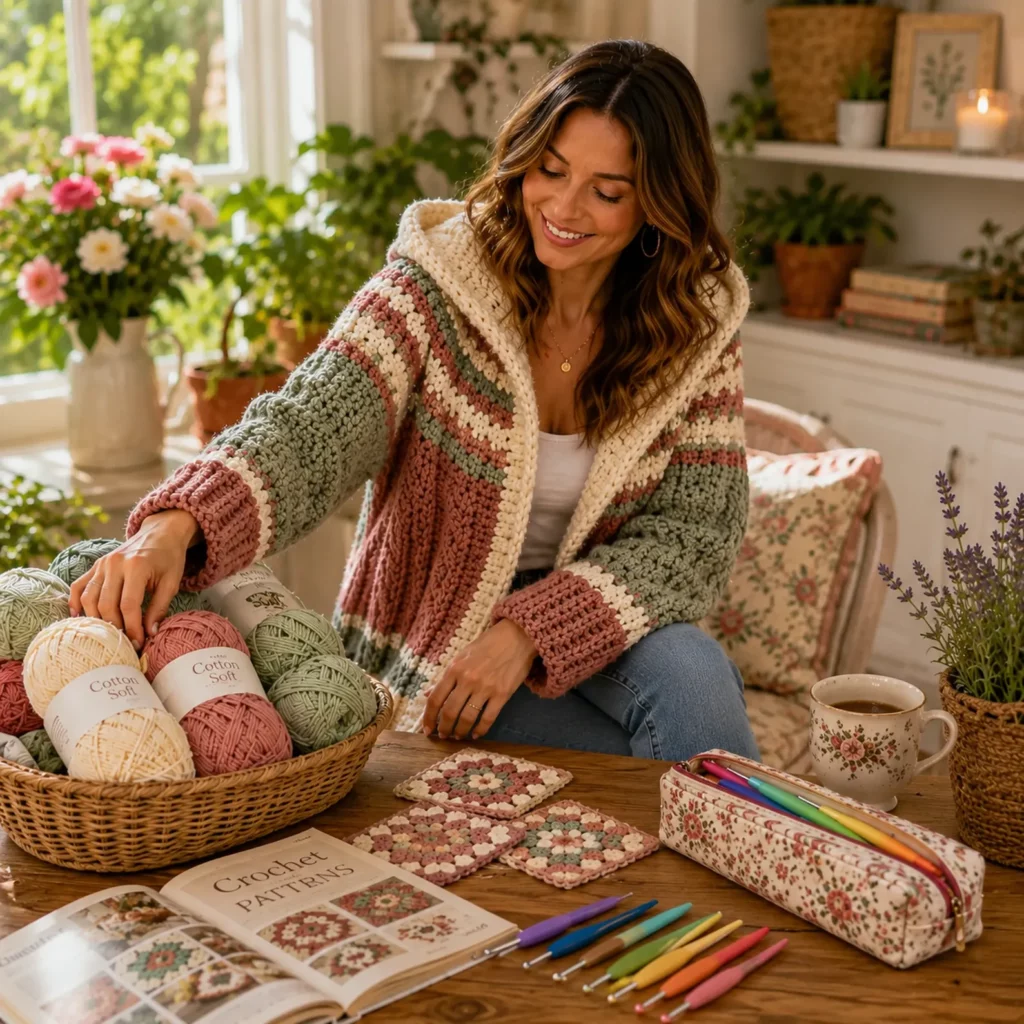
Materials Needed#
Yarn
A chunky cardigan gets its cozy feel from the yarn choice, so pick something that feels good against your skin and has enough structure to show texture.
Recommended yarn weights
- Bulky weight yarn for a thick, warm fabric
- Super bulky yarn for an even faster, more coat-like result
Fiber suggestions
- Wool or wool blend for warmth and bounce
- Acrylic blend for easy care and softness
- Alpaca blend for a luxurious feel (note it can grow, so check gauge carefully)
Color planning
This design looks great with
- A main neutral for the body texture
- Two to three accent colors for the yoke stripes
If you want an easy approach, pick one main color and one contrast color, then add a small stripe detail only at the yoke.
Estimated yardage
Chunky garments use more yarn than you expect, especially with a hood. A practical starting estimate
- Smaller sizes often need about 1200 to 1600 yards bulky
- Medium to large sizes often need about 1600 to 2200 yards bulky
- Extended sizes or longer lengths can need about 2200 to 3000 yards bulky
If using super bulky, yardage may be lower but the number of skeins can still be high depending on skein size. Always plan a little extra for the hood and ribbing.
Hook
Choose a hook that gives a dense fabric without being stiff.
- Bulky yarn often pairs well with a 6.0 mm to 8.0 mm hook
- Super bulky often pairs well with an 8.0 mm to 10.0 mm hook
The “right” hook is the one that gives you a fabric you love and meets your measurements.
Notions
- Stitch markers
- Tapestry needle for seaming
- Scissors
- Measuring tape
- Optional buttons or a belt tie if you want a closure
- Optional toggle closures for a coat look
- Optional elastic thread for reinforcing cuffs or band if your yarn is stretchy
Stitches & Techniques Explained#
This cardigan uses simple stitches combined in a way that creates bold texture.
Abbreviations in US terms
- ch chain
- sl st slip stitch
- sc single crochet
- hdc half double crochet
- dc double crochet
- fpdc front post double crochet
- bpdc back post double crochet
- st stitch
- rep repeat
Faux cable texture in crochet
Crochet cables are often made with post stitches. When you work a front post stitch around the post of a stitch from the row below, it pops forward and creates a raised ridge. By repeating raised ridges in columns, you get a cable-like look.
Simple cable panel concept
- A background fabric in dc or hdc
- Raised columns made with fpdc
- Optional crossing effect using skip-and-work-behind techniques (more advanced)
For this pattern, the cable look can be achieved with raised columns that are beginner-friendly and still dramatic in chunky yarn.
Ribbing options
You can use either
- Post-stitch ribbing using fpdc and bpdc alternating
or - Back-loop-only single crochet ribbing worked in short rows
Post-stitch ribbing matches the thick, chunky vibe nicely.
Clean striping
To keep stripes neat, change color on the last yarn-over of the stitch before the color change. Carry yarn loosely up the side only if your stripes are close together.
Step-by-Step Instructions#
This is a free crochet pattern written in a measurement-based format so it’s easy to customize. You’ll create a back panel, two front panels, sleeves, then add ribbing and a hood.
Fit notes
- Aim for 4 to 8 inches of positive ease for an oversized cozy fit
- For a closer cardigan, aim for 2 to 4 inches of ease
- For a coatigan feel, keep the ease generous and add length
Gauge and swatching
Because chunky yarn varies a lot, swatching matters.
Make a swatch in your chosen cable texture
- Crochet at least a 6 inch square
- Measure stitches per 4 inches and rows per 4 inches
- Check drape and thickness
- Adjust hook size if needed
Texture stitches can tighten your fabric, so always swatch in the real stitch pattern, not plain dc.
Choose a cable-texture stitch pattern
Here is a beginner-friendly chunky cable texture you can use.
Cable Ridge Stitch Pattern
- Row A: dc across
- Row B: ch 2, bpdc in next 2 sts, fpdc in next 2 sts repeat across, end with bpdc if needed
- Row C: dc across
- Row D: ch 2, bpdc in next 2 sts, fpdc in next 2 sts repeat across, but swap which columns are raised if you want a subtle shifting effect
If you want a simpler look, keep the same columns raised every time so you get strong vertical “cables.”
Back panel
Measure target width
- Back width is usually about half of your bust plus half your ease
Example
- Bust 40 inches
- Ease 6 inches
- Total 46 inches
- Back panel about 23 inches wide
Chain to width
- Chain until your foundation measures the desired back width
- Add turning chains as needed for dc rows
Work the back panel length
- Crochet in your Cable Ridge Stitch Pattern
- Continue until you reach the length you want
Common lengths - Hip length about 26 to 30 inches
- Mid-thigh about 32 to 36 inches
Mark armhole height
When your piece reaches underarm height, place markers at the sides for armhole shaping if desired. For a drop-shoulder fit, you can keep it straight and simply seam later.
Optional yoke stripe section
For that classic striped upper area, you can change colors for the top portion of the back panel.
- Decide how tall you want the stripe section (often 4 to 8 inches)
- Work stripes in simple dc or the same texture stitch
- Keep stripe rows consistent across front panels and sleeves for a cohesive look
Fasten off.
Front panels
Make two front panels that match the back length.
Determine front panel width
A simple approach
- Each front panel is about 45 to 55 percent of the back panel width
This gives enough front overlap and an open-front look.
Chain and crochet
- Work the same Cable Ridge Stitch Pattern
- Match the length and yoke stripe placement to the back panel
- Make sure both front panels have the same row count
If you want a deeper neckline opening, you can shape the neckline slightly by skipping stitches near the top front edge, but this pattern works beautifully with a simple straight front and a hood attached later.
Fasten off.
Shoulder seams and body assembly
Seam shoulders
- Lay the back panel flat
- Place front panels on top with right sides together
- Seam shoulders, leaving a neck opening in the center
Seam sides
- Fold the piece so right sides are together
- Seam from hem upward, leaving an opening for armholes
The opening height is your armhole depth. A relaxed cardigan often uses 8 to 10 inches, but you can measure your favorite sweater for accuracy.
Sleeves
These sleeves are roomy and cozy with fitted cuffs.
You can build sleeves two ways
- Make a rectangle sleeve and seam it into a tube
- Crochet a tapered sleeve with gentle decreases
For a chunky cardigan, the rectangle sleeve is often the easiest and still looks great.
Rectangle sleeve method
Measure sleeve width
- Upper sleeve width should fit your upper arm comfortably with ease
A common approach is 16 to 20 inches around for an oversized sleeve, but measure your arm and add ease.
Chain to sleeve width
- Chain until you reach half the sleeve circumference measurement (since you’re working flat)
Work sleeve length
- Crochet in the same cable texture
- Stop when sleeve length reaches from underarm to wrist
Make two sleeves.
Seam sleeves into tubes
- Fold each sleeve with right sides together
- Seam along the length to create a tube
Attach sleeves
- With the body still inside out, align sleeve seam with side seam
- Pin or clip sleeve into armhole
- Seam around the armhole edge
This creates a sturdy, structured join.
Ribbed cuffs
Chunky cuffs make the cardigan feel finished.
Post-stitch ribbing cuff
- Attach yarn at wrist opening
- Work one round of dc evenly around
- Next round: alternate fpdc and bpdc around
- Repeat rib rounds until cuff is your desired height, often 3 to 5 inches
If you prefer a more fitted cuff, go down a hook size for ribbing rounds.
Hem ribbing
Hem ribbing helps prevent the cardigan from stretching and gives a neat bottom edge.
Post-stitch hem
- Attach yarn at hem
- Work a base round of dc evenly around
- Work fpdc and bpdc alternating for several rounds
Alternative BLO ribbing
- Work short-row ribbing with sc BLO around the hem for a more elastic band
Front band edging
A thick cardigan needs a firm front edge so it doesn’t sag.
Simple sturdy band
- Attach yarn at the bottom of one front edge
- Work sc evenly up the front, around the neck opening, and down the other front edge
- Work 1 to 3 more rows of sc or hdc
Key tip for a flat band
- Pick up fewer stitches on row edges if you notice rippling
- Keep your band tension slightly firmer than the body fabric
If you want a thicker “coat” look, add more band rows or use half double crochet for a chunkier edge.
Hood
A hood is essentially a rectangle or slightly shaped piece that is seamed at the top and attached around the neckline.
Hood method that fits well
- Pick up stitches evenly around the neckline opening
- Crochet upward in rows to build hood height
- Seam the top of the hood
- Add an edging around the hood opening
Step-by-step hood build
- Attach yarn at the neckline and pick up stitches evenly around the opening
- Work in rows back and forth using dc or the same texture stitch
- Continue until hood reaches the height you want, usually 12 to 14 inches for a deep hood
- Fold hood in half and seam the top edge to create the hood shape
Hood edging
- Work sc around the hood opening for 1 to 3 rounds
- If you want a thicker edge, do hdc rounds
- Optional: add a drawstring channel by working a round of dc, then a round of ch-1 spaces
Optional drawstring
- Chain a long cord or crochet an i-cord
- Thread through the hood opening channel
Common Mistakes and How to Avoid Them#
The cable texture looks uneven
- This often comes from inconsistent post stitch tension
- Slow down on fpdc stitches and pull yarn to the same height each time
The cardigan feels too stiff
- Go up a hook size or choose a softer yarn
- Chunky yarn plus tight tension can create a board-like fabric
The front band waves
- Too many stitches were picked up on the edge
- Skip occasional row edges when picking up stitches and keep band tension firm
Sleeves feel bulky at the underarm
- Reduce sleeve width slightly or use a tapered sleeve method
- Also avoid overly thick seams by using mattress stitch
Hood pulls the neckline backward
- Hood may be too heavy or too tall
- Reduce hood height or add a sturdy neckline stabilizing row before attaching the hood
Hem flares out
- Ribbing may be too loose
- Use a smaller hook for ribbing, or decrease a few stitches in the base round before ribbing
Expert Tips for Better Results#
- Swatch the cable texture before starting and adjust hook for drape
- Use stitch markers to keep cable columns aligned across panels
- Block lightly to relax stitches, but avoid overstretching chunky ribbing
- Seam with mattress stitch for a flatter, cleaner join
- Weave ends as you go, especially if you’re changing colors for stripes
- If your yarn pills easily, choose an anti-pill blend for a cardigan you’ll wear often
- Reinforce the front band with an extra row of slip stitches on the inside if the edge feels stretchy
Variations and Customization Ideas#
- Make it shorter as a hip-length hoodie cardigan by reducing body length
- Make it a true coatigan by adding length and using toggle closures
- Add pockets by crocheting two rectangles in the cable stitch and sewing them to the lower fronts
- Swap the stripe colors for a holiday palette, earthy neutrals, or modern monochrome
- Add a zipper instead of an open front for maximum warmth
- Add thumbhole cuffs by extending cuff ribbing and creating a small opening
- Create a sleeveless hooded vest version by skipping sleeves and finishing armholes with ribbing
Benefits of This Crochet Project#
- A practical crochet pattern you’ll actually wear constantly
- Chunky yarn makes it satisfying and faster than many garments
- The cable texture looks high-end while using repeatable stitches
- The hood adds extra warmth and a casual, modern vibe
- Easy to customize for length, fit, and color design
- A great stash-busting project if you have multiple coordinating chunky skeins
Internal Linking Suggestions#
- How to Crochet Front Post and Back Post Stitches
- Beginner Crochet Cable Tutorial Using Post Stitches
- Crochet Gauge Guide for Wearable Garments
- How to Seam Crochet Sweaters With Mattress Stitch
- Easy Crochet Hood Tutorial for Cardigans and Sweaters
- Best Chunky Yarn for Cozy Crochet Cardigans
- Free Crochet Pocket Tutorial for Cardigans
FAQ#
Is this an easy crochet pattern for beginners
It can be, as long as you’re comfortable with basic stitches and willing to practice post stitches. The construction is straightforward, and the cable texture is repetitive once you learn it.
What yarn is best for a hooded cardigan crochet pattern
Bulky or super bulky yarn works best for a cozy coat-like feel. Wool blends and anti-pill acrylics are popular choices because they show texture well and hold shape.
How do I adjust the size without complex math
Use your gauge swatch and measure panel widths in inches rather than relying on set stitch counts. You can widen or narrow panels by adding or subtracting cable repeats.
How can I make the cardigan warmer
Choose a wool blend, make the cardigan longer, add a wider front band, and consider adding closures like toggles. You can also crochet the hood slightly deeper.
How do I stop the cardigan from stretching out
Use ribbing with a smaller hook, keep the front band firm, and avoid over-blocking. Choosing yarn with bounce (like wool blends) also helps the garment keep its shape.
Can I add buttons to this style
Yes. Add a wider front band and place buttonholes using chain spaces. Chunky cardigans often look great with large buttons or toggle closures.
Conclusion#
A chunky hooded cable cardigan is one of those crochet patterns that feels like a forever piece—warm, flattering, and easy to throw on with anything. With bold textured columns, cozy ribbing, and a hood that adds instant comfort, it’s the kind of DIY crochet project that earns its place in your everyday wardrobe.
If you tell me your yarn weight and the bust measurement you want to fit, I can help you map out the easiest panel widths and cable repeat counts so your cardigan comes out perfectly proportional.


