Introduction#
If you’ve ever tossed your glasses into a bag and immediately regretted it, you already know the problem: scratches, bent arms, and that frantic “where did I put them?” moment. A good glasses case should be protective, easy to grab, and slim enough to carry—but it can still be adorable.
Explore more beginner bags crochet patterns in our pattern library.
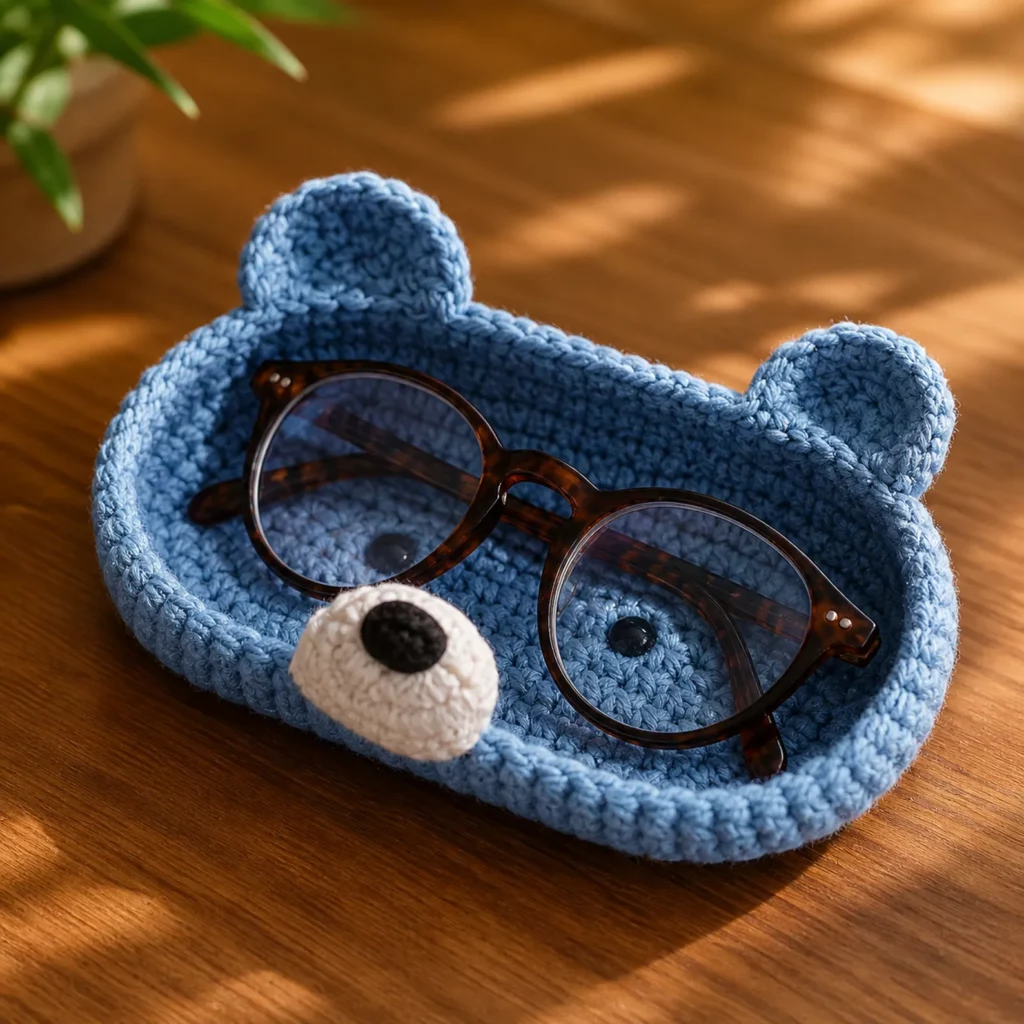
This crochet pattern teaches you how to make a bear-shaped glasses case that’s both practical and charming. The design is built like a simple sleeve (so it’s beginner-friendly), then dressed up with cute details: rounded bear ears, little eyes, and a soft snout patch. The result is a sturdy case that keeps lenses protected while adding personality to your everyday routine.
It’s also a perfect “small project with big payoff” option: quick to finish, great for gifts, and easy to customize for sunglasses, kids’ glasses, or even a phone-sized pouch.
Detailed Description of the Crochet Pattern#
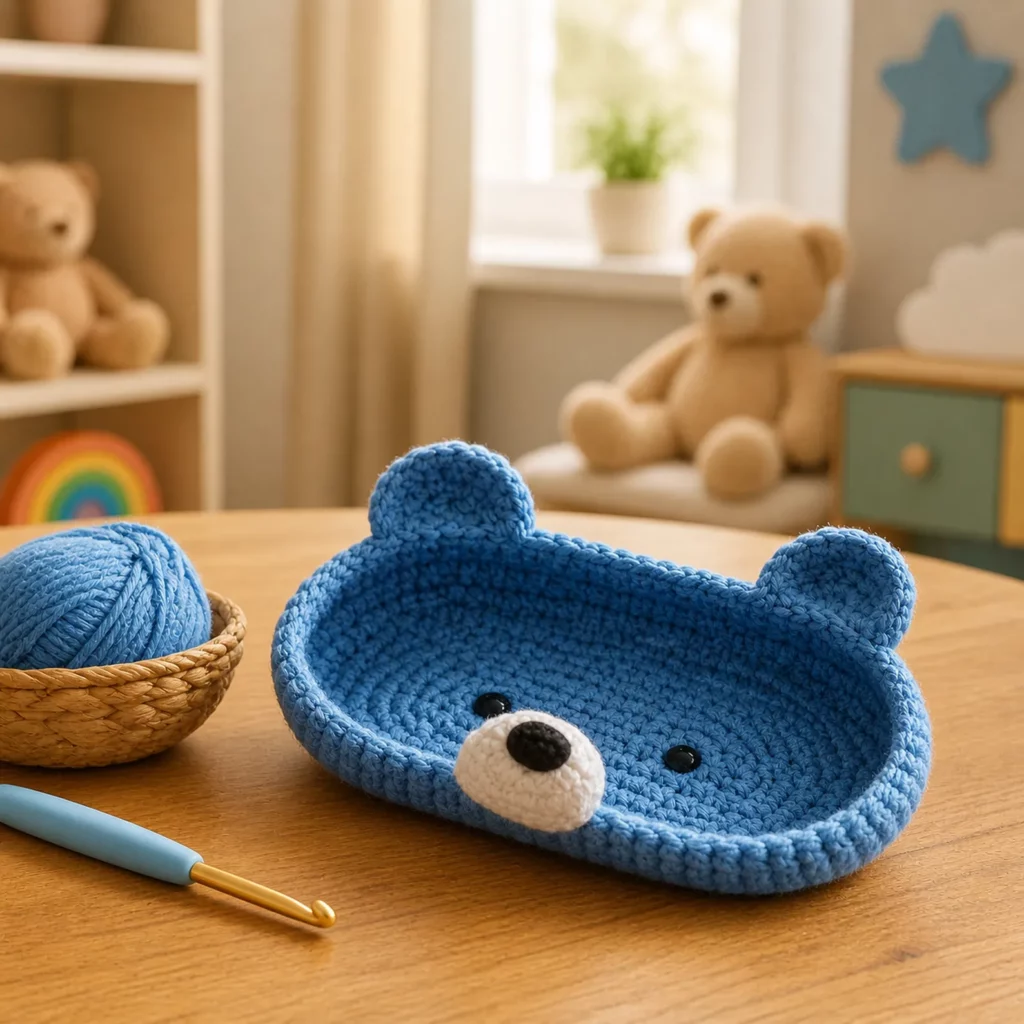
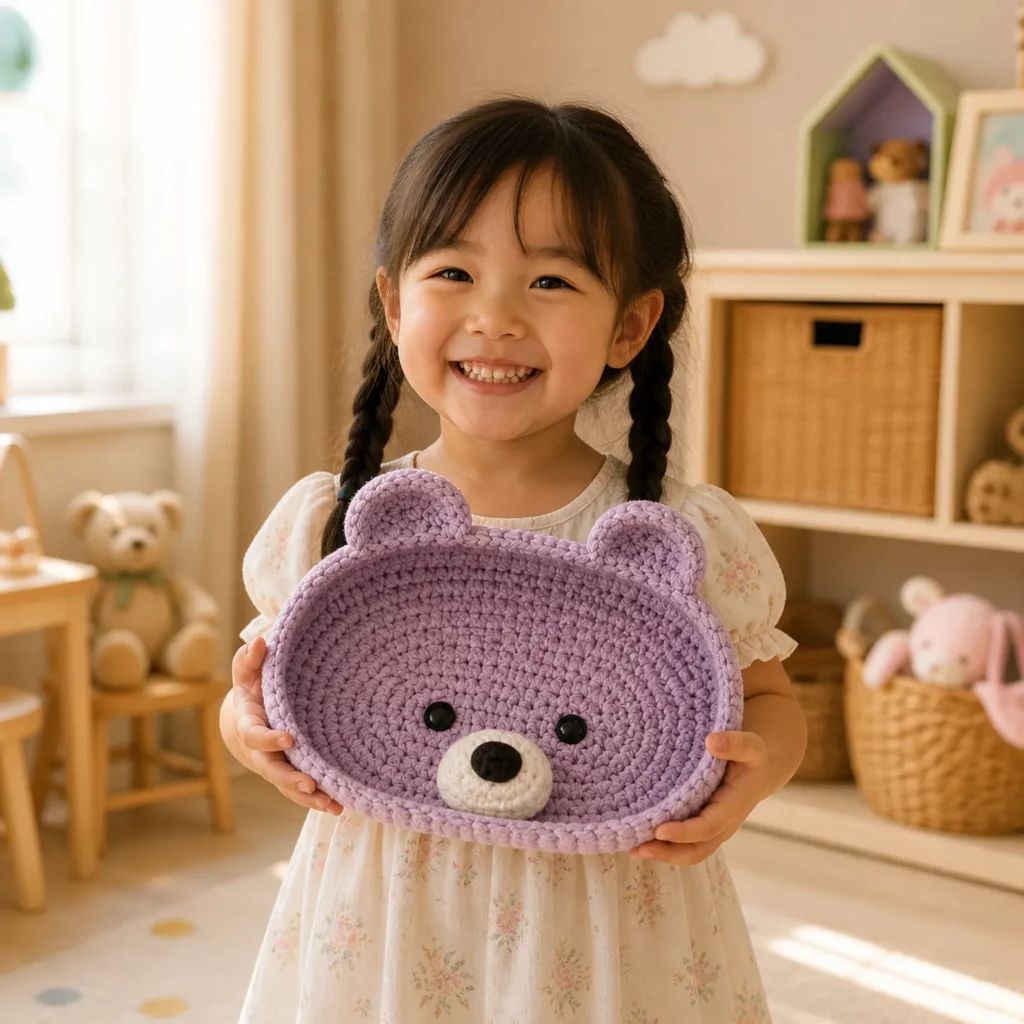
This project is a bear glasses case—a crocheted sleeve with a slightly rounded top and a snug opening. The bear face sits on the front, and the ears extend gently above the top edge for that unmistakable bear silhouette.
Design features
- Protective sleeve construction: A thick, dense fabric helps prevent scratches and provides light cushioning.
- Easy sizing: The case is based on a simple rectangle or oval-base tube, so you can adjust the width and height without complicated math.
- Bear details: Two small ears, a snout patch, and minimal facial embroidery create a clean, modern look.
- Optional closure: Keep it simple (open-top sleeve), or add a button, snap, or flap.
How it’s made
You’ll build the case in one of two beginner-friendly ways:
- Two-panel method (simplest): Crochet two matching rectangles, then seam the sides and bottom.
- In-the-round method (neater interior): Crochet an oval base and work upward in rounds to create a seamless tube.
Both methods work beautifully. In this tutorial, I’ll teach the two-panel method (fast and easy), plus include an optional “in the round” variation if you prefer a seamless finish.
Skill Level Explanation#
This is an easy-to-intermediate crochet project.
Great for beginners who can:
- crochet in rows (single crochet and half double crochet)
- keep consistent stitch counts
- seam with a yarn needle (whip stitch or mattress stitch)
- do simple embroidery (a few stitches for the face)
Intermediate (optional) upgrades include:
- adding a lining for extra lens protection
- adding a button flap or snap closure
- making a firmer fabric with tighter tension or a smaller hook
If you’ve made a scarf, dishcloth, or simple pouch, this easy crochet pattern is a super satisfying next step.
Materials Needed#
Yarn
Choose yarn with good stitch definition and a slightly firm feel.
Best yarn options:
- Worsted weight (#4) cotton (sturdy, washable, great protection)
- Cotton-acrylic blend (soft but still structured)
- Worsted acrylic (easy and affordable—line it if you want extra protection)
Suggested colors:
- Main bear color: beige, tan, caramel, gray, or brown
- Snout patch: cream or white
- Nose/mouth: black yarn or embroidery thread
Yardage estimate:
- 80–150 yards total (small project—perfect for leftovers)
Hook
Use a hook that creates a dense fabric:
- Worsted yarn: 3.5–4.5 mm
Tip: If your stitches look “holey,” go down a hook size.
Notions
- Stitch markers (optional but helpful)
- Yarn needle
- Scissors
- Measuring tape
Optional add-ons (recommended for a polished finish)
- Small piece of felt (for a neat snout patch backing)
- Lightweight fabric for lining (cotton works well)
- Button or magnetic snap (for closure)
- Soft interfacing (if lining and you want extra structure)
Stitches & Techniques Explained#
Abbreviations (US terms)
- ch = chain
- sl st = slip stitch
- sc = single crochet
- hdc = half double crochet
- inc = increase (2 stitches in one stitch)
- dec = decrease (sc2tog)
- BLO = back loop only
- st(s) = stitch(es)
- rep = repeat
Best stitch choice for a glasses case
A glasses case needs density more than drape. The best beginner stitches are:
- Single crochet (sc): dense, protective, minimal stretch
- Half double crochet (hdc): slightly faster, still fairly dense
For maximum protection, this pattern uses single crochet as the main fabric.
Neat edges for seaming
A clean edge makes seaming look professional:
- Use a ch 1 turning chain that does not count as a stitch.
- Place a marker in the first and last stitch of each row until you get comfortable.
Simple embroidery for the face
The bear face uses minimal embroidery:
- small dots or short stitches for eyes
- a small oval/triangle nose
- a tiny “V” or “Y” mouth
Less is more—tiny faces look cleaner with fewer stitches.
Step-by-Step Instructions#
Pattern notes
- Written in US terms
- Case is made from two identical panels
- Keep tension firm for protection
- Finished size is adjustable (instructions below)
Suggested finished size (standard eyeglasses)
- Approx. 6.5–7″ tall
- Approx. 3.25–3.5″ wide when laid flat
This fits most adult eyeglasses. For large sunglasses, increase width and height (see resizing tips).
Part 1: Crochet the Front Panel (Main Color)
Foundation: Ch 16
(Adjust width by chaining more/less. A good flat width is about 3.25–3.5″.)
Row 1: Sc in 2nd ch from hook and across. (15) Turn.
Row 2: Ch 1, sc across. (15) Turn.
Repeat Row 2 until the panel measures 6.5–7″ tall (or the length of your glasses + ½”).
Fasten off and weave in ends.
Part 2: Crochet the Back Panel
Make a second panel identical to the first.
Tip: Count rows to match exactly. Two matching panels are the secret to a neat final shape.
Part 3: Seam the Case
Place panels right sides together.
Using a yarn needle and the main color yarn:
- Seam one side from top edge down to bottom
- Seam across the bottom
- Seam up the other side
Leave the top open.
Best seam options:
- Whip stitch: sturdy and quick
- Mattress stitch: neater and less visible
Turn right side out.
Part 4: Top Edging (Stabilizes the Opening)
Join yarn at a side seam near the top opening.
Round 1: Ch 1, sc evenly around the opening.
- Work 1 sc in each stitch along the front and back top edges
- Add 1 extra sc at each side seam if it feels tight
Join with sl st.
Round 2: Ch 1, sc around again. Join.
Fasten off and weave in ends.
This edging helps the opening keep its shape and feel more “finished.”
Part 5: Bear Ears (Make 2, Main Color)
Rnd 1: MR, 6 sc (6)
Rnd 2: inc around (12)
Rnd 3: sc around (12)
Flatten the ear (do not stuff).
Fasten off, leaving a long tail for sewing.
Attach ears:
Pin ears to the top corners of the case front, slightly angled outward. Sew securely with multiple passes.
Part 6: Snout Patch (Contrast Color)
Make a small oval patch.
Ch 6
Rnd 1: Starting in 2nd ch from hook: 4 sc, 3 sc in last ch. Working on other side: 3 sc, 2 sc in last ch. (12)
Rnd 2: inc, 3 sc, inc x3, 3 sc, inc x2 (18)
Fasten off, leaving a tail.
Sew the snout patch centered on the front panel, about 1.5–2″ below the top edge (adjust to your taste).
Part 7: Face Details (Eyes + Nose + Mouth)
Use black yarn or embroidery thread.
Eyes:
- Make two small vertical stitches or French knots above the snout patch.
Nose:
- A small oval stitch on the snout patch.
Mouth:
- Stitch a tiny “Y” or “V” just below the nose.
Tip: Pin-mark where you want the face first. Symmetry matters more than perfection.
Optional Part 8: Closure Ideas
If you want extra security:
Option A: Button + loop
- Sew a button to the front
- Crochet a small loop on the back top edge (ch 10–14, sl st to secure)
Option B: Snap
- Sew a small snap to the inside top edges
Option C: Flap
- Crochet a small flap from the back top edge and close with a button
Optional Part 9: Lining (Extra Lens Protection)
A lining makes the case feel professional and protects lenses from textured yarn.
Simple method:
- Measure interior width/height.
- Sew a fabric rectangle into a sleeve.
- Insert lining.
- Whip stitch lining to inside top edge.
If you line it, you can also add a little padding or soft interfacing for extra cushion.
Common Mistakes and How to Avoid Them#
- Case is too tight:
Add 2–4 chains to the foundation or use hdc instead of sc for slightly more give. - Case is too loose:
Reduce foundation chain by 2, or use a smaller hook size. - Top opening stretches out:
Don’t skip the top edging rounds. Consider adding a closure for long-term shape. - Seams look bulky:
Use mattress stitch and avoid pulling too tight. - Face looks “off”:
Mark placement before stitching. Start with eyes first—then nose—then mouth. - Ears flop:
Use cotton yarn, keep tension firm, and sew the ear base with multiple anchor stitches.
Expert Tips for Better Results#
- Use cotton for structure: It holds shape and protects better than drapey yarn.
- Go tighter than garments: A glasses case should feel dense.
- Block panels before seaming: Even a light steam-block helps the edges align.
- Reinforce stress points: Sew ears with extra passes—those get tugged.
- Keep the face minimal: Small features read best at this scale.
- Make it gift-ready: Add a lining and a button closure for a “store-bought” finish.
Variations and Customization Ideas#
- Different animals: Turn ears into cat ears, bunny ears, or add a tiny snout for a dog.
- Sunglasses size: Add 4–8 chains and crochet 1–2 inches taller.
- Kids’ glasses case: Make it shorter and slightly narrower, add bright colors.
- Add a wrist strap: Crochet a small strap and attach at one side seam.
- Add a zipper: Sew zipper into the lining and stitch lining into the case.
- Texture swap: Use lemon peel stitch for a slightly textured but still dense fabric.
Benefits of This Crochet Project#
- Protects your glasses from scratches and daily wear
- Quick, satisfying project (great for scraps)
- Beginner-friendly construction with cute results
- Customizable for sunglasses, pens, crochet hooks, or makeup brushes
- Great handmade gift idea (teachers, friends, coworkers)
- Helps you practice neat seaming and simple appliqué details
Internal Linking Suggestions#
You may also like…
- Crochet Tutorial: How to Seam with Mattress Stitch
- Free Crochet Pattern: Mini Zipper Pouch (Beginner-Friendly)
- Best Yarn for Crochet Accessories (Cotton vs Acrylic)
- Crochet Tutorial: Simple Oval Appliqué Shapes
- DIY Crochet: How to Add a Fabric Lining to Crochet Pouches
- Free Crochet Pattern Roundup: Small Crochet Gifts
FAQ Section#
What yarn is best for a glasses case crochet pattern?
Cotton yarn is the best because it’s sturdy, holds shape, and offers better protection. Acrylic works too, but a lining is recommended for extra durability.
Is this an easy crochet pattern for beginners?
Yes. It’s mostly single crochet rectangles plus simple seaming. The bear details are small and forgiving, and you can keep the face very minimal.
How do I resize the bear glasses case?
Change the foundation chain to adjust width and add/remove rows to adjust height. A good rule is glasses length + ½” for height, and glasses width + a little ease for width.
Do I need to add a lining?
Not required, but highly recommended if you want maximum lens protection and a more professional finish—especially if you use textured yarn.
What closure works best?
A button-and-loop is the easiest and cutest. A snap is low-profile. A zipper is the most secure, especially if you carry your case in a packed bag.
Can I wash the crochet glasses case?
Yes—especially if you use cotton yarn. Hand washing and air drying is gentlest. If you add a lining, follow the fabric’s care instructions.
Conclusion#
A bear glasses case is the perfect blend of cute and useful: it protects your frames, keeps your bag organized, and adds a little handmade personality to your day. This free crochet pattern keeps the construction simple while teaching finishing skills that make your work look polished—dense stitches, neat seams, and clean appliqué details.
If you tell me whether you’re making it for regular glasses or oversized sunglasses, I can recommend the best starting chain and row count so your crochet pattern fits perfectly.