


Introduction#
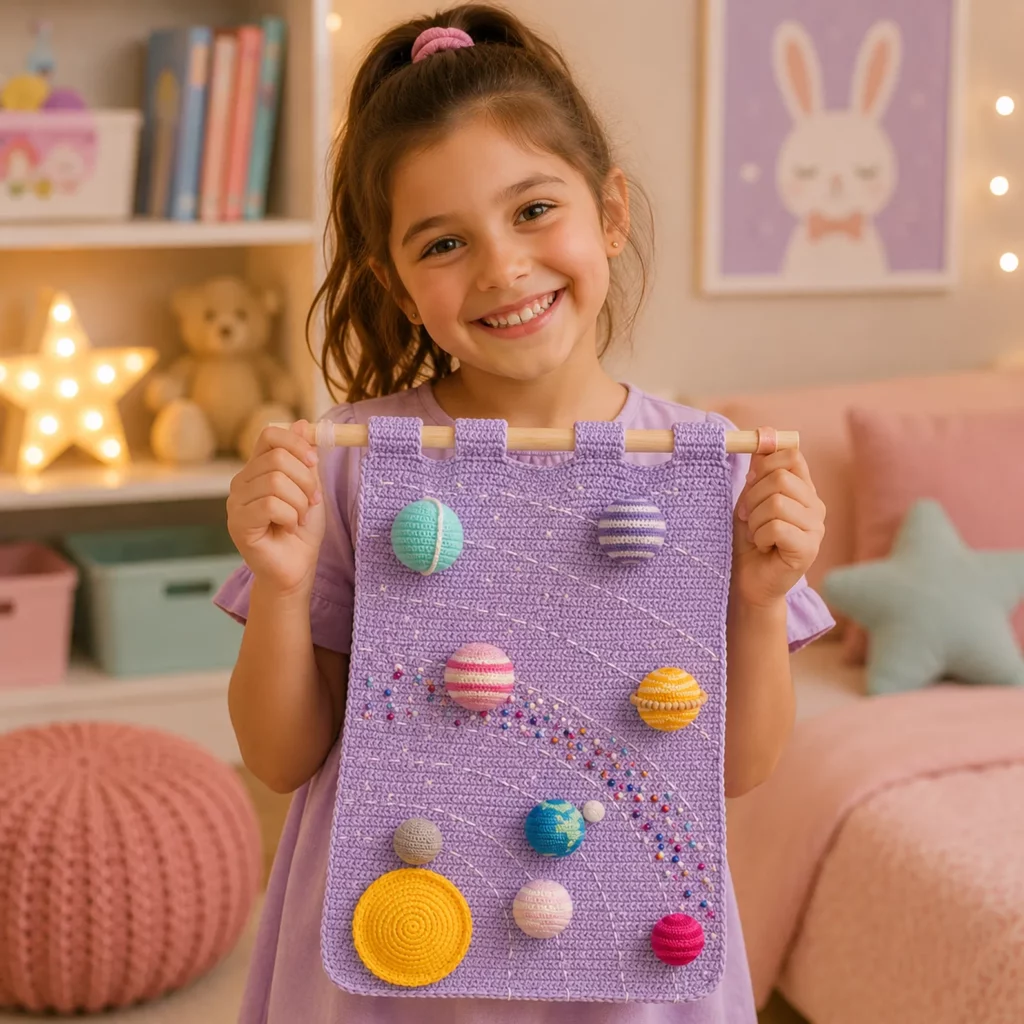
Sometimes you want a crochet project that feels like art. Not just “cute,” not just “useful,” but something that makes a wall look finished and tells a story the moment someone walks into the room. A solar system wall hanging does exactly that. It’s bold, educational, and cozy all at once—like a soft, textured poster you made with your own hands.
Explore more beginner home decor crochet patterns in our pattern library.
This crochet pattern is especially fun because it combines two satisfying styles of crochet: a clean, flat background panel (easy, repetitive, relaxing) and a set of small 3D amigurumi planets (quick little wins with big visual impact). Once you add the orbit lines and tiny “stars,” the whole piece comes alive. It’s the kind of project that looks complex, but the steps are very approachable if you break it down: crochet the base, make the planets, place them, then decorate with stitched details.
Whether you’re decorating a kid’s room, a classroom corner, a reading nook, or your own craft space, this DIY crochet wall hanging feels meaningful. Plus, it’s customizable—change planet sizes, colors, and even add labels if you want it to be a learning tool. In this guide, you’ll get a beginner-friendly, step-by-step roadmap to make your own solar system wall hanging crochet pattern, with lots of practical tips so it hangs straight and looks polished.
Detailed Description of the Crochet Pattern#
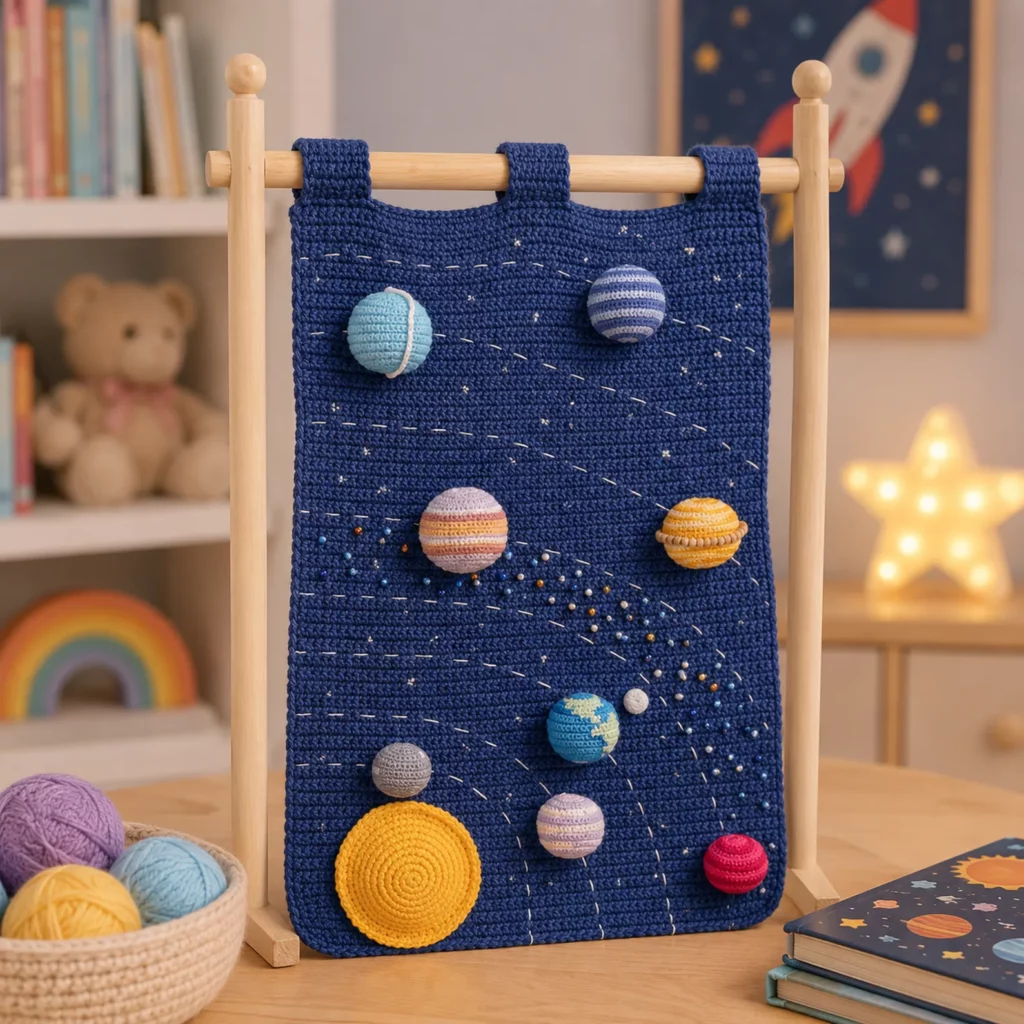
This crochet pattern creates a rectangular wall hanging with built-in hanging loops at the top. The main panel is worked in a dense stitch pattern (typically single crochet or half double crochet) so it stays flat and sturdy. The background color is usually a deep “space” shade—navy, indigo, charcoal, or deep purple—because it makes the planets pop and hides minor stitching imperfections.
The planets are crocheted as small stuffed spheres and then stitched onto the background. Each planet uses simple amigurumi shaping: a magic ring, evenly spaced increases, a few straight rounds, then decreases. Colorwork on the planets can be done as stripes (easy and clean) or as surface embroidery (great for details like Earth’s continents).
To complete the solar-system look, you add curved orbit lines (stitched with running stitch or backstitch) and clusters of “stars.” Stars can be embroidered French knots, tiny seed beads, small crocheted dots, or even contrasting speckles made with a needle and yarn. The final effect is dimensional, playful, and surprisingly professional-looking—especially once the planets are spaced thoughtfully and the orbit lines guide the eye around the design.
This is one of those crochet patterns where the finishing touches matter as much as the crocheting, and that’s a good thing. It teaches you how to plan layout, attach appliqués cleanly, and create a wall piece that doesn’t sag.
Skill Level Explanation#
This is an easy-to-intermediate crochet pattern.
Beginner-friendly skills used
Single crochet or half double crochet rows for the background panel
Magic ring, increases, and decreases for planets
Basic sewing (attaching planets, hiding yarn tails)
Simple embroidery stitches for orbit lines and stars
Intermediate skills (optional)
Neat color changes for striped planets
Surface embroidery on planets (for Earth-like details)
Working with beads (if you choose beaded stars)
Blocking and finishing for a perfectly flat wall hanging
If you’ve made a simple scarf and a basic amigurumi ball, you can make this project. Even if you haven’t, it’s still approachable because the steps are repetitive and forgiving—especially on the background panel.
Materials Needed#
Yarn
Background panel: Worsted weight (#4) cotton or acrylic
Cotton is great for crisp edges and less stretching; acrylic is softer and budget-friendly.
Planets: Worsted or DK yarn scraps in multiple colors
Using DK for planets creates slightly smaller, more detailed spheres, but worsted works perfectly too.
Suggested color palette (you can freestyle)
Space background: deep navy, indigo, or charcoal
Sun: golden yellow + orange accent
Mercury: light gray
Venus: pale yellow or cream
Earth: turquoise/blue + green/cream accents
Mars: brick red
Jupiter: cream + tan + light brown stripes
Saturn: pale yellow + beige ring
Uranus: light aqua
Neptune: royal blue
Optional “stars”: white, silver, pastel dots
Hook
Background: 4.0–5.0 mm depending on yarn and desired drape
Planets: 3.0–4.0 mm (slightly smaller hook helps spheres look neat and firm)
Notions
Stitch marker
Yarn needle
Scissors
Fiberfill stuffing
Measuring tape or ruler
Optional: dowel rod or wooden stick for hanging
Optional: felt (for backing or extra structure)
Optional: beads or sequins for stars
Optional: fabric glue (tiny dot) for securing ends on the back, used carefully
Helpful finishing tools
Straight pins (for blocking and layout)
Steam iron or spray bottle (for blocking—use yarn-safe method)
Stitches & Techniques Explained#
Abbreviations (US terms)
MR = magic ring
ch = chain
sc = single crochet
hdc = half double crochet
inc = increase (2 stitches in one stitch)
dec = invisible decrease
sl st = slip stitch
st(s) = stitches
Key techniques
Flat panel crochet: Keeping edges straight and stitch count consistent
Amigurumi sphere shaping: Increase rounds, straight rounds, decrease rounds
Color changes: Switching colors on the last yarn over of the stitch before the new color
Running stitch or backstitch embroidery: For curved orbit lines
Secure appliqué attachment: Sewing planets down evenly so they don’t wobble or pull the panel
If you want the wall hanging to look crisp, aim for tight, consistent stitches and a firm tension on the planets. A wall hanging doesn’t need drape; it needs structure.
Step-by-Step Instructions#
Pattern notes
This is a flexible “free crochet pattern” style guide. You can make your wall hanging any size by adjusting the background panel dimensions and scaling planet sizes. I’ll give a classic medium size that works well for most walls, then explain how to adjust.
Finished size (suggested)
Approximately 14–18 inches wide and 24–32 inches tall, not including hanging loops.
You can scale up or down easily.
Step 1: Crochet the background panel
Option A: Single crochet panel (sturdy, clean)
Ch 51 (or any odd/even works for sc; this is just a sample width)
Row 1: sc in 2nd ch from hook and across, turn
Row 2: ch 1, sc across, turn
Repeat Row 2 until the panel reaches your desired height.
Option B: Half double crochet panel (faster, slightly softer)
Ch 51
Row 1: hdc in 2nd ch from hook and across, turn
Row 2: ch 1, hdc across, turn
Repeat until desired height.
Edge check
Count your stitches every few rows so the sides don’t drift. If your edges are wavy, your tension is changing. If the panel pulls inward, you may be skipping the last stitch at the end of rows—very common with sc.
Step 2: Add hanging loops
You can crochet loops directly at the top. A simple method is to create two or three strap-like loops that slide over a dowel rod.
Loop placement
Mark positions near the top edge: left, center (optional), right.
Loop method (for each loop)
Attach yarn at top edge where you want the loop
Ch 12–18 (depending on dowel thickness and how low you want it to hang)
Sl st back into the top edge a few stitches away to form a loop
Reinforce by working sc around the loop chain (optional but recommended for strength)
Repeat for each loop.
If you prefer a super clean finish
Instead of separate loops, crochet a top sleeve: fold the top edge over a dowel and stitch it down. This looks very polished.
Step 3: Plan the solar system layout
Before crocheting planets, decide your composition. A balanced layout usually has the sun near the bottom corner or side, then the planets placed in a gentle diagonal flow upward. Orbit lines guide the eye and make the arrangement feel intentional.
Layout tip
Use paper circles or small yarn balls to test placement. Take a quick photo to see if spacing feels balanced.
Step 4: Crochet the planets (basic sphere formula)
This sphere pattern can be used for most planets—just adjust how large you make them.
Small sphere (Mercury, Pluto-style, tiny moons)
Rnd 1: MR, 6 sc (6)
Rnd 2: inc around (12)
Rnd 3: (sc, inc) around (18)
Rnd 4–5: sc around (18)
Stuff lightly
Rnd 6: (sc, dec) around (12)
Rnd 7: dec around (6)
Fasten off, close.
Medium sphere (Earth, Venus, Mars)
Rnd 1: MR, 6 sc (6)
Rnd 2: inc around (12)
Rnd 3: (sc, inc) around (18)
Rnd 4: (2 sc, inc) around (24)
Rnd 5–7: sc around (24)
Stuff firmly
Rnd 8: (2 sc, dec) around (18)
Rnd 9: (sc, dec) around (12)
Rnd 10: dec around (6)
Fasten off, close.
Large sphere (Jupiter)
Continue increasing one more round:
Up to 30 or 36 stitches, then work a few straight rounds, then decrease back down.
Color ideas for planets
Striped planets: Change colors every 1–2 rounds for clean stripes
Earth: Crochet in blue, then add green “continents” using surface embroidery or tiny sewn shapes
Mars: Solid red or red with subtle darker speckles (embroidered dots)
Neptune: Deep blue with lighter blue stripe or speckles
Step 5: Crochet Saturn’s ring (optional detail that looks amazing)
Ring strip
Ch long enough to wrap around Saturn’s widest point
Row 1: sc across, turn
Row 2: ch 1, sc across
Fasten off.
Wrap around Saturn and sew in place
Stitch at the sides and a few points underneath so it stays centered.
Alternative ring method
Crochet a thin oval ring separately and sew Saturn onto it. This creates a clear ring silhouette.
Step 6: Crochet the sun (flat circle or stuffed disc)
The sun can be flat (like a big appliqué) or lightly stuffed for dimension.
Flat circle (simple and clean)
Rnd 1: MR, 6 sc
Rnd 2: inc around (12)
Rnd 3: (sc, inc) around (18)
Rnd 4: (2 sc, inc) around (24)
Continue until it’s large enough (8–10 inches works well for a bold sun).
Fasten off.
Optional sun rays
Add a scalloped edge using (sl st, sc, hdc, dc, hdc, sc) in one stitch, sl st in next, repeat.
Step 7: Attach planets to the panel
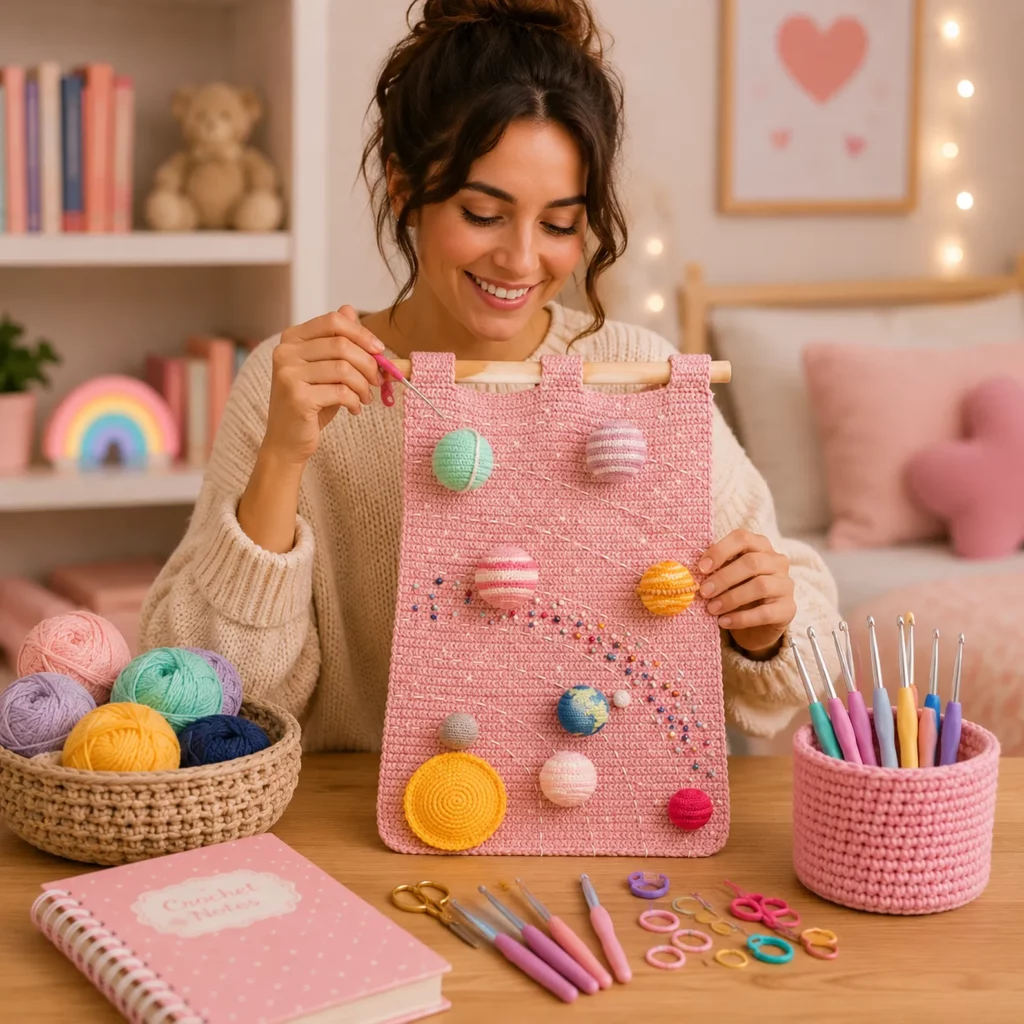
Pin everything first. Then sew each planet down with small stitches around the base. For stuffed spheres, stitch around the “equator” area that touches the panel.
Attachment tips
Use matching yarn for invisible stitches
Sew through the panel and catch multiple stitches of the planet each time
Don’t pull too tight or you’ll pucker the panel
Secure all ends on the back and weave in thoroughly
Step 8: Add orbit lines and stars
Orbit lines
Use a contrasting thread or yarn (white or pale gray). With a yarn needle, stitch curved lines that arc around the planets. Running stitch gives a soft, dotted effect. Backstitch gives a stronger line. Both look great.
Stars
Options include:
Tiny embroidered x-stitches scattered around
French knots for raised dots
Seed beads sewn individually (beautiful sparkle)
Small crocheted dots (MR 4–6 sc, close, sew on)
Cluster stars more densely near one side for a “galaxy swirl” effect, and keep other areas lightly sprinkled so it doesn’t feel too busy.
Step 9: Block and finish
Blocking makes a huge difference for wall hangings.
How to block
Lay the panel flat on a towel or blocking mat
Pin edges straight and square
Mist lightly with water (for cotton) or steam carefully (for acrylic, hover steam, don’t press)
Let dry completely before hanging
If your piece feels heavy
Consider adding a lightweight backing (felt or fabric) to support it and hide messy ends.
Common Mistakes and How to Avoid Them#
The panel edges are uneven
Count stitches and use a turning chain that matches your stitch (ch 1 for sc, ch 1 or 2 for hdc depending on your style). Be consistent.
Planets look lumpy
Stuff in tiny amounts and shape with your hands as you go. Overstuffing can distort the sphere.
Panel puckers where planets are attached
You’re sewing too tightly. Use gentler tension and spread stitches evenly.
Orbit lines look messy
Draw faint guidelines with tailor’s chalk or use pins to mark curves before stitching.
Colors look “off” together
Stick to a limited palette: one deep background, 4–6 main planet colors, and one star color. Too many random shades can look chaotic.
Hanging loops stretch
Use cotton for loops or reinforce loops by crocheting sc around the chain.
Expert Tips for Better Results#
Make the planets first if you’re a “quick win” person, then do the background panel as relaxing filler between sewing sessions.
Use a slightly smaller hook for planets than the panel to make them firm and neat.
Photograph your layout before sewing so you can replicate it if something shifts.
If you want it to look extra premium, add a dowel pocket at the top and a second dowel at the bottom for perfect weight balance.
Add tiny labels (embroidered or felt) for a classroom wall hanging, but keep labels minimal so the design stays clean.
Variations and Customization Ideas#
Make it glow-in-the-dark by using glow yarn for stars or orbit lines.
Create a “constellation” theme instead of planets by stitching star patterns and names.
Add a rocket, astronaut, or UFO appliqué for a playful kids’ version.
Turn it into a height chart: add stitched measurement marks along the side.
Make it seasonal: pastel planets for spring, deeper jewel tones for winter, or neon for a retro galaxy look.
Add a pocket at the bottom to hold tiny felt “planet cards” for learning.
Benefits of This Crochet Project#
It’s a showpiece crochet pattern that looks like wall art
Great for kids’ rooms, nurseries, classrooms, and science lovers
Excellent stash-buster for yarn scraps in many colors
Teaches both flat crochet and amigurumi basics in one project
Encourages creative layout and design planning
A meaningful handmade gift that’s decorative and educational
Internal Linking Suggestions#
You may also like these related posts
Free Crochet Pattern: Basic Amigurumi Sphere in Multiple Sizes
Crochet Tutorial: How to Sew Amigurumi Pieces Neatly to a Flat Panel
Best Yarn for Crochet Wall Hangings That Don’t Stretch
DIY Crochet: Embroidering Stars, Dots, and Constellation Lines
Easy Crochet Pattern: Minimalist Tapestry Wall Hanging for Beginners
How to Block Crochet Panels for Perfectly Straight Edges
FAQ Section#
Is this an easy crochet pattern for beginners?
Yes. The background panel is simple rows, and the planets are basic amigurumi spheres. The only part that requires patience is sewing and placing details neatly.
What stitch is best for the background panel?
Single crochet is excellent because it creates a dense, sturdy fabric that hangs well and supports the weight of the planets.
How do I make the wall hanging bigger or smaller?
Adjust the panel width and height by adding chains and rows. Scale planet sizes by adding or removing increase rounds on the spheres.
Do I need a dowel rod?
It’s recommended. A dowel helps the top stay straight and makes hanging easy. You can also use a wooden hanger or even a sturdy branch for a rustic look.
How do I keep the planets from sagging the panel?
Use dense stitches, sew planets on with evenly spaced stitches, and block the panel. A backing fabric or a bottom dowel adds extra structure.
Can I wash this wall hanging?
Spot-cleaning is best. If you used cotton yarn and secure stitching, gentle hand washing is possible, but it may require re-blocking afterward.
Conclusion#
A solar system wall hanging is the kind of crochet pattern that feels joyful from start to finish. You get the calm rhythm of a flat panel, the fun of making colorful 3D planets, and the creative freedom of arranging orbits and stars however you like. When it’s done, it doesn’t just decorate a wall—it tells a story, sparks curiosity, and shows off your crochet skills in a way that feels truly unique.
If you tell me the size you want (small nursery version or large classroom wall version), I can suggest the best panel stitch count and planet sizes so everything stays perfectly balanced and proportional.


