


Introduction#
If you love crochet that instantly makes a room feel warmer and more “put together,” a lace table runner is one of the most rewarding projects you can make. It’s practical enough to use every day, but it also has that heirloom charm that looks like it was passed down through generations. The best part is that once you learn the repeat, it becomes a relaxing project you can pick up anytime—one more row here, one more motif there—until it’s ready to dress up your table.
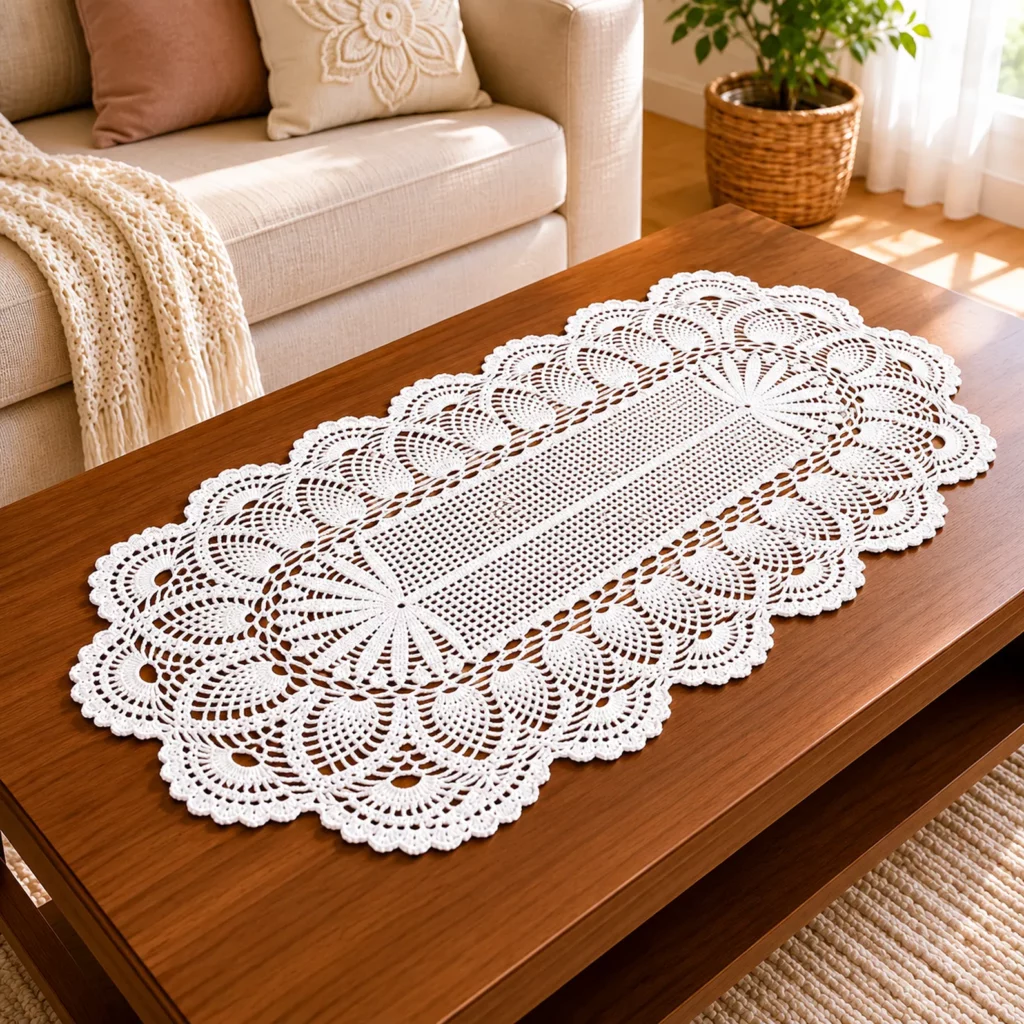
This crochet pattern creates a long runner with a clean, structured center (so it lies flat), plus dramatic lace ends made from fan-like shells and pineapple-style arches. The edging finishes everything with soft scallops, giving the runner a delicate outline that looks beautiful on wood tables, sideboards, consoles, and dressers.
Below you’ll find a detailed, tutorial-style guide: how the runner is constructed, what stitches create the lacework, how to adjust the size, and how to block it so the details pop. This is written to be AdSense-friendly and genuinely helpful—so you can confidently make your own version without guessing.
Explore more beginner home decor crochet patterns in our pattern library.
Detailed Description of the Crochet Pattern#
This lace runner has three main design zones that work together for that classic look.
A structured center panel: a filet-style mesh that looks tidy and geometric. It’s made by repeating small chain spaces anchored by double crochet, which creates a lightweight fabric that still holds its shape.
Decorative side borders: a band of openwork along both long sides that transitions the center panel into the more ornate ends. This “bridge” is important because it prevents the runner from looking like two separate patterns stitched together.
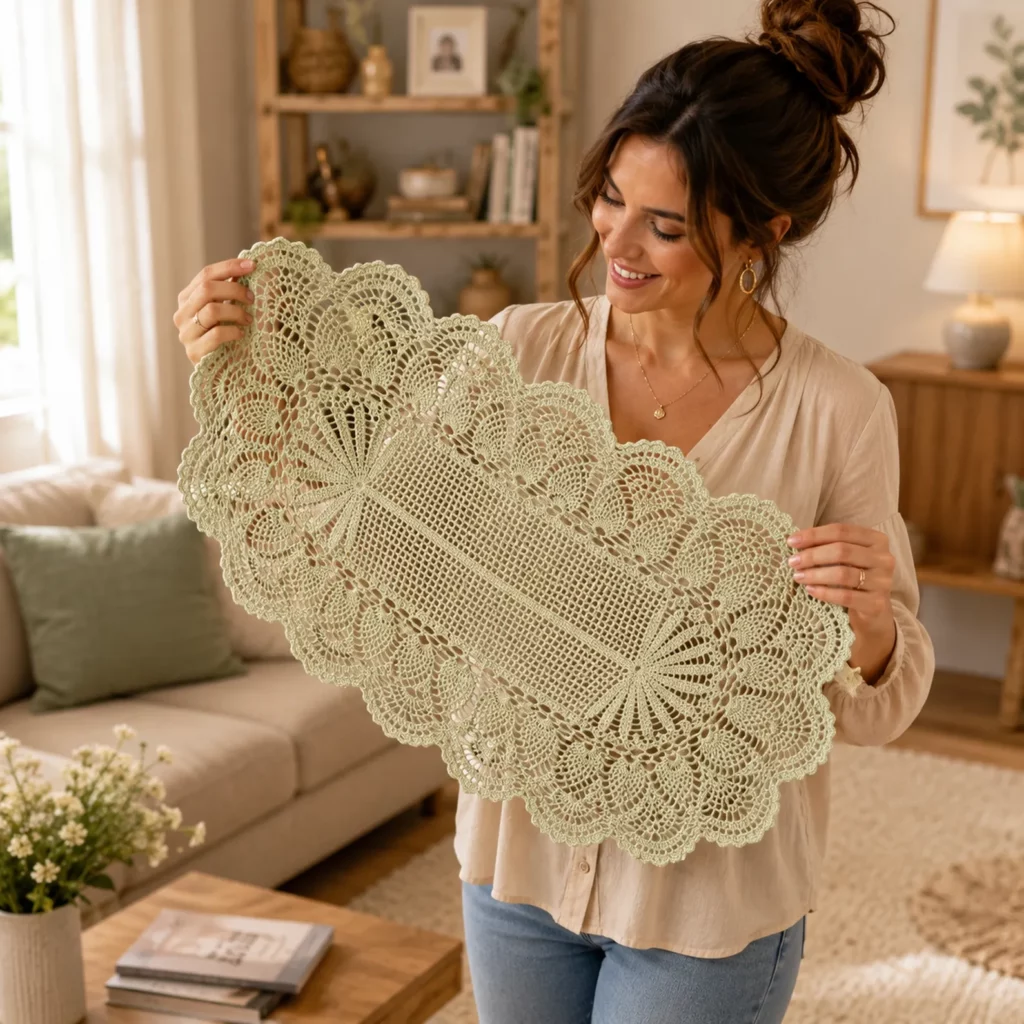
Ornate end motifs: each short end features large, curved fan sections with pineapple-like arches and radiating spokes. These ends are what give the runner a true heirloom vibe and make it look far more complex than it actually is once you understand the logic.
The whole piece is worked as one continuous runner (not separate motifs), which means fewer seams, fewer ends, and a smoother finished look. You’ll build length first, then deepen the lace on the ends, and finally add a neat scalloped edging around the outside.
Skill Level Explanation#
Skill Level: Intermediate Beginner to Intermediate
You’ll do great if you already know:
Chain (ch)
Slip stitch (sl st)
Single crochet (sc)
Double crochet (dc)
Working into chain spaces
Counting repeats across a row
Newer skills you’ll learn (or practice):
Filet crochet logic (mesh vs solid sections)
Shaping lace with increases at the ends
Shell/fan building (multiple dc in one space)
Keeping tension consistent in thread crochet
Blocking and pinning lace to shape
If you’ve made a doily, lace shawl, or any project with chain spaces, you can absolutely handle this crochet pattern. The key is patience and consistent counting, not speed.
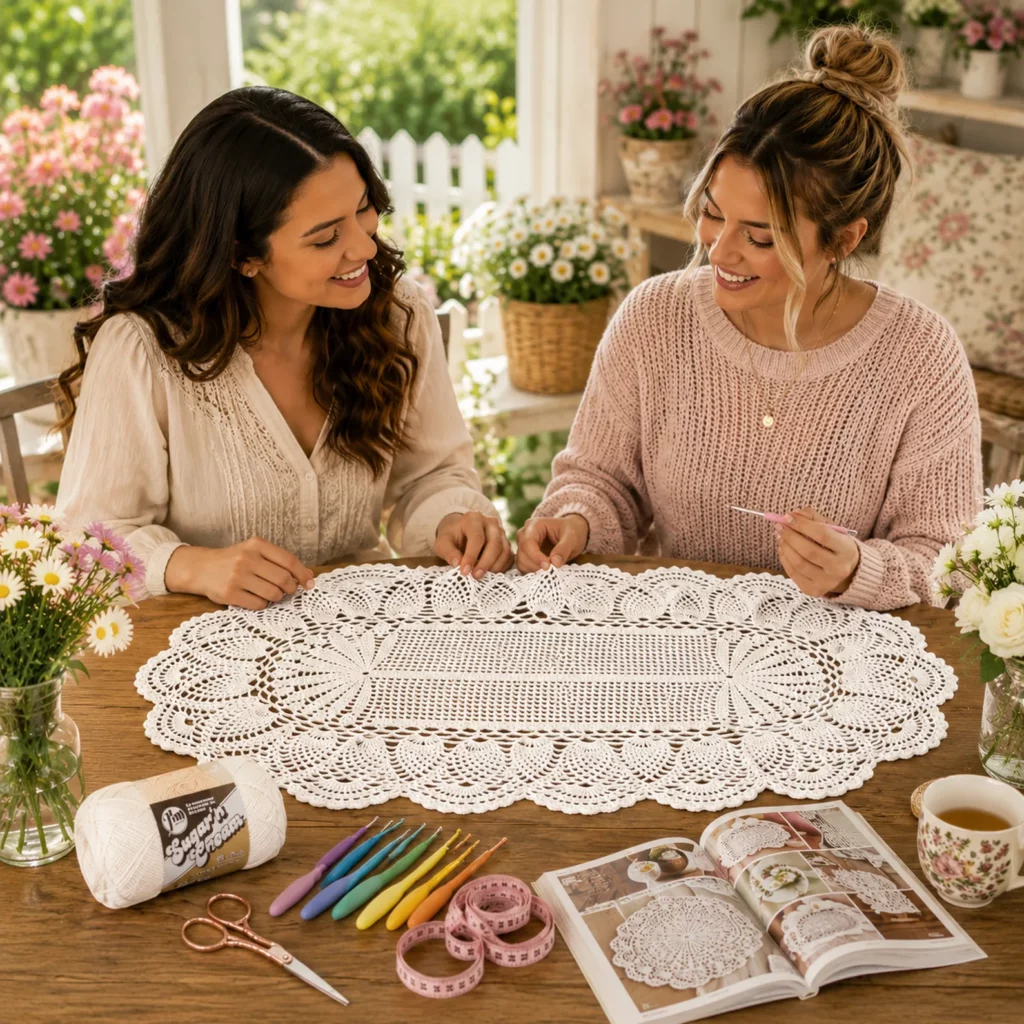
Materials Needed#
Thread or Yarn
For the most traditional heirloom look, use crochet thread. For a slightly thicker, faster runner, use fine yarn.
Best choice (classic lace):
Size 10 cotton crochet thread (most common for runners and doilies)
Alternative choices:
Size 5 thread for a larger runner with bolder lace
Fingering-weight cotton yarn for a modern, slightly softer look
Color tips:
Cream, ecru, and white look timeless and highlight stitch detail
Soft gray or sand gives a modern farmhouse feel
Mercerized cotton thread adds a subtle sheen that photographs beautifully
Yardage estimate (varies by size):
Size 10 thread: approximately 400–700 yards for a runner around 36–48 inches long
If you extend the center panel, plan for more thread (the mesh grows slowly but steadily)
Hook
Size 10 thread: 1.5 mm to 1.75 mm
Size 5 thread: 2.0 mm to 2.25 mm
Fingering cotton yarn: 2.75 mm to 3.25 mm
Tip: Lace looks best when it’s not too loose. If your chain spaces look floppy, size down.
Notions
Stitch markers (helpful for end shaping points)
Yarn needle
Scissors
Blocking pins and a blocking mat or towel
Optional: spray starch (for a crisp, heirloom finish)
Stitches & Techniques Explained#
Common Abbreviations
ch = chain
sl st = slip stitch
sc = single crochet
dc = double crochet
tr = treble crochet
sp = space
st(s) = stitch(es)
rep = repeat
( ) = repeat instructions
Filet mesh basics
Filet crochet is built from “blocks.” A simple filet mesh block is usually:
Open mesh: dc, ch 2, dc (skipping two stitches below if working on a solid foundation)
In lace runners, you often work into chain spaces rather than skipping stitches, which keeps the fabric neat and predictable.
Fan/Shell basics
A fan is multiple dc worked into the same chain space. Common fans are 5 dc, 7 dc, or 9 dc. The bigger the fan, the more dramatic the curve.
Pineapple-style arches
Pineapple motifs are created by stacked arches (chain loops) that gradually change height, with anchor stitches between them. You don’t have to memorize the whole pineapple at once—think “arch ladder” that expands and then contracts.
Step-by-Step Instructions#
Finished Size
This crochet pattern is easy to resize. A common finished runner size is:
Width: 12–14 inches (including lace border)
Length: 36–48 inches for a dining table, or 24–30 inches for a console table
Notes Before You Start
Thread crochet rewards consistency. Keep your tension steady and pause to count repeats at the end of each row.
Use stitch markers to mark the last mesh repeat on each side so you don’t accidentally increase or shrink the center panel.
Plan your length first. It’s easier to add more center rows before the ornate ends are built.
Foundation and Center Panel (Filet-Style Mesh)
This runner begins with a long foundation that establishes the width, then you repeat rows to create the length.
Foundation chain
Chain a multiple of 3 + 5 to set up a tidy filet mesh width.
Helpful width guide (size 10 thread, approximate):
For ~12 inches wide: ch 110–140 depending on your tension
Row 1 (setup)
Dc in 6th ch from hook (counts as dc + ch-2 space), ch 2, sk 2, dc in next ch
Repeat (ch 2, sk 2, dc in next ch) across
This creates a clean mesh base.
Row 2 and onward (mesh repeat)
Ch 5 (counts as dc + ch-2), dc in next dc, ch 2
Repeat: dc in next dc, ch 2 across
You are always placing dc into the dc stitches from the row below, which makes the mesh very consistent.
Continue until the center panel is your desired length minus the decorative ends.
Practical planning tip
If you want a 42-inch runner, aim for about 28–32 inches of center mesh, then allow the end motifs to add the remaining length.
Transition Band (Strengthens and Frames the Center)
Before forming the ornate ends, add a narrow band that gives the lace structure.
Transition Row A
Ch 3, dc in each dc across, placing 2 dc in each ch-2 space
This turns mesh into a more solid fabric and creates a stable base for fans.
Transition Row B
Ch 1, sc across evenly (one sc per stitch)
This row locks the edges and makes end shaping easier.
Ornate End Motif (Fan + Pineapple Look)
You’ll work the end motifs on the short ends only. Each end is built by adding arches and fans that grow outward and form the scalloped outline.
End Setup Round (worked on one short end)
Attach thread at one corner of a short end. Work along the short edge.
Create anchor points: (sc, ch 3, sc) spaced evenly across the end edge (think “loops” you’ll build into).
Fan Round
In each ch-3 space, work a fan: 7 dc in ch-3 sp, ch 1 between fans if you need spacing
This creates the first dramatic curved layer.
Pineapple Arch Round
Between fans, create arches: sl st to between fans, ch 5, sc in next between-fan gap, ch 5, sc again
These arches form the first pineapple scaffolding.
Shaping the pineapple effect
On each following round, you’ll stack arches and slightly shift where you anchor them.
Example shaping logic (repeat for 4–8 rounds depending on how dramatic you want the ends):
Round 1: arches are ch 5
Round 2: arches become ch 6 and anchor into the middle of the previous arch (into the ch-5 space)
Round 3: arches become ch 7 and expand outward
Then you begin decreasing back down: ch 6, then ch 5, so the motif narrows and finishes neatly
Add radiating “spokes” (the doily-style rays)
To mimic the radiating look, add a round where you work long stitches into the arches:
In each arch: (dc, tr, tr, dc) into the arch space, then sc into the next anchor point
This creates that “ray” texture that looks like sunbursts at each end.
Repeat the same end motif on the opposite short end so the runner is symmetrical.
Outer Edging (Scalloped Finish)
A scalloped edging gives lace runners their signature outline and helps everything look intentional.
Edging Round 1 (stabilize)
Work sc evenly around the entire perimeter of the runner.
At curves, add extra sc as needed so the edge doesn’t pull.
At points, work (sc, ch 1, sc) to turn neatly.
Edging Round 2 (scallops)
Work scallops using shells:
(sk 1, 5 dc in next st, sk 1, sl st in next st) repeat around
Adjust at corners/points: sometimes you’ll skip 0 or skip 2 to make the scallops lie flat. The goal is a smooth border, not strict math.
Blocking (Makes Lace Look Professional)
Blocking is not optional for lace if you want it to look like the inspiration.
Wet block method
Soak the runner in lukewarm water, gently squeeze out water (don’t wring), lay flat, pin to measurements, and let dry fully.
Starch method (optional but beautiful)
After blocking, lightly spray starch and let dry. This makes the runner crisp and helps the scallops hold their shape.
Common Mistakes and How to Avoid Them#
The runner is getting wider or narrower as you go
Cause: missing a mesh repeat or adding extra stitches at row ends
Fix: place stitch markers in the first and last dc of each row and count your dc posts every few rows
Mesh looks uneven or lumpy
Cause: inconsistent chain tension
Fix: keep chain-2 spaces consistent and don’t tighten chains more than your dc stitches
End motifs don’t match on both sides
Cause: different number of arch rounds or different fan spacing
Fix: write down how many rounds you used for the first end and repeat exactly for the second end
Scallops ruffle
Cause: too many stitches around curves
Fix: redo only the scallop round and increase your skip count in ruffly areas
Scallops pull tight
Cause: too few stitches around curves
Fix: add extra sc in the stabilize round so the shell round has enough stitches to sit flat
Expert Tips for Better Results#
Use mercerized cotton thread for crisp stitch definition and a clean “heirloom” look.
Count motifs, not just stitches. Lace is easier when you track repeats: number of mesh blocks, number of fans, number of arches.
If your hands tire with thread crochet, take breaks and stretch—tension changes show quickly in lace.
To make the runner more modern, keep the center panel longer and the end motifs slightly shorter. For vintage drama, do the opposite.
For a super polished finish, weave ends into the solid transition band rather than through mesh spaces, so tails don’t show.
If you want the runner to grip the table better, add a final round of tiny picots around the scallops (ch 3, sl st into first ch) for extra texture.
Variations and Customization Ideas#
Make it longer
Simply add more mesh rows in the center before beginning the end motifs.
Make it wider
Increase the foundation chain using the same multiple (3 + 5 logic) and keep the mesh repeat the same.
Add a contrasting border
Work the runner in cream, then crochet the scallops in a soft gold or pale gray for a subtle two-tone look.
Turn it into placemats
Use the same concept but shorten the center panel dramatically. You’ll get matching lace mats that look like a coordinated set.
Use it as a dresser scarf
Make it narrower and longer for a bedroom runner that looks gorgeous under a lamp, perfume tray, or framed photo.
Benefits of This Crochet Project#
A timeless crochet pattern that elevates any table instantly
Lightweight and breathable, perfect year-round
Teaches filet crochet and lace shaping in a practical way
Customizable size for dining tables, consoles, dressers, and sideboards
Makes a meaningful handmade gift for weddings, anniversaries, and housewarmings
Internal Linking Suggestions#
Beginner Filet Crochet Tutorial: How Mesh Blocks Work
How to Block Crochet Lace (Wet Blocking + Starch Tips)
Easy Shell Stitch Edging for Doilies and Runners
How to Keep Straight Edges in Crochet Rows
Best Cotton Thread for Crochet Lace Projects
FAQ#
Is this crochet pattern suitable for beginners?
It’s best for confident beginners who can count stitches and work comfortably in chain spaces. If you’re brand new, start with a simpler doily first, then come back to this runner.
What thread size should I use?
Size 10 cotton thread is the classic choice. Size 5 will make a larger, bolder runner, and fingering cotton yarn will make a softer, more modern version.
How do I make the runner longer without changing the ends?
Add more filet mesh rows in the center panel, then work the same end motif rounds as written.
Do I have to block it?
For lace, yes. Blocking is what turns “pretty crochet” into “heirloom lace.” It opens the mesh, sharpens the fans, and smooths the scallops.
Why does my mesh look uneven?
Usually it’s chain tension. Keep your chain-2 spaces consistent and avoid pulling them tight. A gentle wet block also evens out minor tension differences.
Can I wash a lace table runner?
Yes, if you use cotton thread. Hand washing and laying flat to dry is the safest. If you starch it, you may need to re-starch after washing.
How do I keep the scalloped edge from ruffling?
Make sure your stabilize sc round is not too dense, and adjust your skip count in the scallop round. Flat is the goal.
Conclusion#
This lace table runner crochet pattern is one of those projects that feels slow and soothing while you make it, then looks absolutely stunning the moment it’s blocked and laid on a table. The filet-style center keeps it elegant and flat, the ornate fan ends give it heirloom drama, and the scalloped edging ties everything together into a polished finish.
If you tell me your thread size (Size 10, Size 5, or yarn weight) and your target runner length, I can suggest a foundation chain range and a simple “how many mesh rows” plan so your finished piece lands right on your table measurements.


